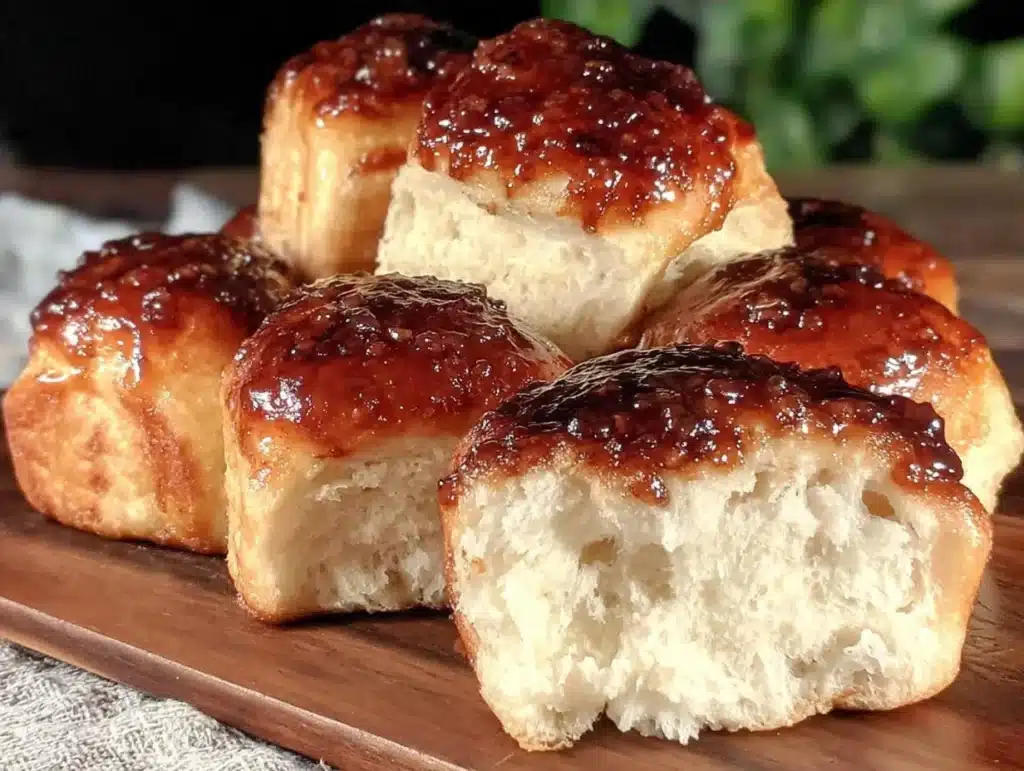
There is a specific kind of magic that happens when warm, pillowy dough meets the sharp, bright punch of fresh citrus. I first discovered the power of this combination during a chaotic holiday brunch, when I ran out of butter for my usual honey glaze and grabbed a lemon instead. The result was so startlingly good that my family stopped talking long enough to ask for seconds. Honestly, it wasn’t just a substitution; it was a revelation. Those Homemade Hawaiian Rolls – Citrus Glaze became the star of the table, proving that sometimes the best recipes are born from happy accidents.
Let’s face it, store-bought Hawaiian rolls are convenient, but they lack that soul-soothing freshness you get when you bake from scratch. I’ve tested this dough over a dozen times, tweaking the hydration and the glaze ratios until it was perfect. The key isn’t just the soft bread; it’s the acid. That final squeeze of citrus cuts through the sweetness of the dough, creating a balance that keeps you coming back for more. It’s like the secret ingredient in my 5-Min Citrus Zest Hack, but applied to baking. If you love that zesty brightness, you’ll understand why this recipe is now a staple in my weekly rotation.
These rolls are incredibly versatile. They work perfectly as a side for a heavy dinner, but they also shine as a sweet treat for breakfast or afternoon tea. I often serve them alongside a rich protein dish to lighten the palate. The texture is incredibly soft, almost melting in your mouth, while the glaze adds a glossy, tangy finish that feels sophisticated yet is surprisingly simple to make. Whether you are a beginner baker or a seasoned pro, this recipe delivers consistent results with minimal fuss.
I remember making these for a potluck last summer. The heat made the rolls sticky, but the citrus glaze held up beautifully, keeping them fresh for hours. It’s that kind of reliability that makes this recipe worth your time. You know how it is; you want something that looks impressive but doesn’t require hours of standing over a stove. These rolls rise quickly, bake evenly, and always get rave reviews. It’s comfort food reimagined—healthier, faster, but with the same soul-soothing satisfaction. Trust me, once you try the homemade version, you’ll never go back to the package again.
Why You’ll Love This Recipe
There are plenty of bread recipes out there, but few capture that specific soft, sweet texture of Hawaiian rolls while adding a modern, bright twist. I’ve spent years refining this dough, testing different flours and rising times to get that perfect crumb. This isn’t just another bread recipe; it’s a crowd-pleaser that bridges the gap between breakfast and dinner. Here is why this recipe has earned a permanent spot in your kitchen repertoire.
- Quick & Easy: Despite looking impressive, these rolls come together in under two hours, including rise time. It’s perfect for busy weeknights or when you need a last-minute dessert for guests. You don’t need to knead for hours; a brief mix and a short rise are all it takes.
- Simple Ingredients: You likely already have everything in your kitchen. Flour, sugar, yeast, eggs, and butter are staples. The only special touch is the citrus, which adds a burst of flavor without requiring a trip to a specialty store.
- Perfect for Any Occasion: Whether it’s a cozy family dinner, a holiday breakfast, or a summer potluck, these rolls fit right in. They pair wonderfully with everything from spicy Spicy Asian Cucumber Salad to rich roast meats.
- Crowd-Pleaser: Kids love the sweetness, and adults appreciate the subtle tang. They are always met with rave reviews, making them a safe bet for any gathering where you want to impress without stress.
- Unbelievably Delicious: The texture is next-level comfort food. Soft, airy, and slightly chewy, with a glaze that adds a glossy finish and a zesty kick. It’s the kind of bread that makes you close your eyes after the first bite.
What makes this recipe different is the balance. Most sweet breads are cloying, but the citrus glaze cuts through that sweetness, creating a complex flavor profile. It’s like the acid punch in my Thai Peanut Chicken Wraps, but in a sweet form. This recipe isn’t just good; it’s the kind that makes you feel like a pro baker. It turns a simple meal into something memorable, adding a touch of brightness to any table.
What Ingredients You Will Need
This recipe uses simple, wholesome ingredients to deliver bold flavor and satisfying texture without the fuss. The beauty of homemade Hawaiian rolls lies in the quality of the basics. You don’t need fancy flours or exotic spices. Just good butter, fresh eggs, and real citrus juice. Here is what you need to get started.
For the Dough
- All-Purpose Flour: 3 ½ cups (420g). I recommend a high-protein brand like King Arthur for better structure, but standard all-purpose works fine.
- Granulated Sugar: ½ cup (100g). This feeds the yeast and adds sweetness. You can reduce it slightly if you prefer less sweet rolls.
- Active Dry Yeast: 1 packet (2 ¼ tsp). Make sure it’s fresh for the best rise.
- Warm Milk: 1 cup (240ml). Warm to about 110°F (43°C). This activates the yeast without killing it.
- Unsalted Butter: ¼ cup (57g), melted. Adds richness and tenderness to the crumb.
- Large Eggs: 2, room temperature. One for the dough, one for the egg wash.
- Salt: 1 tsp. Balances the sweetness and strengthens the gluten.
- Vanilla Extract: 1 tsp. Adds a subtle depth of flavor that complements the citrus.
For the Citrus Glaze
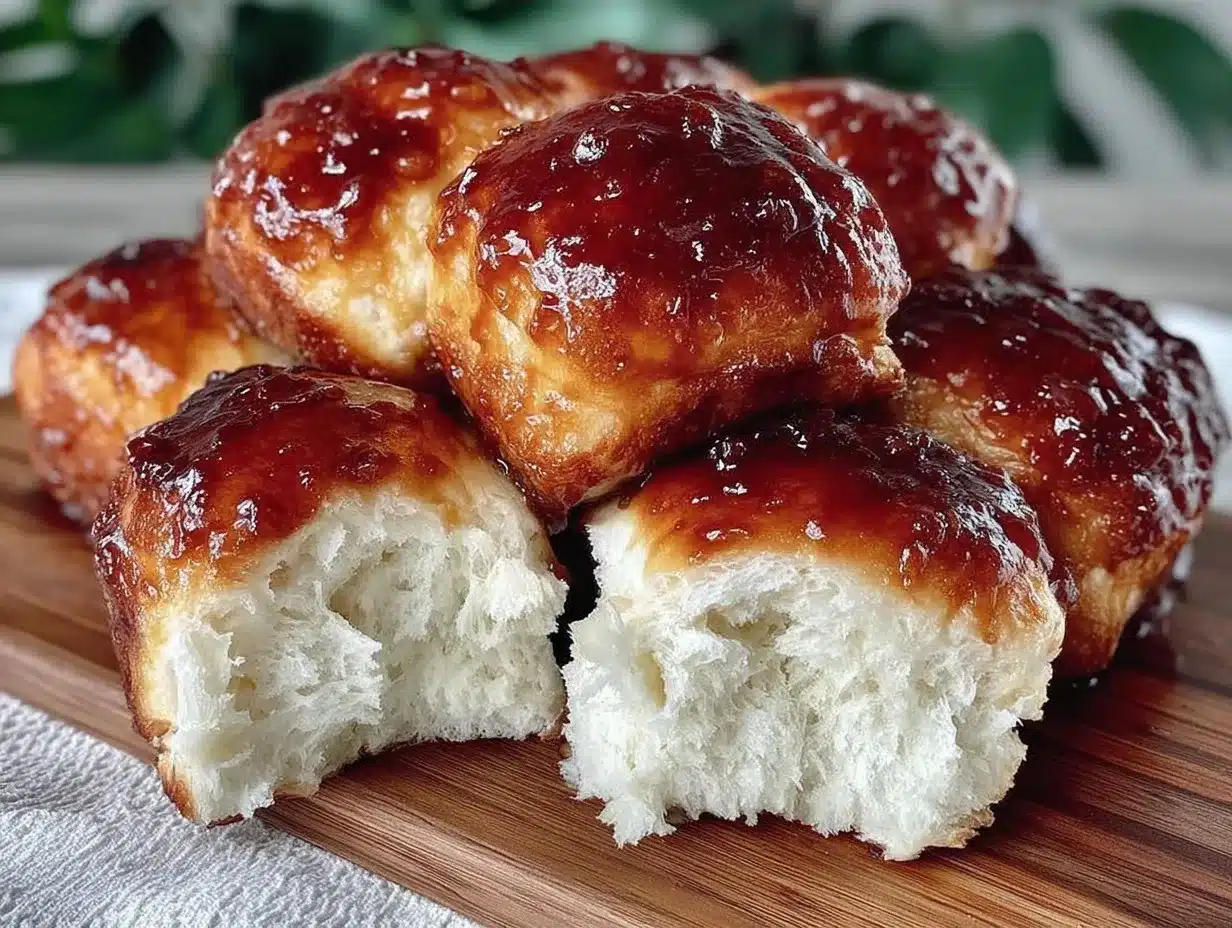
- Confectioners’ Sugar: 1 cup (120g). Sifted to avoid lumps.
- Fresh Lemon Juice: 2-3 tbsp. Use fresh-squeezed for the best brightness.
- Orange Zest: 1 tsp. Adds an aromatic layer that lemon alone can’t achieve.
- Milk: 1-2 tbsp. Adjust for desired consistency.
I always insist on fresh citrus juice. Bottled juice often tastes flat and metallic, which can ruin the delicate balance of the glaze. If you can’t find fresh lemons, oranges work well too, but the combination is best. Look for firm, small-curd cottage cheese? No, that’s for breads! For rolls, look for bright, unwaxed citrus. In summer, you can swap in grapefruit for a more bitter, sophisticated note.
For substitutions, you can use almond milk instead of dairy milk if needed, though the dairy adds richness. If you want a gluten-free option, you can use a 1:1 gluten-free flour blend, but the texture will be slightly denser. Always measure your flour correctly by spooning it into the cup and leveling it off, rather than scooping, to avoid dry dough.
Equipment Needed
You don’t need a lot of fancy gear to make these rolls, but having the right tools makes the process smoother. A large mixing bowl is essential for combining the dough. I prefer a glass or ceramic bowl because it’s easy to see the dough’s consistency.
A stand mixer with a dough hook is helpful but not mandatory. You can knead by hand if you have the patience, but a mixer saves time and effort. If you don’t have one, a wooden spoon will work for mixing, and then you’ll knead on a floured surface.
A 9×13 inch baking pan is ideal for this recipe. It allows the rolls to rise together, creating that classic Hawaiian roll texture where they pull apart easily. You can also use two 8×8 inch pans if you prefer smaller rolls.
A pastry brush is useful for applying the egg wash and glaze evenly. Silicone brushes are durable and easy to clean. A wire cooling rack is necessary to let the rolls cool completely before glazing, ensuring the glaze sets properly.
If you don’t have a stand mixer, a hand mixer with dough hooks can work, but you’ll need to knead the final product by hand. Budget-friendly options include a simple wooden spoon and a plastic spatula. Avoid using metal bowls if you are kneading by hand, as they can get cold and slow down the yeast activity.
Preparation Method
Getting these rolls right is about patience and technique. Let’s break it down step by step so you can achieve that perfect soft texture.
- Activate the Yeast: In a small bowl, combine the warm milk and sugar. Sprinkle the yeast over the top and let it sit for 5-10 minutes until it becomes foamy. This step is crucial; if it doesn’t foam, your yeast might be old, and the rolls won’t rise.
- Mix the Dough: In a large bowl, combine the flour and salt. Add the melted butter, eggs, vanilla, and the yeast mixture. Mix on low speed until a shaggy dough forms. If mixing by hand, stir until it’s too thick to stir, then turn it out onto a floured surface.
- Knead the Dough: Knead for 5-7 minutes until the dough is smooth and elastic. It should pass the windowpane test; stretch a small piece of dough thin enough to see light through it without tearing. This develops the gluten, which gives the rolls their structure.
- First Rise: Place the dough in a greased bowl, cover with plastic wrap or a damp towel, and let it rise in a warm place for 1-1.5 hours, or until doubled in size. A warm, draft-free spot is best. My oven with just the light on is perfect for this.
- Shape the Rolls: Punch down the dough to release air bubbles. Roll it out into a rectangle on a floured surface. Cut the dough into 12 equal squares. Roll each square into a ball, tucking the edges underneath to create tension. This helps them hold their shape.
- Second Rise: Place the balls in a greased 9×13 inch pan, leaving a little space between them. Cover and let them rise again for 30-45 minutes until puffy. They should touch each other, which helps them rise upward rather than outward.
- Bake: Preheat your oven to 350°F (175°C). Brush the tops with egg wash for a golden finish. Bake for 15-18 minutes until golden brown. The rolls should sound hollow when tapped on the bottom.
- Make the Glaze: While the rolls bake, whisk together the confectioners’ sugar, lemon juice, orange zest, and enough milk to reach a drizzling consistency. It should be thick but pourable.
- Glaze: As soon as the rolls come out of the oven, brush the glaze over the hot rolls. The heat helps the glaze soak in slightly, creating a sticky, flavorful coating. Let them cool in the pan for 10 minutes before serving.
Keep an eye on the oven during the last few minutes, as ovens vary. If the tops are browning too quickly, cover them loosely with foil. The internal temperature should reach 190°F (88°C) for fully cooked rolls.
Cooking Tips & Techniques
I’ve made my fair share of dense, flat rolls, so I’ve learned a few tricks to avoid common pitfalls. The biggest mistake people make is overworking the dough after the second rise. Handle it gently to keep the air bubbles intact.
Temperature is key. If your kitchen is cold, your dough will take longer to rise. Try to keep your dough in a spot that’s around 75-80°F (24-27°C). If you live in a cold climate, you can place your dough in a turned-off oven with a bowl of hot water to create a humid, warm environment.
Don’t skip the windowpane test. It’s the best way to know if your gluten is developed enough. Under-kneaded dough results in dense rolls, while over-kneaded dough can become tough. Stop when it’s smooth and elastic.
For the glaze, make sure it’s applied while the rolls are still hot. This helps it adhere and creates that signature sticky texture. If you wait until they are cool, the glaze will sit on top and might slide off.
Multitasking is your friend here. Start the glaze while the rolls are baking so it’s ready to go the moment they come out. This ensures the glaze is fresh and the rolls are served warm.
If you find the dough is too sticky to handle, add a little more flour, a tablespoon at a time. But be careful not to add too much, as this can make the rolls dry. It’s better to have a slightly sticky dough than a dry one.
Variations & Adaptations
One of the best things about this recipe is how adaptable it is. You can tweak it to suit your tastes or dietary needs.
For a citrus-free version, you can substitute the lemon juice with orange juice or even a splash of vanilla extract for a classic sweet glaze. But I really recommend keeping the citrus for that bright finish.
If you want a richer flavor, add a tablespoon of orange zest to the dough itself. This infuses the bread with citrus flavor from the inside out. It pairs beautifully with the glaze.
For a dairy-free option, use coconut oil instead of butter and almond milk instead of dairy milk. The texture will be slightly different, but still delicious. You can also use a vegan egg replacer for the egg wash.
For a savory twist, omit the sugar in the dough and glaze. Add garlic powder and herbs to the dough, and use a lemon-herb glaze. These would be perfect with a salad or soup.
I once tried adding poppy seeds to the dough, and it added a nice crunch and visual appeal. It’s a small change that makes a big difference. You can also add dried cranberries or raisins for a fruity variation.
If you are making these ahead of time, you can freeze the baked rolls without the glaze. Thaw them and add the glaze just before serving. This is great for meal prep or preparing for a party.
Serving & Storage Suggestions
These rolls are best served warm, right after glazing. They pair wonderfully with a variety of dishes. I love them with a rich roast chicken or a hearty beef stew. The citrus cuts through the richness of the meat, balancing the meal.
For breakfast, serve them with scrambled eggs and bacon. They also make a great base for French toast or sandwiches. Try them with a slice of ham and cheese for a quick lunch.
To store leftovers, place them in an airtight container at room temperature for up to 2 days. If you live in a humid climate, refrigerate them to prevent mold.
For longer storage, freeze the rolls in a freezer-safe bag for up to 3 months. Thaw them at room temperature or gently warm them in the microwave. Add a fresh glaze after thawing for the best flavor.
Reheating is simple. Warm them in a 300°F (150°C) oven for 5-10 minutes to restore their softness. Avoid the microwave, as it can make them chewy.
The flavors develop over time, becoming slightly more intense as the glaze soaks in. However, they are best fresh. If you make too many, share them with neighbors! They always make great gifts.
Nutritional Information & Benefits
While these rolls are a treat, they can be part of a balanced diet. Each roll contains approximately 150-180 calories, depending on the size. They are a good source of carbohydrates for energy.
The eggs provide protein, while the butter adds healthy fats. Using whole milk adds calcium and vitamin D. The citrus glaze adds a touch of vitamin C, though the amount is small.
For a lower-calorie option, you can reduce the sugar in the dough and glaze. Use a sugar substitute if needed. The citrus adds brightness without adding significant calories.
These rolls are not gluten-free, so they are not suitable for those with celiac disease. They are also not vegan due to the butter and eggs. However, with substitutions, they can be adapted.
I enjoy these as a special treat rather than a daily staple. They bring joy and comfort to the table, which is a benefit in itself. Moderation is key, but occasionally indulging in homemade baked goods is good for the soul.
Conclusion
Making Homemade Hawaiian Rolls – Citrus Glaze is a rewarding experience that pays off in every bite. The combination of soft, sweet bread and tangy glaze is irresistible. I hope you try this recipe and enjoy the process as much as I do.
Feel free to customize the recipe to suit your preferences. Add extra zest, try different fruits, or experiment with flavors. Baking is about creativity and fun.
I love these rolls because they bring people together. There is something special about sharing warm, homemade bread with friends and family. It creates memories and connections.
Please share your results with me! Leave a comment below with your thoughts or photos of your rolls. I love seeing how others adapt the recipe. Don’t forget to share this post with friends who love baking.
Happy baking! Remember, the squeeze of citrus is the secret to making these rolls truly special. Enjoy every bite!
Frequently Asked Questions
Can I use instant yeast instead of active dry yeast?
Yes, you can use instant yeast. You can mix it directly with the flour without activating it in milk first. Just reduce the liquid slightly if needed, as instant yeast absorbs moisture differently.
Why did my rolls turn out dense?
Dense rolls are often caused by over-flouring the dough or not kneading it enough. Make sure to knead until the dough is smooth and elastic. Also, ensure your yeast is fresh and active.
Can I freeze the dough before baking?
Yes, you can freeze the shaped rolls after the second rise. Place them in the pan, cover tightly, and freeze. When ready to bake, let them thaw and rise slightly before baking. Add a few extra minutes to the baking time.
What if I don’t have a 9×13 pan?
You can use two 8×8 inch pans or a round 9-inch pan. Adjust the baking time accordingly, as smaller pans may cook faster. Keep an eye on them to prevent over-browning.
Can I make the glaze with lime instead of lemon?
Absolutely! Lime glaze is also delicious and adds a tropical twist. You can even mix lemon and lime for a more complex citrus flavor. Just adjust the amount of juice to reach the desired consistency.
Pin This Recipe!
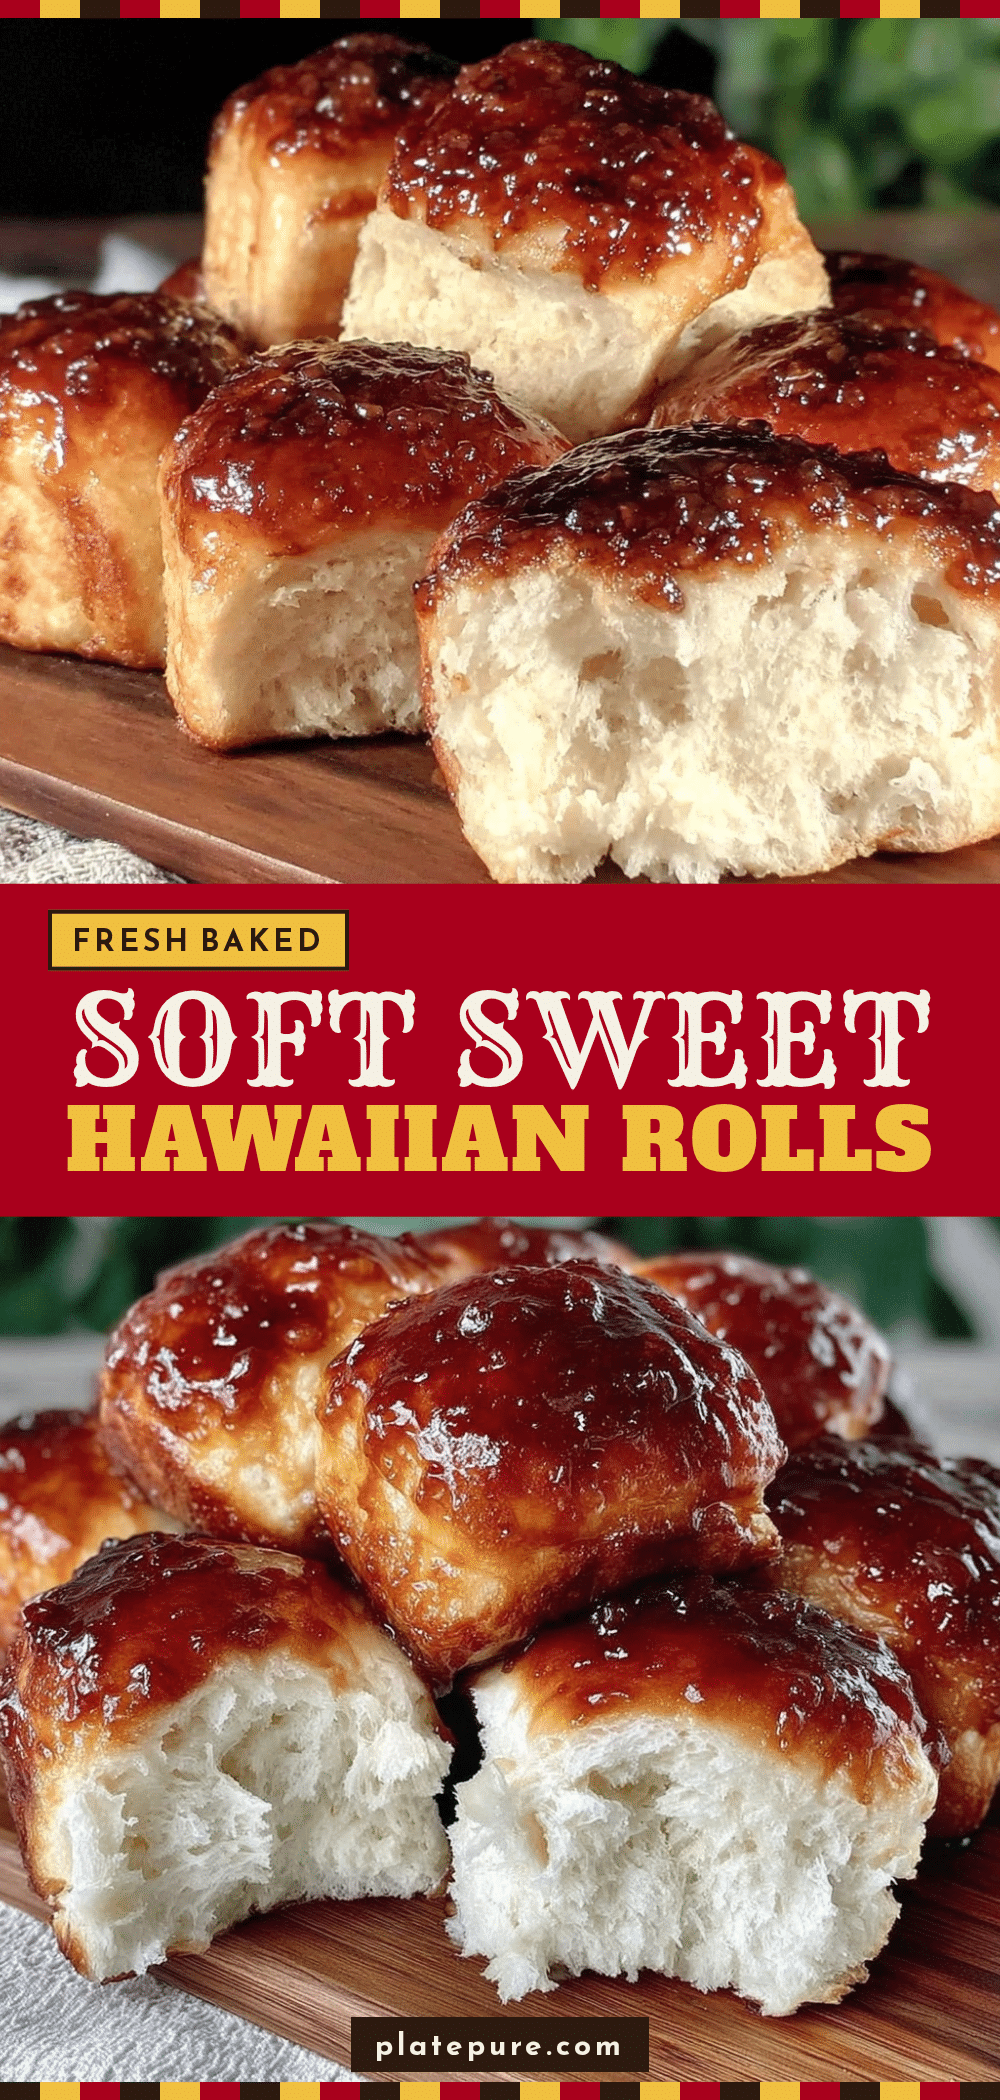
Homemade Hawaiian Rolls: Easy Citrus Glaze Recipe
- Total Time: 2 hours 48 minutes
- Yield: 12 servings 1x
Description
Soft, pillowy homemade Hawaiian rolls with a bright, tangy citrus glaze. These versatile rolls are perfect for breakfast, dinner sides, or dessert, offering a sophisticated yet simple baking experience.
Ingredients
- 3 ½ cups (420g) All-Purpose Flour
- ½ cup (100g) Granulated Sugar
- 1 packet (2 ¼ tsp) Active Dry Yeast
- 1 cup (240ml) Warm Milk (110°F/43°C)
- ¼ cup (57g) Unsalted Butter, melted
- 2 Large Eggs, room temperature
- 1 tsp Salt
- 1 tsp Vanilla Extract
- 1 cup (120g) Confectioners’ Sugar, sifted
- 2–3 tbsp Fresh Lemon Juice
- 1 tsp Orange Zest
- 1–2 tbsp Milk (for glaze consistency)
- 1 Egg (for egg wash)
Instructions
- Activate the yeast: In a small bowl, combine warm milk and sugar. Sprinkle yeast over the top and let sit for 5-10 minutes until foamy.
- Mix the dough: In a large bowl, combine flour and salt. Add melted butter, eggs, vanilla, and the yeast mixture. Mix on low speed until a shaggy dough forms.
- Knead the dough: Knead for 5-7 minutes until smooth and elastic, passing the windowpane test.
- First rise: Place dough in a greased bowl, cover, and let rise in a warm place for 1-1.5 hours until doubled in size.
- Shape the rolls: Punch down dough, roll into a rectangle, and cut into 12 equal squares. Roll each square into a ball, tucking edges underneath.
- Second rise: Place balls in a greased 9×13 inch pan. Cover and let rise for 30-45 minutes until puffy and touching.
- Bake: Preheat oven to 350°F (175°C). Brush tops with egg wash. Bake for 15-18 minutes until golden brown and internal temperature reaches 190°F (88°C).
- Make the glaze: While rolls bake, whisk confectioners’ sugar, lemon juice, orange zest, and milk until drizzling consistency.
- Glaze: Brush glaze over hot rolls immediately after removing from oven. Let cool in pan for 10 minutes before serving.
Notes
Ensure yeast is fresh and foams before proceeding. Do not over-knead after the second rise. Apply glaze while rolls are hot for best adhesion. If kitchen is cold, place dough in an oven with the light on to rise. Internal temperature should reach 190°F (88°C).
- Prep Time: 30 minutes
- Cook Time: 18 minutes
- Category: Bread
- Cuisine: American
Nutrition
- Serving Size: 1 roll
- Calories: 165
- Sugar: 12
- Sodium: 180
- Fat: 5
- Saturated Fat: 3
- Carbohydrates: 28
- Fiber: 1
- Protein: 4
Keywords: Hawaiian rolls, citrus glaze, homemade bread, easy baking, breakfast rolls, dinner rolls, sweet bread, lemon glaze, orange zest