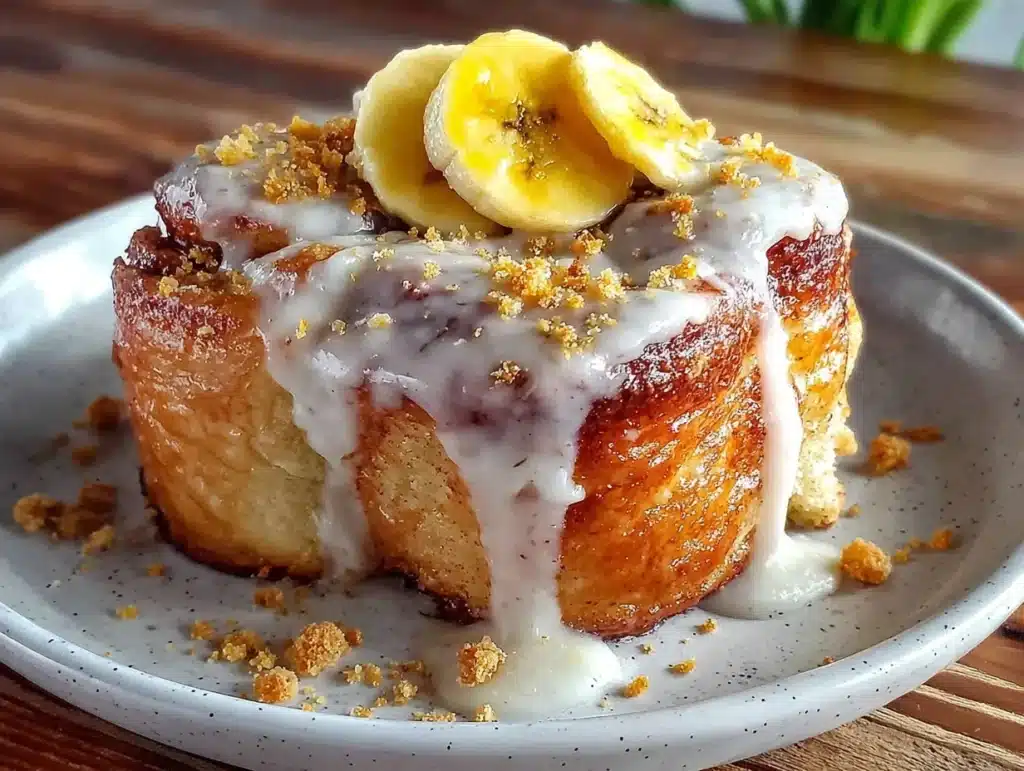
Let’s be honest for a second. We’ve all been there. It’s 9 PM, the kids are finally asleep, and you’re staring into the fridge hoping for a miracle. You want something sweet, something nostalgic, but you absolutely do not want to turn on the oven and heat up the kitchen. That’s exactly where I found myself last Tuesday, craving that specific, creamy hug that only banana pudding can provide. But instead of a bowl, I wanted a roll. Something I could hold. Something with a little bit of a kick.
That’s when I decided to reinvent the classic with these Soft Banana Pudding Rolls. I wasn’t looking for another muted, heavy dessert. I wanted brightness. I wanted those rolls to have a zesty finish that cuts through the rich, creamy filling. The secret? A no-bake filling that’s actually spiked with a touch of citrus zest and a pinch of sea salt. It changes everything. It’s not just sweet; it’s alive.
I’ve tested this recipe over a dozen times because, let’s face it, I’m particular about my textures. I wanted the dough to be pillowy soft, almost like a dinner roll but sweeter, and the filling to be so smooth it melts on your tongue. And honestly? It works. These rolls are the ultimate crowd-pleaser for potlucks, brunches, or just when you need a mid-afternoon pick-me-up. They pair beautifully with a glass of classic southern sweet tea because that tangy brew balances the sweetness perfectly. If you’re looking for a quick, bright twist on traditional baking, this is your new go-to.
Why You’ll Love This Recipe
There is a specific kind of magic that happens when you combine the ease of no-bake techniques with the comfort of yeast dough. These rolls are not just another version of a banana dessert; they are my best version. After years of testing batters and fillings, I’ve landed on a formula that guarantees success every single time. Here is why these rolls deserve a spot in your weekly rotation:
- Quick & Easy Prep: While the dough needs time to rise, the active prep time is minimal. The filling comes together in under five minutes. It’s perfect for busy weeknights or when you have last-minute guests knocking at the door.
- Simple Ingredients: You likely have everything you need in your kitchen right now. Flour, sugar, bananas, cream cheese, and a few pantry staples. No fancy grocery trips needed for exotic ingredients.
- Bright & Zesty Finish: Most banana puddings are one-note sweet. These rolls are different. The filling is finished with a splash of lemon juice and vanilla bean paste, creating a complex flavor profile that keeps you coming back for more. It’s the finishing sauce doing all the work.
- Crowd-Pleaser Status: Kids love the soft texture, and adults appreciate the balanced sweetness. They always get rave reviews. I’ve served these at book clubs, office parties, and family dinners, and they disappear faster than you can blink.
- Unbelievably Delicious Texture: The contrast between the fluffy, warm bread and the cool, creamy filling is next-level comfort food. It’s soul-soothing satisfaction without the heavy, cloying feeling of traditional desserts.
This recipe isn’t just good—it is the kind that makes you close your eyes after the first bite. It’s comfort food reimagined. Healthier in spirit (because it’s no-bake and lighter), faster to assemble, but with the same emotional warmth. Perfect for impressing guests without the stress of baking a cake from scratch, or turning a simple Tuesday evening into something memorable.
What Ingredients You Will Need
This recipe uses simple, wholesome ingredients to deliver bold flavor and satisfying texture without the fuss. The beauty of this dish lies in the quality of a few key components. I recommend sourcing the best vanilla you can find, as it is the backbone of the filling. For the dough, all-purpose flour works perfectly, giving you that tender crumb without being too dense. If you want to get fancy, you can swap half the all-purpose flour for bread flour for a chewier roll, but standard AP flour keeps it soft and pillowy.
For the filling, the star is obviously the banana. But not just any banana. You need ripe, spotted bananas. The browner the spots, the sweeter the fruit, and the easier it is to mash into a silky puree. I always use cream cheese for the base of the filling because it holds its structure better than whipped cream and adds a slight tang that balances the fruit. Full-fat is non-negotiable here; low-fat versions can make the filling watery and less rich.
- For the Dough: Warm milk (about 110°F/43°C), active dry yeast, granulated sugar, all-purpose flour, unsalted butter (softened), a large egg (room temperature), and a pinch of salt. The warm milk is crucial to activate the yeast properly.
- For the No-Bake Filling: Ripe bananas (mashed), full-fat cream cheese (softened), powdered sugar, heavy whipping cream (for stability), vanilla bean paste (for those tiny specks of flavor), and a fresh squeeze of lemon juice. The lemon juice is the secret weapon for brightness.
- For the Glaze/Topping: A simple drizzle of melted white chocolate or a dusting of powdered sugar. I prefer the white chocolate because it adds a subtle cocoa butter richness that complements the banana perfectly.
I personally prefer Organic Valley butter for its consistent texture, and I always keep a jar of Stevia Xtra vanilla bean paste on hand because the seeds look beautiful and the flavor is intense. If you are dairy-free, you can use a plant-based cream cheese and coconut cream, though the texture will be slightly different. Look for firm, small-curd cottage cheese if you want to swap the cream cheese for a protein boost, but honestly, the traditional cream cheese version is just too good to skip.
Equipment Needed
You don’t need a professional kitchen to make these rolls, but having the right tools makes the process much smoother. A stand mixer with a dough hook is ideal for kneading the bread dough, saving you about ten minutes of arm fatigue. However, a large bowl and a sturdy spoon work just fine if you’re doing it by hand. You’ll need a standard 9×13 inch baking dish for assembling the rolls. Make sure it’s large enough so the rolls have room to expand and puff up without touching each other too much.
For the filling, an electric hand mixer or a food processor is your best friend. You want that puree to be completely smooth, with no chunks of banana remaining. A fine-mesh sieve is a great tool here if you’re feeling perfectionist—you can press the mashed banana through it to remove any fibrous bits. Also, grab a pastry brush for applying any egg wash or glaze, and a sharp serrated knife for slicing the finished rolls cleanly.
If you don’t have a stand mixer, don’t worry. I’ve made this dough by hand many times. Just be prepared to knead for about 8-10 minutes until the dough is smooth and elastic. Budget-friendly options include using a wooden spoon for mixing and a clean kitchen towel for covering the dough during rising. Avoid using plastic wrap directly on the dough if it’s sticky; a damp towel works better and prevents drying.
Preparation Method
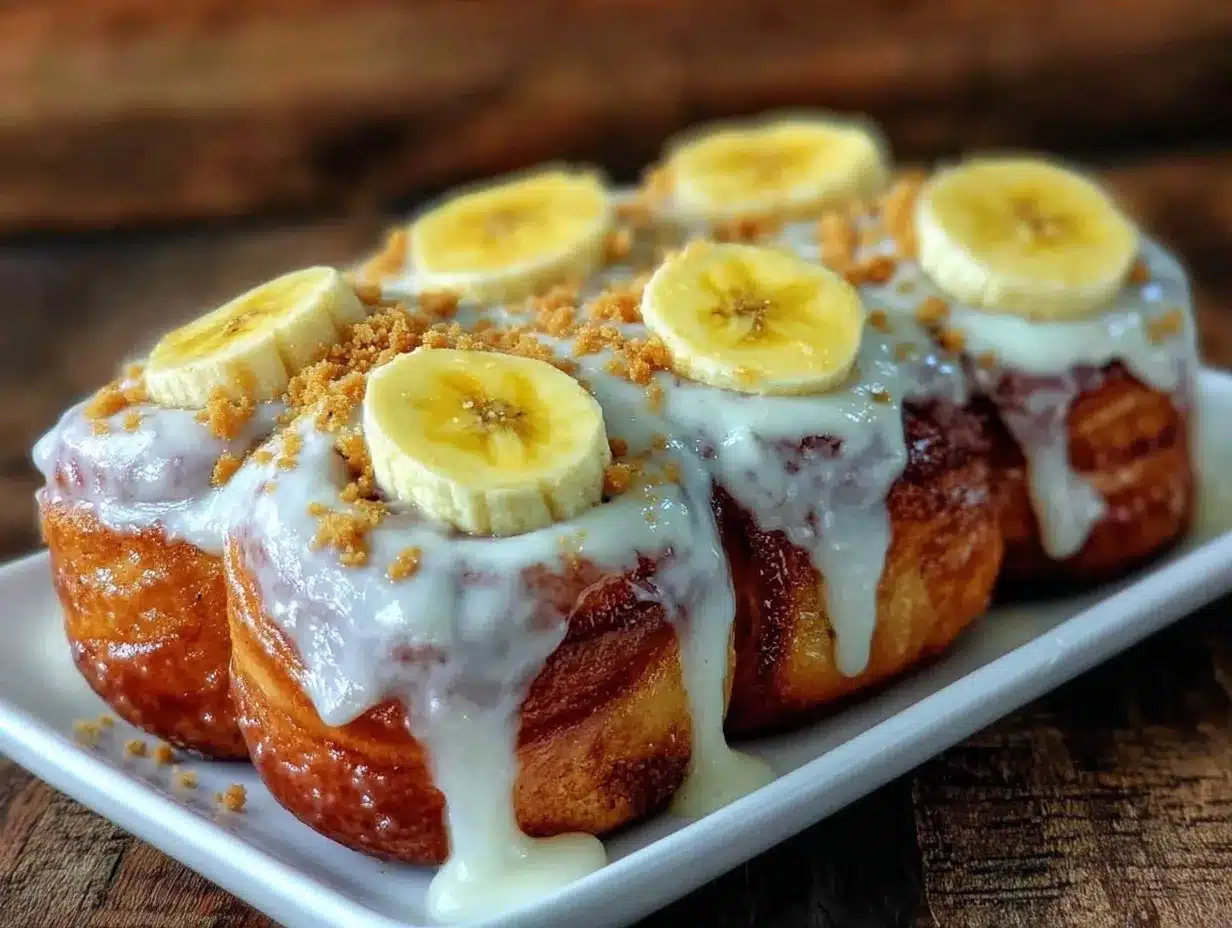
Let’s get into the nitty-gritty. Making these rolls is a process of layers, and patience is key. We start with the dough, then move to the filling, and finally, the assembly. Here is how to do it right.
- Activate the Yeast (10 minutes): In the bowl of your stand mixer, combine the warm milk, sugar, and yeast. Stir gently and let it sit for 5-10 minutes. You want it to become foamy and bubbly. If it doesn’t foam, your yeast might be old, and your dough won’t rise. This is a common failure point, so check your milk temperature—it should be warm to the touch, not hot.
- Knead the Dough (10-15 minutes): Add the softened butter, egg, and salt to the yeast mixture. Start the mixer on low speed, then gradually add the flour. Switch to the dough hook and knead on medium speed for about 8-10 minutes. The dough should pull away from the sides of the bowl and be smooth and elastic. If it’s too sticky, add a tablespoon of flour at a time. If it’s too dry, add a splash of milk. Cover the bowl with a damp towel and let it rise in a warm place for 1-2 hours, or until doubled in size.
- Prepare the Filling (5 minutes): While the dough rises, make the filling. Mash the ripe bananas in a bowl until smooth. In a separate large bowl, beat the softened cream cheese until creamy. Add the powdered sugar, vanilla bean paste, and lemon juice. Beat until combined. Fold in the mashed bananas gently. In a separate small bowl, whip the heavy cream to stiff peaks, then fold it into the banana mixture. This adds air and lightness to the filling, making it less dense. Refrigerate until ready to use.
- Shape the Rolls (15 minutes): Punch down the risen dough and turn it out onto a lightly floured surface. Roll it out into a large rectangle, about 12×16 inches. Spread the chilled banana filling evenly over the dough, leaving a small border on the edges. Starting from the long edge, tightly roll the dough up into a log. Use a sharp serrated knife to slice the log into 12 even rolls. Place them cut-side up in your greased 9×13 inch baking dish.
- Second Rise & Bake (1 hour + 30 mins): Cover the rolls loosely with plastic wrap or a towel and let them rise again for about 30-45 minutes. They should look puffy and jiggly. Preheat your oven to 350°F (175°C). Bake for 25-30 minutes, or until the tops are golden brown. If they brown too quickly, cover them loosely with foil for the last 10 minutes.
- Glaze and Cool (20 minutes): While the rolls bake, melt the white chocolate according to package instructions. Once the rolls are out of the oven, let them cool in the pan for 10 minutes. Drizzle the melted chocolate over the warm rolls. Let them cool completely before slicing to allow the filling to set. This step is crucial; if you cut them too soon, the filling will ooze out everywhere.
Cooking Tips & Techniques
There are a few tricks I’ve learned along the way to ensure these rolls turn out perfectly every time. First, temperature control is everything. When working with yeast, if your milk is too hot, you’ll kill the yeast. If it’s too cold, it won’t activate. Use a kitchen thermometer if you have one—aim for 110°F. For the filling, make sure your cream cheese is truly room temperature. Cold cream cheese creates lumps that are impossible to beat out, ruining the smooth texture you want.
Another common mistake is over-mixing the filling after adding the whipped cream. You want to fold it in gently to keep the air bubbles intact. If you mix too vigorously, you’ll deflate the cream, and your rolls will feel heavy. Also, don’t skip the second rise! It’s tempting to bake them right away, but that second rise gives you that bakery-style softness. If you skip it, you’ll get dense, bready rolls instead of fluffy pillows.
I once tried using frozen bananas for the filling because I was in a rush. The texture was watery and the flavor was muted. Always use fresh, ripe bananas. If you’re making this ahead of time, you can prepare the dough and filling separately and assemble them the day of baking. The dough can be refrigerated overnight after the first rise, but you’ll need to let it come to room temperature before shaping. This flexibility makes these rolls perfect for meal prepping desserts for the week.
Variations & Adaptations
One of the best things about this recipe is how adaptable it is. If you’re not a fan of banana, you can easily swap the filling for a strawberry or raspberry puree. The acidity of the berries pairs well with the cream cheese base. For a tropical twist, try using mango or passion fruit. If you want to add a crunch, sprinkle toasted coconut flakes or crushed macadamia nuts over the filling before rolling.
For a gluten-free option, use a 1:1 gluten-free flour blend that includes xanthan gum. The texture will be slightly different, more like a cake than a bread, but it will still be delicious. If you’re looking for a lower-sugar version, you can substitute the powdered sugar with erythritol or monk fruit sweetener. Just note that sugar provides bulk, so the filling might be slightly less stable.
I also love adding a layer of peanut butter to the filling for a “Reese’s” vibe. Just spread a thin layer of peanut butter over the dough before adding the banana cream. It adds a savory depth that balances the sweetness beautifully. For a spiced variation, add a pinch of cinnamon or nutmeg to the dough. It complements the banana flavor naturally and adds warmth. These variations keep the recipe fresh and exciting, allowing you to experiment with different flavor profiles.
Serving & Storage Suggestions
These rolls are best served at room temperature, allowing the flavors to meld and the texture to soften. They make a stunning centerpiece for a brunch table, especially when dusted with powdered sugar and garnished with fresh mint leaves or banana slices. Pair them with a cup of dirty strawberry soda for a refreshing, bright contrast to the rich dessert. The citrus notes in the soda cut through the sweetness perfectly.
For storage, keep the rolls in an airtight container at room temperature for up to 2 days. If you live in a humid climate, refrigeration is better to prevent the filling from spoiling. They can also be frozen for up to 3 months. To freeze, bake and cool the rolls completely, then wrap them tightly in plastic wrap and foil. Thaw them at room temperature before serving. Reheating is optional, but a 10-second zap in the microwave can make them extra soft and warm.
The flavors actually develop over time, becoming more cohesive after a day in the fridge. However, the texture of the dough will soften as it absorbs moisture from the filling, so they are best eaten fresh. If you notice the tops getting sticky, you can add a light dusting of powdered sugar just before serving to restore that dry, sweet finish.
Nutritional Information & Benefits
While these rolls are a treat, they offer some surprising benefits. Bananas are a great source of potassium, vitamin B6, and fiber, which support heart health and digestion. The cream cheese provides calcium and protein, helping to keep you satiated longer than a simple cookie or cake. By using fresh fruit instead of artificial flavorings, you’re getting natural sugars and antioxidants.
However, these are still indulgent rolls, so moderation is key. Each roll contains approximately 250-300 calories, depending on the size and glaze. They are not gluten-free unless you use a GF flour blend, and they contain dairy and eggs. For a lighter option, you can reduce the amount of glaze or skip it entirely. I like to think of these as a “better-for-you” dessert because the main ingredient is fruit, and the no-bake method preserves more nutrients than high-heat baking.
Conclusion
These Soft Banana Pudding Rolls are more than just a dessert; they are a reminder that comfort food doesn’t have to be complicated or heavy. With a bright, zesty filling and pillowy soft dough, they offer a modern twist on a classic favorite. I love that they are easy to make, impressive to serve, and absolutely delicious. Whether you’re feeding a crowd or just treating yourself, these rolls will hit the spot.
I encourage you to try this recipe and make it your own. Add your favorite mix-ins, experiment with different glazes, or serve them with a unique beverage pairing. I’d love to hear how they turn out for you. Leave a comment below with your variations or photos of your creation. And don’t forget to share them with friends and family—because dessert is always better when shared. Enjoy the process, and let the brightness of these rolls make your day a little sweeter.
Frequently Asked Questions
Can I use frozen bananas for the filling?
It’s not recommended. Frozen bananas release a lot of water when thawed, which can make the filling runny and affect the texture of the dough. Fresh, ripe bananas provide the best consistency and flavor.
How do I keep the rolls from sticking to the pan?
Grease your 9×13 inch baking dish generously with butter or non-stick spray. You can also line the pan with parchment paper for easy removal. This ensures the rolls slide out cleanly after baking.
Can I make the dough ahead of time?
Yes! After the first rise, you can punch down the dough, wrap it tightly in plastic wrap, and refrigerate it overnight. Let it come to room temperature for about an hour before shaping and filling.
What can I use instead of heavy whipping cream?
You can use full-fat coconut cream for a dairy-free option. It whips similarly to heavy cream and adds a nice tropical flavor that pairs well with banana. Just ensure it’s chilled before whipping.
Why did my rolls turn out dense?
This usually happens if the yeast was dead or the dough didn’t rise long enough. Make sure your milk is warm (not hot) and let the dough rise until it has clearly doubled in size. Also, avoid over-flouring the dough during kneading.
Pin This Recipe!
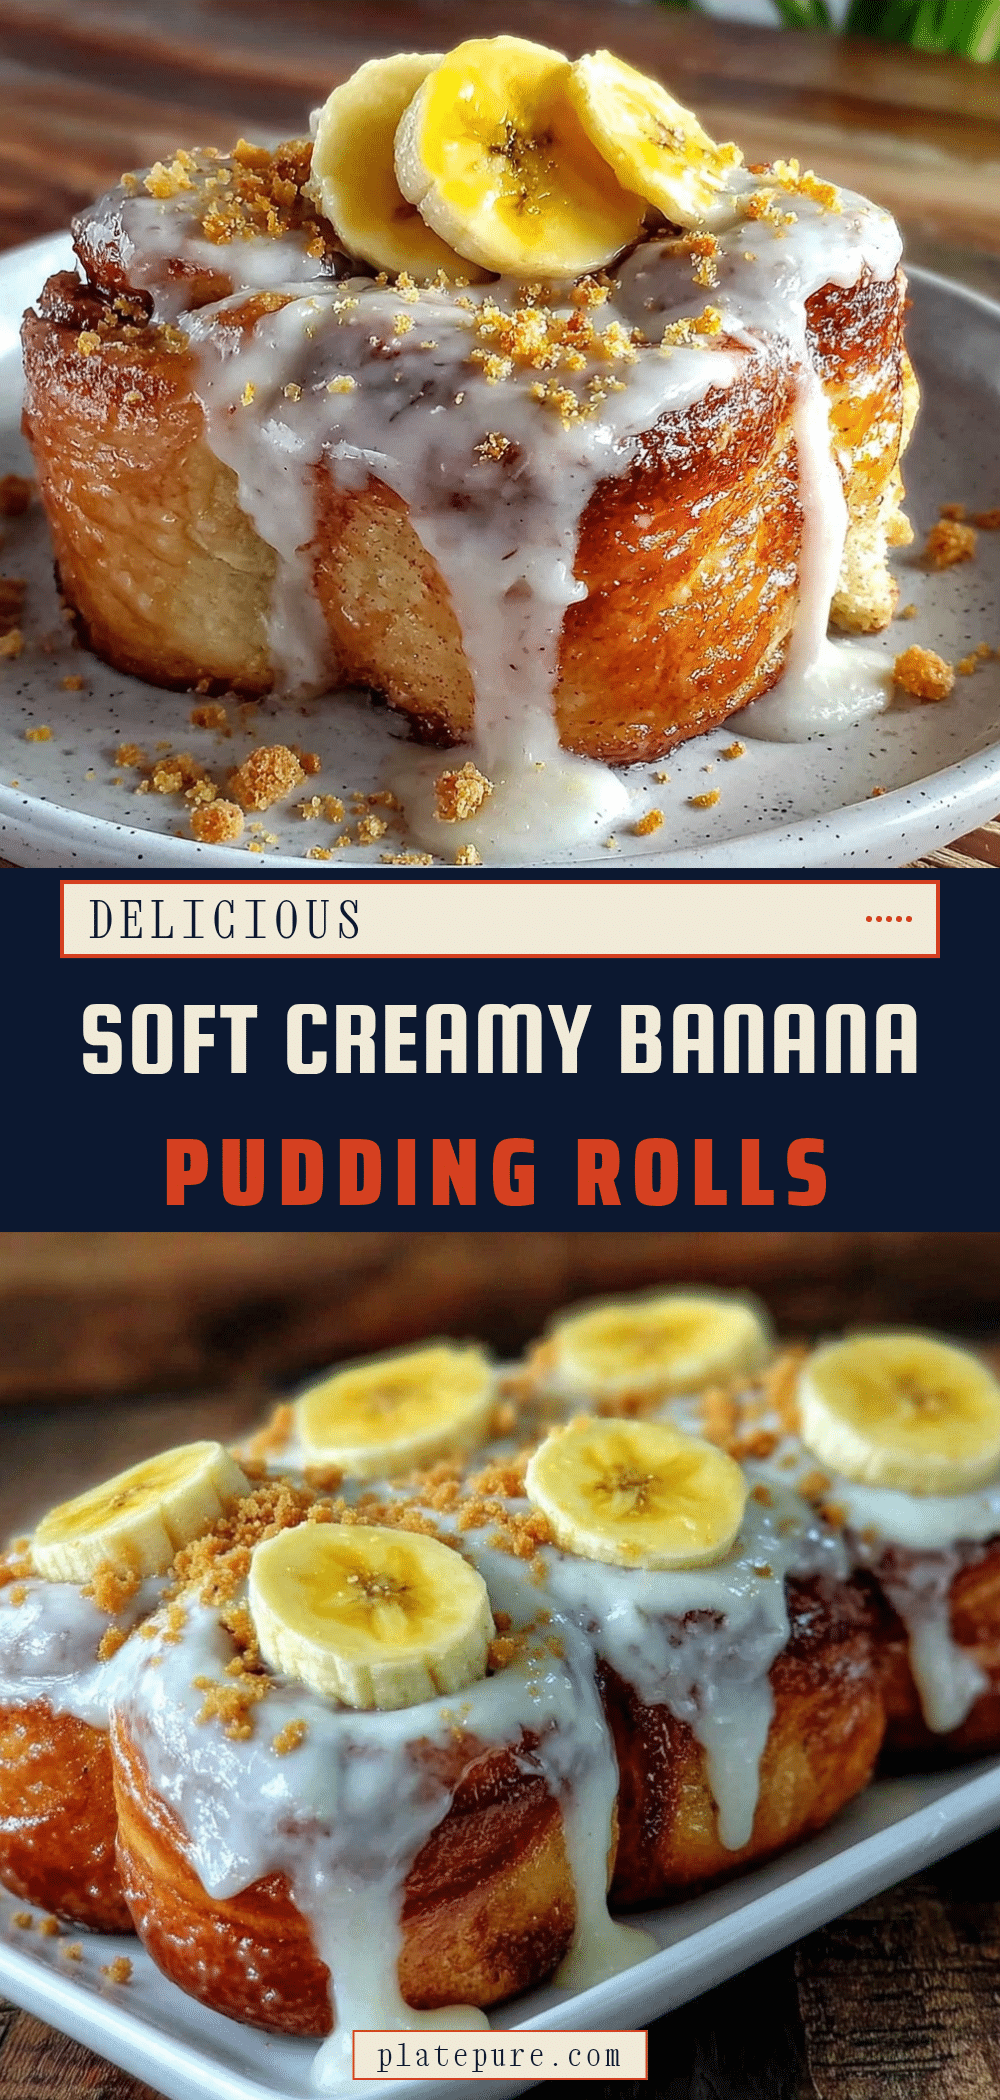

Soft Banana Pudding Rolls: 5-Ingredient No Bake Filling
- Total Time: 2 hours 15 minutes
- Yield: 12 servings
Description
A modern twist on classic banana pudding featuring pillowy soft yeast dough filled with a bright, zesty no-bake cream cheese and banana filling, finished with a white chocolate glaze.
Ingredients
- Warm milk (110°F/43°C)
- Active dry yeast
- Granulated sugar
- All-purpose flour
- Unsalted butter (softened)
- Large egg (room temperature)
- Pinch of salt
- Ripe bananas (mashed)
- Full-fat cream cheese (softened)
- Powdered sugar
- Heavy whipping cream
- Vanilla bean paste
- Fresh lemon juice
- White chocolate (for glaze)
Instructions
- Activate the yeast by combining warm milk, sugar, and yeast in a mixer bowl; let sit for 5-10 minutes until foamy.
- Add softened butter, egg, and salt to the yeast mixture. Gradually add flour and knead with a dough hook for 8-10 minutes until smooth and elastic.
- Cover the dough and let it rise in a warm place for 1-2 hours until doubled in size.
- While dough rises, mash bananas until smooth. Beat cream cheese until creamy, then mix in powdered sugar, vanilla bean paste, and lemon juice.
- Fold mashed bananas into the cream cheese mixture. In a separate bowl, whip heavy cream to stiff peaks and gently fold it into the banana mixture. Refrigerate filling.
- Punch down risen dough and roll out into a 12×16 inch rectangle on a floured surface.
- Spread chilled banana filling evenly over the dough, leaving a border. Roll tightly into a log.
- Slice log into 12 even rolls and place cut-side up in a greased 9×13 inch baking dish.
- Cover rolls and let rise again for 30-45 minutes until puffy.
- Preheat oven to 350°F (175°C). Bake rolls for 25-30 minutes until golden brown.
- Melt white chocolate. Let rolls cool in pan for 10 minutes, then drizzle with chocolate.
- Cool completely before slicing to allow filling to set.
Notes
Ensure milk is warm (110°F) but not hot to activate yeast without killing it. Use ripe, spotted bananas for best sweetness and texture. Do not skip the second rise for fluffy rolls. If using frozen bananas, they may make the filling watery; fresh is preferred. Rolls can be refrigerated overnight after the first rise if meal prepping.
- Prep Time: 45 minutes
- Cook Time: 30 minutes
- Category: Dessert
- Cuisine: American
Nutrition
- Serving Size: 1 roll
- Calories: 275
- Sugar: 22
- Sodium: 150
- Fat: 12
- Saturated Fat: 7
- Carbohydrates: 38
- Fiber: 2
- Protein: 5
Keywords: banana pudding, no bake dessert, yeast rolls, cream cheese filling, white chocolate glaze, brunch recipe, comfort food