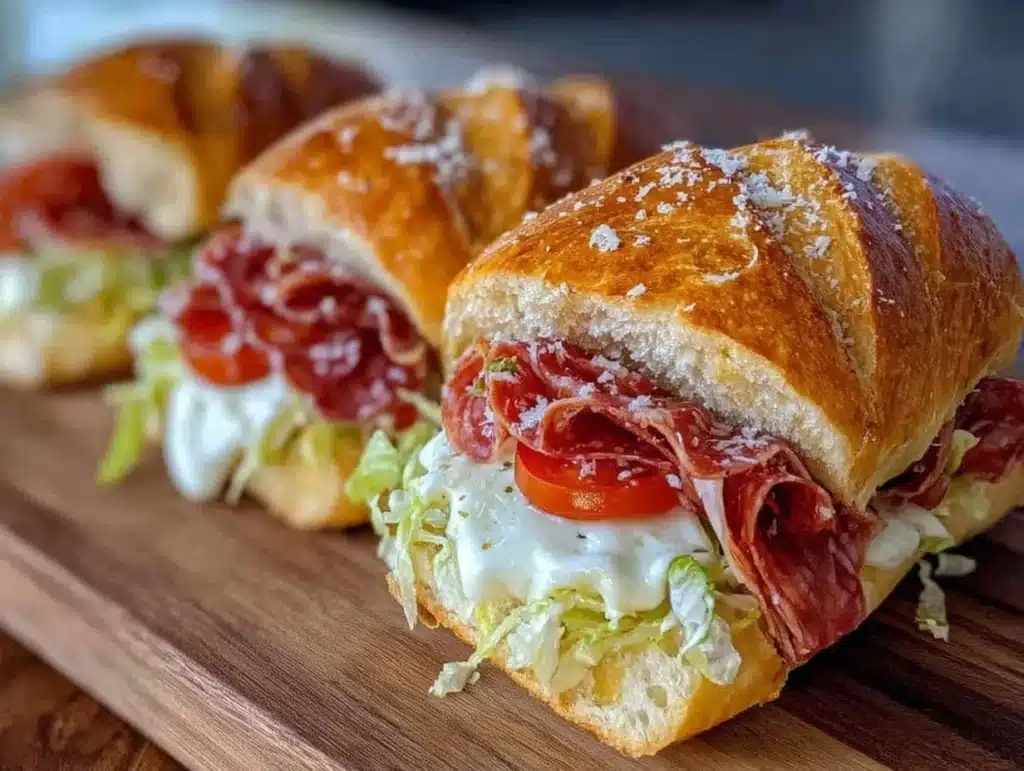
Let’s be honest, there is nothing worse than buying a package of sub rolls from the store, only to find them dry, dense, or just plain flavorless. I’ve been there, standing in the bakery aisle, staring at those sad, plastic-wrapped loaves, wondering where the magic went. You know that feeling when you finally bite into a sandwich and it’s supposed to be the star of the show, but instead, it’s just a vehicle for the fillings? It’s frustrating, honestly.
My journey with homemade sub rolls began years ago when I decided to stop compromising on texture. I wanted a roll that was soft enough to squeeze without crumbling, yet sturdy enough to hold up to heavy meats, sharp cheeses, and tangy dressings without falling apart. It wasn’t just about convenience; it was about elevating the everyday lunch experience into something memorable. I tested this dough over a dozen times, tweaking the hydration and proofing methods until I nailed it.
These homemade sub rolls are the result of that obsession. They are pillowy soft on the inside with a slight chew that mimics the best deli breads out there. Whether you are prepping for a big game day party or just want a better sandwich for your daily commute, these rolls deliver. As someone who has spent countless hours in the kitchen perfecting doughs, I can tell you that the effort is worth every minute. The smell of baking bread fills your home, and the taste is incomparable to anything you’ll buy at the grocery store.
What makes these rolls special is their versatility. You can use them for Italian subs, cheesesteaks, turkey clubs, or even just buttered and toasted for a simple snack. They freeze beautifully, which means you can make a big batch on the weekend and have fresh bread ready all week long. If you’ve been hesitant about baking bread because you think it’s too difficult, trust me, this recipe is approachable. You don’t need fancy equipment or years of experience. Just a few simple ingredients and a little patience. Once you try these, you’ll never go back to store-bought again.
Why You’ll Love This Recipe
There is a specific satisfaction that comes from pulling a tray of golden-brown sub rolls out of the oven. It’s a feeling that’s hard to describe until you’ve experienced it. These rolls aren’t just bread; they are the foundation of your best sandwiches. Here is why they have become a staple in my kitchen and why I know they will become one in yours too.
- Unbeatable Texture: These rolls are designed to be soft and airy, yet they have enough structure to hold heavy toppings. I’ve tested many doughs, and this one strikes the perfect balance between fluffiness and chewiness.
- Simple Ingredients: You likely already have everything you need in your pantry. Flour, yeast, salt, sugar, water, and a little oil. No weird additives or preservatives that you find in store-bought versions.
- Perfect for Meal Prep: If you are like me, you love having lunch ready to go. These rolls freeze exceptionally well. You can make a double batch, freeze half, and have fresh bread ready whenever you need it.
- Customizable Size: Want mini sliders for a party? Or large, hearty rolls for a cheesesteak? This dough is versatile enough to be shaped any way you like. It adapts to your needs.
- Impressive Results: When you serve these at a gathering, people will ask for the recipe. There is something about homemade bread that feels like a labor of love, even if it’s actually quite simple to make.
What really sets these apart is the crumb structure. I spent a lot of time figuring out the right hydration level to get that open, airy interior without making the rolls too sticky to handle. The result is a roll that tears apart easily but doesn’t disintegrate. It’s the kind of bread that makes you close your eyes after the first bite because it’s just that good. It brings back memories of Sunday dinners and family gatherings, but with a modern twist that fits into busy weeknight routines.
I also love that these rolls are forgiving for beginners. If you over-proof them slightly, they still turn out fine. If you under-proof them, they are just a bit denser, but still delicious. This reliability gives you confidence in the kitchen. You aren’t gambling with your ingredients. You know that if you follow the steps, you will get a great result every single time.
What Ingredients You Will Need
Making sub rolls at home is surprisingly straightforward because the ingredient list is short and simple. You don’t need exotic flours or specialized baking powders. The magic happens in the technique, not in a long list of hard-to-find items. Here is what you need to create the perfect dough.
- All-Purpose Flour: This is your main structure builder. I recommend using a high-quality all-purpose flour like King Arthur or Gold Medal. They have consistent protein levels that help create that nice chew. You will need about 4 to 4.5 cups depending on humidity.
- Warm Water: The water activates the yeast. It should be between 105°F and 115°F (40°C-46°C). Too hot, and you kill the yeast. Too cold, and it won’t activate properly. Warm tap water usually works perfectly.
- Active Dry Yeast: One standard packet (2 1/4 teaspoons) is all you need. I prefer active dry yeast for its reliability, but instant yeast works too. Just mix it directly with the flour if you use instant.
- Sugar: A tablespoon of granulated sugar helps feed the yeast and adds a slight sweetness that balances the savory dough. It also helps with browning.
- Salt: Two teaspoons of kosher salt are essential. Salt strengthens the gluten and adds flavor. Without it, the bread tastes flat.
- Olive Oil: Two tablespoons of extra virgin olive oil add richness and moisture. It keeps the crumb soft for days. You can use vegetable oil if you prefer a neutral flavor, but olive oil adds a nice depth.
- Egg Wash (Optional): For that glossy, golden-brown finish, an egg wash made with one beaten egg and a tablespoon of water is great. It’s not strictly necessary, but it makes them look professional.
One tip I’ve learned over the years is to weigh your flour if you have a kitchen scale. Volume measurements can vary wildly depending on how packed the flour is. If you use a cup, fluff the flour first, then spoon it into the cup and level it off. This prevents you from adding too much flour, which is the number one reason homemade bread turns out dense.
Also, don’t skip the quality of your yeast. If your yeast is old, it might not be active enough to make the dough rise properly. If you aren’t sure, test it by mixing it with warm water and a pinch of sugar. If it foams up in five minutes, you’re good to go.
Equipment Needed
You don’t need a fancy stand mixer to make these rolls, but having the right tools makes the process much easier. Here is what I recommend for the best results.
- Mixing Bowl: A large bowl is essential. You need enough space for the dough to expand as it kneads. A glass or ceramic bowl is nice because you can see the dough rising clearly.
- Measuring Cups and Spoons: Standard measuring tools for dry ingredients. A liquid measuring cup is helpful for the water and oil.
- Kitchen Scale (Recommended): While not mandatory, a scale ensures accuracy. It takes the guesswork out of flour measurement.
- Baking Sheet: A standard half-sheet pan is perfect. Make sure it is heavy-gauge metal for even baking. Dark pans can cause the bottoms to burn, so line them with parchment paper.
- Parchment Paper: This is your best friend. It prevents sticking and makes cleanup a breeze. It also helps with even browning.
- Oven Thermometer: Ovens can be inaccurate. An inexpensive thermometer helps you know your oven is truly at 375°F (190°C).
If you don’t have a stand mixer, don’t worry. You can knead this dough by hand. It takes a bit more effort, about 10-12 minutes, but it’s a great way to connect with your dough. Just use a sturdy wooden spoon to mix at first, then turn it out onto a floured surface. A dough scraper is also handy for cleaning the bowl and handling sticky dough.
Preparation Method
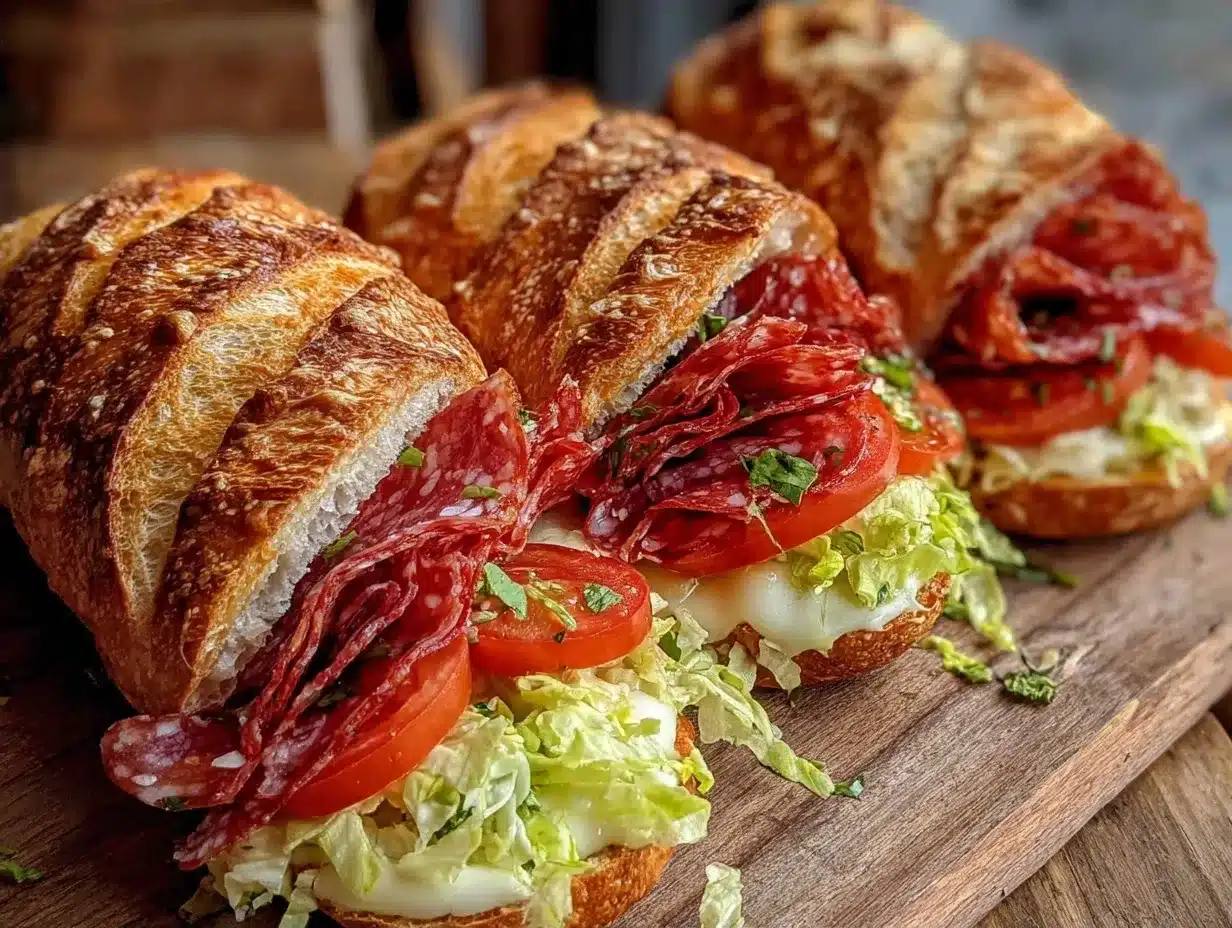
Now for the fun part—making the dough. This process is simple if you take your time. Here is how to get those perfect sub rolls.
- Activate the Yeast: In a small bowl, combine the warm water, sugar, and yeast. Stir gently and let it sit for 5-10 minutes. You should see a foamy layer on top. If it doesn’t foam, your yeast might be dead, and you should start over.
- Mix the Dough: In a large bowl, whisk together the flour and salt. Make a well in the center and pour in the yeast mixture and olive oil. Mix with a wooden spoon or your hands until a shaggy dough forms. This takes about 2-3 minutes.
- Knead the Dough: Turn the dough out onto a lightly floured surface. Knead for about 8-10 minutes until the dough is smooth and elastic. If using a stand mixer with a dough hook, knead on medium-low speed for 5-7 minutes. The dough should pass the windowpane test—stretch a small piece thinly without it tearing.
- First Rise: Lightly oil a clean bowl. Place the dough inside and turn it to coat with oil. Cover with plastic wrap or a damp towel. Let it rise in a warm, draft-free spot for 1-1.5 hours, or until doubled in size.
- Shape the Rolls: Punch down the dough to release air. Divide it into 8-10 equal pieces. Roll each piece into a tight ball by tucking the edges underneath. Place them on a parchment-lined baking sheet, spacing them about 1 inch apart. They will expand during the second rise.
- Second Rise: Cover the shaped rolls loosely with oiled plastic wrap. Let them rise again for 30-45 minutes. They should look puffy and jiggly when you shake the pan. Preheat your oven to 375°F (190°C) during the last 15 minutes.
- Bake: If using an egg wash, brush the tops gently. Bake for 15-18 minutes until golden brown. The internal temperature should reach 190°F (88°C). If they sound hollow when tapped on the bottom, they are done.
- Cool: Transfer the rolls to a wire rack. Let them cool for at least 15 minutes before slicing. This allows the crumb to set so the rolls don’t become gummy.
A common mistake is slicing the rolls while they are still hot. I know it’s tempting, but the steam inside needs to escape. If you cut them too soon, the texture will be dense and wet. Patience is key here.
Cooking Tips & Techniques
Getting the texture right can be tricky, but these tips will help you avoid common pitfalls. I’ve made plenty of mistakes along the way, so you don’t have to.
First, pay attention to the temperature of your water. If it’s too hot, you kill the yeast. If it’s too cold, the dough won’t rise. The water should feel like a warm bath. If you don’t have a thermometer, test it with your finger—it should feel warm but not hot.
Second, don’t add too much flour during kneading. It’s easy to add extra flour when the dough feels sticky, but sticky dough usually means higher hydration, which leads to softer rolls. If it’s too sticky to handle, wet your hands instead of adding more flour. This keeps the dough moist.
Third, the second rise is crucial for softness. Don’t rush this step. If the rolls don’t look puffy and airy before baking, they will be dense after baking. Use the jiggle test—gently shake the pan. If the rolls jiggle like Jell-O, they are ready.
Also, consider steam in the oven. For a crisper crust, you can place a pan of hot water on the bottom rack while baking. However, for sub rolls, you usually want a softer crust, so skip the steam. A soft crust is what makes them perfect for squeezing into sandwiches.
Finally, store your baked goods properly. Once cooled, keep them in a plastic bag or airtight container. Exposure to air dries them out quickly. If you live in a humid climate, you might notice they soften faster. In dry climates, they might dry out faster. Adjust your storage accordingly.
Variations & Adaptations
One of the best things about this dough is how adaptable it is. You can tweak it to fit your dietary needs or flavor preferences.
Whole Wheat Option: Substitute half of the all-purpose flour with whole wheat flour. This adds nuttiness and fiber. Note that whole wheat absorbs more water, so you might need to add an extra tablespoon of water.
Garlic Herb Rolls: Add 1 teaspoon of garlic powder and 1 teaspoon of dried Italian herbs to the dry ingredients. This adds a savory kick that pairs well with marinara sauces.
Gluten-Free: Use a 1:1 gluten-free flour blend that contains xanthan gum. You may need to adjust the liquid ratio slightly, as GF flours behave differently. Let the dough rest for 10 minutes before kneading to allow the gums to hydrate.
Sweet Rolls: Increase the sugar to 3 tablespoons and add a pinch of cinnamon. These are great for breakfast sandwiches or with butter and jam.
I once tried adding grated Parmesan cheese to the dough, and it was delicious. The cheese added a salty, umami flavor that complemented the soft bread. Just be careful not to add too much, as it can weigh down the dough.
Serving & Storage Suggestions
These rolls are best served fresh, but they keep well if stored correctly. Here is how to handle them after baking.
Serving: Slice the rolls horizontally with a serrated bread knife. This prevents crushing the soft interior. Toast the cut sides lightly with butter for extra flavor and texture. Serve with your favorite deli meats, cheeses, and veggies.
Room Temperature: Store cooled rolls in a plastic bag or airtight container at room temperature for up to 2 days. They stay soft and fresh.
Freezing: These rolls freeze beautifully. Wrap them tightly in plastic wrap, then in aluminum foil or a freezer bag. They can be frozen for up to 3 months. To thaw, leave them on the counter for a few hours or warm them in the oven at 300°F (150°C) for 10 minutes.
Reheating: If they have gone stale, sprinkle a little water on them and warm them in the oven for 5-7 minutes. This revives the softness. Avoid the microwave, as it can make them chewy.
I love making a big batch and freezing them. It’s a lifesaver when guests drop by unexpectedly. Just pull them out in the morning, let them thaw, and you have fresh bread ready by dinner time.
Nutritional Information & Benefits
While these are indulgent treats, they are made with simple, wholesome ingredients. Here is a rough estimate of the nutritional value per roll (without fillings).
- Calories: Approximately 180-200 calories per roll.
- Carbohydrates: About 35 grams, mostly from the flour.
- Protein: Around 5 grams, depending on the flour used.
- Fat: 2-3 grams from the olive oil.
- Fiber: 1-2 grams, unless you use whole wheat flour.
The olive oil adds healthy monounsaturated fats, which are good for heart health. Using whole wheat flour can increase the fiber content, aiding digestion. These rolls are a great base for balanced meals when paired with lean proteins and vegetables.
I appreciate that I know exactly what is in these rolls. No hidden sugars or preservatives. It’s just real food. This transparency is important to me when feeding my family. I can control the salt and sugar levels, making it healthier than store-bought options.
Conclusion
Making homemade sub rolls is a rewarding experience that pays off in every bite. The soft, chewy texture and fresh flavor are unmatched by anything you can buy in a store. I hope this recipe inspires you to spend some time in the kitchen and enjoy the process of baking.
Feel free to experiment with different shapes and flavors. Make mini rolls for parties or large ones for hearty sandwiches. The possibilities are endless. Once you master this dough, you’ll wonder why you ever bought store-bought rolls.
If you try this recipe, I’d love to hear how it turned out. Leave a comment below with your thoughts or share your variations. Tag me on social media if you post a picture—I love seeing your creations. Happy baking!
Frequently Asked Questions
Can I use instant yeast instead of active dry yeast?
Yes, you can. Instant yeast can be mixed directly with the flour without activating it in water first. You may need to reduce the liquid slightly, but the result will be very similar. Just ensure your liquid is warm, as instant yeast still needs warmth to activate.
Why are my sub rolls dense?
Dense rolls are usually caused by too much flour or insufficient rising time. Make sure you aren’t adding extra flour during kneading unless absolutely necessary. Also, ensure the dough has doubled in size during the first rise and is puffy before baking.
How do I keep the rolls soft for days?
Storing them in an airtight container or plastic bag is crucial. Exposure to air dries them out quickly. You can also add a piece of bread to the container to help maintain moisture, as the bread will absorb excess humidity.
Can I freeze the dough before baking?
Yes, you can. After shaping the rolls, let them rise until slightly puffy, then freeze them on the baking sheet. Once solid, transfer them to a freezer bag. When ready to bake, let them thaw and rise at room temperature before baking.
What is the best way to slice sub rolls?
Use a serrated bread knife. Gently saw back and forth without pressing down hard. This prevents crushing the soft interior. If the rolls are still slightly warm, be extra gentle to avoid tearing.
Pin This Recipe!


Homemade Sub Rolls: Best Soft Sandwich Bread
- Total Time: 48 minutes
- Yield: 8-10 servings 1x
Description
Soft, pillowy homemade sub rolls with a slight chew, perfect for sandwiches, subs, and sliders. These versatile rolls are easy to make, freeze well, and offer superior texture compared to store-bought versions.
Ingredients
- 4 to 4.5 cups All-Purpose Flour
- 1 packet (2 1/4 teaspoons) Active Dry Yeast
- 1 tablespoon Granulated Sugar
- 2 teaspoons Kosher Salt
- 1 cup Warm Water (105°F-115°F)
- 2 tablespoons Extra Virgin Olive Oil
- 1 Egg beaten with 1 tablespoon water (for egg wash, optional)
Instructions
- Activate the yeast: In a small bowl, combine warm water, sugar, and yeast. Stir gently and let sit for 5-10 minutes until foamy.
- Mix the dough: In a large bowl, whisk together flour and salt. Make a well and pour in the yeast mixture and olive oil. Mix until a shaggy dough forms.
- Knead the dough: Turn dough onto a lightly floured surface and knead for 8-10 minutes until smooth and elastic (or use a stand mixer on medium-low for 5-7 minutes). The dough should pass the windowpane test.
- First rise: Place dough in a lightly oiled bowl, cover, and let rise in a warm spot for 1-1.5 hours until doubled in size.
- Shape the rolls: Punch down dough and divide into 8-10 equal pieces. Roll each into a tight ball and place on a parchment-lined baking sheet, spaced 1 inch apart.
- Second rise: Cover rolls loosely with oiled plastic wrap and let rise for 30-45 minutes until puffy and jiggly. Preheat oven to 375°F (190°C) during the last 15 minutes.
- Bake: Brush tops with egg wash if desired. Bake for 15-18 minutes until golden brown and internal temperature reaches 190°F (88°C).
- Cool: Transfer to a wire rack and cool for at least 15 minutes before slicing to allow the crumb to set.
Notes
Weigh flour for accuracy if possible. Do not add too much flour during kneading; wet hands if sticky. Ensure water is warm but not hot to avoid killing yeast. Do not slice rolls while hot to prevent a gummy texture. Rolls freeze well for up to 3 months.
- Prep Time: 30 minutes
- Cook Time: 18 minutes
- Category: Bread
- Cuisine: American
Nutrition
- Serving Size: 1 roll
- Calories: 190
- Sugar: 2
- Sodium: 350
- Fat: 2.5
- Saturated Fat: 0.4
- Carbohydrates: 35
- Fiber: 1.5
- Protein: 5
Keywords: homemade sub rolls, soft sandwich bread, yeast rolls, bread recipe, meal prep bread, gluten-free option


