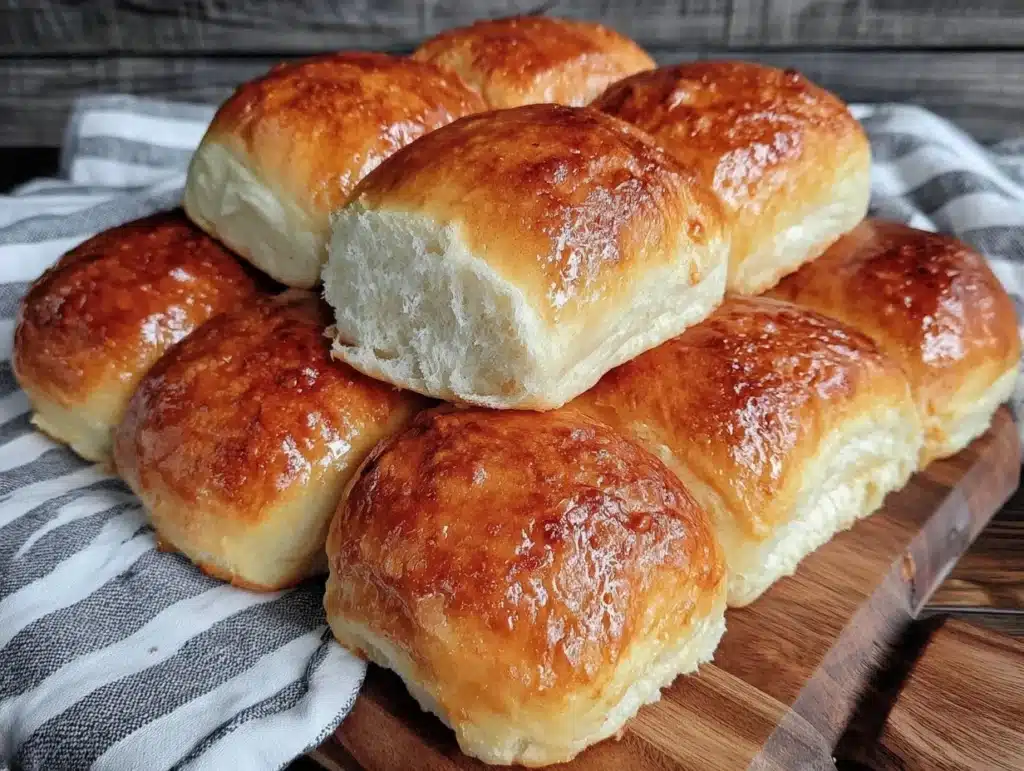
The smell of warm yeast and toasted flour drifting from the kitchen is basically the unofficial national anthem of summer. You know that feeling when you pull a tray of buns out of the oven, and they’re still steaming? Honestly, it’s the best part of the day. I remember my first attempt at making hot dog buns from scratch. It was a disaster. Dense, flat, and honestly, a bit sad. I had let them rise in a drafty garage because my apartment was too small for the smell. But after dozens of tries, I finally cracked the code on soft, pillowy, grill-ready bread.
This recipe for easy soft hot dog buns is the one I come back to every single barbecue season. It’s not just about holding a sausage; it’s about that contrast between the charred snap of a grilled frank and the tender, airy bite of fresh bread. I’ve tested this dough in humid summers and dry winters, tweaking the hydration until it felt just right. As someone who believes every summer meal needs a little brightness, I actually add a touch of lemon zest to the dough. It sounds weird, I know, but it cuts through the richness of the meat and cheese perfectly.
Whether you are hosting a massive neighborhood cookout or just want a better lunch for your kids, these buns are a game-changer. They freeze beautifully, so you can bake a batch when you have the time and pull them out when the grill is lit. Plus, if you love that fresh-baked vibe, you’ll also enjoy how this pairs with my dirty strawberry soda for a complete summer feast. Let’s face it, store-bought buns just can’t compete with the texture of something you pulled out of your own oven.
Why You’ll Love This Recipe
There is a specific kind of magic that happens when you make bread from scratch. It’s not just about the taste; it’s the pride of feeding your family something you created with your own hands. I’ve spent years refining this dough, adjusting the flour ratios and proofing times until it was foolproof. This isn’t just another bread recipe; it’s the result of trial, error, and a lot of taste-testing. Here is why this recipe stands out in my kitchen:
- Quick & Easy: You don’t need a stand mixer, though it helps. This comes together in under an hour of active time, making it perfect for a weekend afternoon when you want to cook but not stress.
- Simple Ingredients: You likely already have everything in your pantry. Flour, yeast, sugar, salt, butter, milk, and an egg. No fancy flours or obscure spices needed.
- Perfect for Grill Season: These buns are sturdy enough to hold a loaded chili dog but soft enough to melt in your mouth. They are the ultimate sidekick for your summer BBQs.
- Crowd-Pleaser: I’ve served these to picky eaters and gourmet foodies alike. Everyone loves fresh bread. It’s a universal comfort.
- Unbelievably Delicious: The texture is next-level. It’s airy, slightly chewy, and has a golden crust that sings when you tear it open.
- The Bright Jolt: Unlike standard plain buns, the hint of lemon zest adds a fresh, zesty note that wakes up your palate. It’s a subtle trick that makes the savory flavors pop.
What makes this recipe different is the attention to detail in the kneading and the final proof. Many recipes skip the egg wash or rush the second rise, resulting in dense buns. I’ve learned that patience pays off. This recipe ensures you get that bakery-quality softness every single time. It’s the kind of bread that makes you close your eyes after the first bite, especially when slathered with some garlic butter or spicy mustard.
What Ingredients You Will Need
This recipe relies on wholesome, simple ingredients to deliver bold flavor and satisfying texture without the fuss. The key to soft buns is using high-quality bread flour if you can find it, but all-purpose works fine too. I also swear by using whole milk for extra richness, though you can swap it out if needed. Here is what you’ll need to get started:
- Bread Flour: 3 ½ cups (420g). I recommend King Arthur brand for its high protein content, which gives the buns that perfect chew. All-purpose flour works too, but the texture will be slightly softer and less structured.
- Active Dry Yeast: 1 packet (2 ¼ tsp). Fast-rising yeast is a time-saver, but standard active dry works great if you give it a few extra minutes to activate.
- Granulated Sugar: 2 tablespoons. This feeds the yeast and helps with browning. You can use honey for a deeper flavor, but sugar keeps the crumb light.
- Salt: 1 ½ teaspoons. Don’t skip this. Salt controls the yeast and enhances the flavor. Use fine sea salt for even distribution.
- Warm Milk: 1 cup (240ml). It should be around 110°F (43°C). Too hot, and you’ll kill the yeast; too cold, and it won’t activate. Whole milk adds the best richness.
- Unsalted Butter: 3 tablespoons, melted. Adds flavor and tenderness. Let it cool slightly before mixing so it doesn’t cook the yeast.
- Large Egg: 1 large egg, room temperature. This binds the dough and adds structure. Room temperature ingredients incorporate more evenly.
- Lemon Zest: 1 teaspoon. This is my secret weapon. It adds a bright, citrusy aroma that cuts through the heaviness of the bread.
- Vegetable Oil: For greasing the bowl and baking sheet. Keeps the buns from sticking and helps them rise evenly.
If you need a dairy-free option, you can swap the milk for oat or almond milk and use coconut oil instead of butter. Just ensure your non-dairy milk is warm, not hot. For a healthier twist, you can substitute half the bread flour with whole wheat flour, though the buns will be denser. I personally stick to white flour for that classic soft hot dog bun texture.
How do I know my yeast is active?
Always proof your yeast first. Mix it with the warm milk and a pinch of sugar. If it foams up after 5-10 minutes, you’re good to go. If it stays flat, your yeast is dead, and you need to start over with fresh yeast.
Equipment Needed
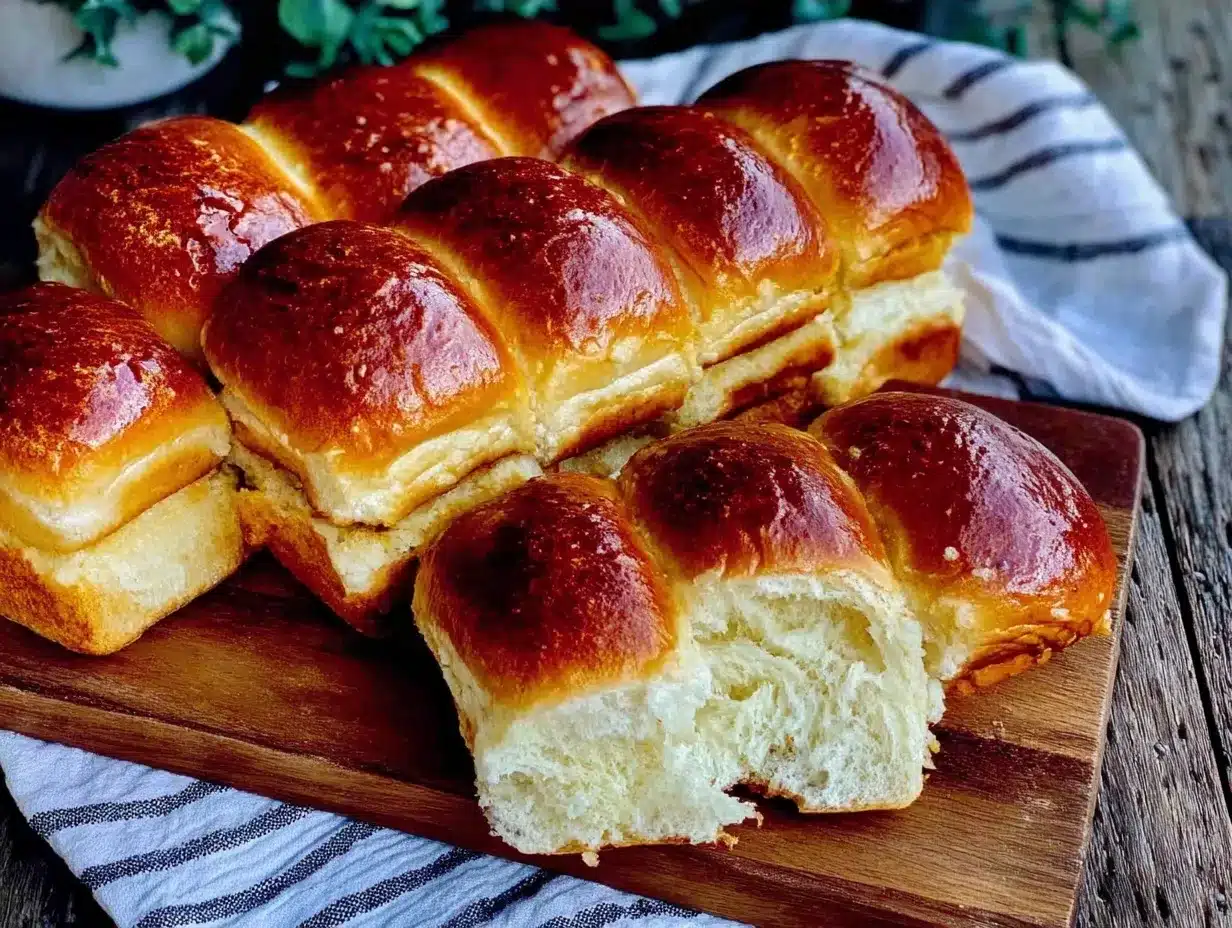
You don’t need a fancy kitchen to make these buns, but having the right tools makes the process smoother. A large mixing bowl is essential for kneading the dough. I prefer a glass or ceramic bowl because it’s easy to clean and doesn’t retain heat. If you have a stand mixer with a dough hook, you can use that to save your arms, but hand-kneading gives you a better feel for the dough’s texture.
A digital kitchen scale is highly recommended for accuracy. Measuring flour by volume can lead to inconsistent results because packing the cup adds too much flour. Weighing your ingredients ensures your buns are soft every time. If you don’t have a scale, use the spoon-and-level method: spoon flour into the cup and level it off with a knife.
A baking sheet lined with parchment paper is perfect for baking. Parchment prevents sticking and makes cleanup a breeze. You can also use a silicone baking mat if you have one. A pastry brush is useful for applying the egg wash to get that golden brown crust. Lastly, a cooling rack is crucial. Letting the buns cool on the rack prevents the bottoms from getting soggy from trapped steam.
If you don’t have a thermometer, you can test the milk temperature by dipping your finger in it. It should feel warm but not hot, like a baby’s bath. Budget-friendly options include using a simple glass measuring cup for mixing and a standard wooden spoon for stirring. You don’t need to spend a lot to bake great bread.
Preparation Method
Let’s get into the nitty-gritty of making these buns. The process is straightforward, but attention to detail is key. Follow these steps carefully for the best results.
Step 1: Activate the Yeast (5 minutes)
In a small bowl or the jug of your blender, combine the warm milk, sugar, and yeast. Stir gently and let it sit for 5-10 minutes. You should see a foamy layer form on top. This means the yeast is alive and ready to work. If you don’t see foam, discard the mixture and try again with fresh yeast.
Step 2: Mix the Dough (10 minutes)
In a large bowl, whisk together the flour and salt. Make a well in the center and pour in the yeast mixture, melted butter, egg, and lemon zest. Mix with a wooden spoon or your stand mixer on low speed until a shaggy dough forms. If using a mixer, switch to the dough hook.
Step 3: Knead the Dough (8-10 minutes)
Turn the dough out onto a lightly floured surface. Knead by hand for 8-10 minutes, or use the mixer on medium-low for 5-7 minutes. The dough should become smooth, elastic, and slightly tacky but not sticky. If it sticks to your hands, add a little more flour, one tablespoon at a time. If it’s too dry, add a splash of milk. The windowpane test is a good indicator: stretch a small piece of dough; if it stretches thin without tearing, it’s ready.
Step 4: First Rise (1 hour)
Place the dough in a lightly oiled bowl, turning it once to coat. Cover with plastic wrap or a damp kitchen towel. Let it rise in a warm, draft-free spot for about 1 hour, or until doubled in size. This is a great time to preheat your grill or prepare your toppings.
Step 5: Shape the Buns (10 minutes)
Punch down the dough to release air bubbles. Divide it into 8 equal pieces. Roll each piece into a log shape about 6 inches long. Place them on a baking sheet lined with parchment paper, leaving about 2 inches between each bun. They will expand during the second rise.
Step 6: Second Rise (30-45 minutes)
Cover the shaped buns loosely with a towel or plastic wrap. Let them rise again until puffy and nearly doubled. This usually takes 30-45 minutes. Preheat your oven to 375°F (190°C) during the last 15 minutes of rising.
Step 7: Bake (15-18 minutes)
Whisk the remaining egg with a tablespoon of water to make an egg wash. Brush the tops of the buns gently. Bake for 15-18 minutes, or until golden brown. If they brown too quickly, cover them loosely with foil. The internal temperature should reach 190°F (88°C).
Step 8: Cool and Serve (20 minutes)
Remove the buns from the oven and transfer them to a cooling rack. Let them cool for at least 20 minutes before slicing or serving. This allows the crumb to set. Warm buns are soft, but cool buns hold their shape better for stuffing.
What if my dough is too sticky?
Humidity affects dough. If it’s a humid day, you might need a little less water or a bit more flour. Add flour gradually, one tablespoon at a time, until the dough is manageable. Over-flouring leads to dense buns, so be careful.
Cooking Tips & Techniques
Making bread from scratch can be intimidating, but these tips will help you succeed. First, temperature is everything. Your kitchen should be warm for rising. If your kitchen is cold, place the bowl near a sunny window or in an oven with just the light turned on. The yeast needs warmth to activate properly.
Don’t rush the rising process. Patience is the most important ingredient. If the dough hasn’t doubled in size, give it more time. Rushing this step results in dense, heavy buns. I once tried to speed up the process by putting the dough in a slightly warm oven, but it caused uneven rising. Stick to the clock.
When kneading, listen to the dough. It should make a slight slapping sound against the counter. If it’s silent, it might be too dry. If it’s squelching, it’s too wet. Adjust accordingly. Also, don’t skip the egg wash. It gives the buns that professional, bakery-style shine and helps the salt or seeds stick if you’re adding toppings.
Another common mistake is slicing the buns while they are still hot. The steam inside is still escaping, and slicing too early can crush the soft interior. Let them cool completely on a rack. This also helps the crust crisp up slightly. For the best texture, serve them the day they are baked. They do stay soft for a day or two, but fresh is best.
How do I store leftover buns?
Store leftovers in an airtight container or a plastic bag at room temperature for up to 2 days. For longer storage, freeze them. Wrap them tightly in plastic wrap and then aluminum foil. They can be frozen for up to 3 months.
Variations & Adaptations
While the classic white bun is delicious, there are many ways to customize these buns to suit your taste or dietary needs. Here are a few variations I love:
- Whole Wheat Buns: Substitute half of the bread flour with whole wheat flour. This adds a nutty flavor and more fiber. The texture will be slightly denser, but still soft.
- Garlic Herb Buns: Add 1 teaspoon of dried garlic powder and 1 teaspoon of dried parsley to the flour mixture. These are perfect for serving with grilled veggies or chicken.
- Seeded Buns: Brush the tops with egg wash and sprinkle with sesame seeds, poppy seeds, or everything bagel seasoning before baking. This adds a nice crunch and visual appeal.
- Gluten-Free Option: Use a 1:1 gluten-free flour blend that includes xanthan gum. You may need to add a little extra liquid, as gluten-free flours absorb moisture differently. The texture will be more cake-like.
- Vegan Buns: Swap the milk for oat milk and the egg for a flax egg (1 tbsp ground flaxseed mixed with 3 tbsp water). Use coconut oil instead of butter. These buns hold together well and taste great.
I also like to make these buns slightly larger for sliders or mini burgers. Just divide the dough into 16 pieces instead of 8. They bake faster, so check them after 12 minutes. These mini buns are perfect for parties and pair wonderfully with my spicy Asian cucumber salad for a refreshing side dish.
Serving & Storage Suggestions
Serve these buns warm, straight from the cooling rack. They are perfect for classic hot dogs with mustard and relish, or gourmet sausages with caramelized onions and gruyère cheese. For a brighter twist, try topping them with a quick pickle or a zesty slaw. The lemon zest in the dough pairs beautifully with tangy condiments.
If you have leftovers, store them in an airtight container at room temperature for up to 2 days. To refresh them, warm them in the oven at 300°F (150°C) for 5 minutes. This restores their softness. For longer storage, freeze the buns. Wrap them tightly in plastic wrap and then aluminum foil. They can be frozen for up to 3 months. Thaw them at room temperature or warm them directly from the freezer in the oven.
These buns also make great breadcrumbs. Simply tear them into pieces, dry them out in the oven, and pulse them in a food processor. Use them to coat chicken or fish for a crispy texture. They are versatile and never go to waste. I often make a double batch and freeze half for quick weeknight dinners.
Can I freeze the dough before baking?
Yes! After the first rise, shape the buns and place them on the baking sheet. Freeze them until solid, then transfer to a freezer bag. Thaw them in the refrigerator overnight, let them rise again, and bake as directed.
Nutritional Information & Benefits
While these buns are a treat, they are also a source of energy and comfort. One bun contains approximately 180 calories, with 4g of protein, 35g of carbohydrates, and 3g of fat. They are a good source of carbohydrates, which fuel your body for active days like grilling and hiking.
Using bread flour provides more protein than all-purpose flour, which helps with muscle repair. If you use whole wheat flour, you get additional fiber, which aids digestion. The lemon zest adds a small amount of vitamin C and antioxidants. While not a health food, these buns are made with simple, recognizable ingredients, which is a step above many store-bought options.
For those watching their intake, enjoy these buns as part of a balanced meal. Pair them with lean proteins and plenty of vegetables. I find that making bread at home allows me to control the sugar and salt content, making it a slightly healthier choice than commercial buns. It’s about balance and enjoying the process of cooking.
Conclusion
Making easy soft hot dog buns from scratch is a rewarding experience that elevates your summer grilling game. The combination of soft, airy dough and a hint of lemon zest creates a unique flavor profile that store-bought buns just can’t match. I hope this recipe brings you joy in the kitchen and delicious memories at the table.
I encourage you to experiment with different toppings and variations. Add some garlic powder for a savory twist or sesame seeds for crunch. These buns are a blank canvas for your creativity. If you try this recipe, I’d love to hear how it turned out. Leave a comment below with your thoughts and any tips you discovered along the way.
Happy grilling, and enjoy your homemade buns! They are worth every minute of effort. Let me know if you have any questions or need advice on your baking journey. Cheers to bright flavors and warm bread!
FAQs
Can I use instant yeast instead of active dry yeast?
Yes, you can use instant yeast. You can mix it directly with the flour without proofing it first. The rising time might be slightly shorter, so keep an eye on the dough.
Why are my buns dense?
Dense buns are usually caused by under-proofing or using too much flour. Make sure the dough doubles in size before baking and weigh your flour for accuracy. Also, ensure your yeast is fresh and active.
How do I get a shiny crust on my buns?
Brush the buns with an egg wash (egg mixed with water or milk) before baking. This creates a glossy, golden-brown crust. You can also brush them with melted butter after baking for a softer crust.
Can I make these buns ahead of time?
Yes, you can shape the buns and freeze them after the first rise. Thaw them in the refrigerator overnight, let them rise again, and then bake. This is a great time-saver for busy weekends.
What is the best way to reheat leftover buns?
Reheat buns in the oven at 300°F (150°C) for 5-10 minutes. This restores their softness and warmth. Avoid using the microwave, as it can make them chewy and tough.
Pin This Recipe!


Easy Hot Dog Buns: The Bright Jolt for Grill Season
- Total Time: 2 hours 30 minutes
- Yield: 8 servings 1x
Description
Soft, pillowy hot dog buns made from scratch with a hint of lemon zest for brightness. These buns are sturdy enough for loaded dogs but tender enough to melt in your mouth, perfect for summer grilling.
Ingredients
- 3 ½ cups (420g) Bread Flour
- 1 packet (2 ¼ tsp) Active Dry Yeast
- 2 tablespoons Granulated Sugar
- 1 ½ teaspoons Salt
- 1 cup (240ml) Warm Milk (110°F/43°C)
- 3 tablespoons Unsalted Butter, melted
- 1 Large Egg, room temperature
- 1 teaspoon Lemon Zest
- Vegetable Oil (for greasing)
- 1 Egg mixed with 1 tablespoon water (for egg wash)
Instructions
- Activate the yeast: In a small bowl, combine warm milk, sugar, and yeast. Let sit for 5-10 minutes until foamy.
- Mix the dough: In a large bowl, whisk flour and salt. Add yeast mixture, melted butter, egg, and lemon zest. Mix until a shaggy dough forms.
- Knead the dough: Turn dough onto a floured surface and knead for 8-10 minutes (or use a mixer with dough hook for 5-7 minutes) until smooth and elastic.
- First Rise: Place dough in an oiled bowl, cover, and let rise in a warm spot for 1 hour or until doubled in size.
- Shape the buns: Punch down dough and divide into 8 equal pieces. Roll each into a 6-inch log and place on a parchment-lined baking sheet, 2 inches apart.
- Second Rise: Cover buns loosely and let rise for 30-45 minutes until puffy. Preheat oven to 375°F (190°C) during the last 15 minutes.
- Bake: Brush buns with egg wash. Bake for 15-18 minutes until golden brown and internal temperature reaches 190°F (88°C).
- Cool: Transfer to a cooling rack and let cool for at least 20 minutes before serving.
Notes
Ensure milk is warm but not hot to avoid killing the yeast. If dough is too sticky, add flour one tablespoon at a time. For a shiny crust, use an egg wash. Store leftovers in an airtight container for up to 2 days or freeze for up to 3 months.
- Prep Time: 30 minutes
- Cook Time: 15-18 minutes
- Category: Side Dish
- Cuisine: American
Nutrition
- Serving Size: 1 bun
- Calories: 180
- Sugar: 4
- Sodium: 300
- Fat: 3
- Saturated Fat: 1.5
- Carbohydrates: 35
- Fiber: 2
- Protein: 4
Keywords: hot dog buns, homemade bread, grill season, lemon zest bread, soft buns, summer recipes, baking from scratch