Let’s be real for a second. You know that feeling when you take a bite of mac and cheese that is so rich, so heavy with cheese, that you immediately want to reach for something sour to cut through the grease? I had that exact moment last Tuesday. I was staring at a bowl of pasta that tasted more like solidified dairy than a meal. It was delicious, sure, but it was also a mouth-coating experience that left me feeling sluggish by 3 PM. That is exactly why I started tweaking my approach to creamy queso mac and cheese. It isn’t just about the cheese; it is about balance. It’s about finding that sweet spot where the comfort meets a little bit of brightness.
I first realized I needed a change after hosting a casual Sunday dinner. I had made a huge pot of standard baked mac. By the end of the meal, three of my guests were reaching for their water glasses just to cleanse their palates. One friend joked that he felt like he needed a nap before he could digest it. I took that as a challenge. I wanted a recipe that was still indulgent and creamy but didn’t leave you feeling weighed down. The solution? Adding a splash of acid. Not just any acid, but something that cuts through the fat and wakes up your taste buds.
This creamy queso mac and cheese is my answer to heavy comfort food. It uses a roux base infused with a touch of lime juice and a hint of chili crisp oil to keep things interesting. It’s the kind of dish that feels like a hug but tastes like a party. If you are tired of bland, one-note cheese sauces, this recipe is for you. It brings together the nostalgia of childhood dinners with a modern, zesty twist that keeps every bite fresh. Honestly, it’s the kind of mac that gets you excited to eat again.
Over the last few months, I have tested this recipe at least a dozen times. I’ve played with different cheeses, different pastas, and different acids. The version I am sharing today is the winner. It strikes the perfect balance between creamy, savory, and tangy. Whether you are cooking for a picky eater or a group of foodies, this dish delivers. It is rich, yes, but it is also lively. Let’s face it, food should be fun. And this mac and cheese is definitely fun to make and even more fun to eat.
Why You’ll Love This Recipe
There are a million mac and cheese recipes out there, but this one stands out because it solves the biggest problem with comfort food: the heaviness. After years of testing and tweaking, I found that the secret isn’t just in the cheese blend. It is in the technique and the finishing touches. This creamy queso mac and cheese is designed to be approachable yet elevated. It doesn’t require hours of prep, but it does require a little attention to detail. That is what makes it special. It feels like a restaurant dish you can make at home on a weeknight.
- Quick & Easy: You can have this on the table in under 30 minutes. It is perfect for those busy weeknights when you want something homemade but don’t have hours to spare. The sauce comes together faster than you can boil the pasta.
- Simple Ingredients: You likely have most of these items in your kitchen right now. No obscure ingredients or fancy grocery runs needed. Just good quality cheese, butter, milk, and a few pantry staples like flour and spices.
- Perfect for Entertaining: This dish is a crowd-pleaser. It’s great for potlucks, game day parties, or cozy family dinners. It looks impressive but is actually very forgiving to make. Even if you are a novice cook, you can’t mess this up.
- Crowd-Pleaser: Kids love the creaminess, and adults appreciate the depth of flavor. It gets rave reviews from everyone. It bridges the gap between simple comfort food and gourmet dining.
- Unbelievably Delicious: The texture is silky smooth, and the flavor is complex. The addition of lime juice and chili crisp oil adds a layer of brightness that keeps you coming back for more. It’s not just another version; it’s the best version.
What makes this recipe different is the balance. Most mac and cheese recipes go heavy on the fat. This one uses a lighter hand with the dairy and adds acidity to cut through the richness. It’s the acid that cuts through and balances it all. You close your eyes after the first bite and feel that immediate satisfaction. It’s comfort food reimagined. It’s healthier in spirit because it doesn’t weigh you down, but it has the same soul-soothing satisfaction. It turns a simple meal into something memorable without any stress.
What Ingredients You Will Need
This recipe uses simple, wholesome ingredients to deliver bold flavor and satisfying texture without the fuss. The key here is quality over quantity. Since there are only a few components, each one needs to do its job. We are building a sauce that is creamy but not cloying, and a pasta that holds up well to the sauce. I always recommend using block cheese rather than pre-shredded. Pre-shredded cheese has anti-caking agents that can make your sauce grainy. So, grab a block of cheddar and shred it yourself. It takes five minutes but makes a huge difference in the final texture.
- Elbow Macaroni: 1 pound (450g). Standard elbow pasta is classic because the curve holds the sauce well. You can use cavatappi or shells if you prefer, but elbows are the traditional choice for a reason.
- Unsalted Butter: 4 tablespoons (56g). This forms the base of the roux. Use real butter for the best flavor. Margarine won’t give you that rich, dairy taste we are looking for.
- All-Purpose Flour: 1/4 cup (30g). This thickens the sauce. Make sure it is fresh so your sauce doesn’t end up too thin or lumpy.
- Whole Milk: 2 cups (480ml). Whole milk gives the creamiest result. If you need to substitute, 2% milk works, but skim milk will make the sauce feel thin and watery.
- Sharp Cheddar Cheese: 2 cups (200g), shredded. Sharp cheddar has a strong flavor that stands up to the other ingredients. Mild cheddar can taste bland in a heavy sauce.
- Monterey Jack Cheese: 1 cup (100g), shredded. This cheese melts beautifully and adds a mild, creamy texture. It balances the sharpness of the cheddar.
- Lime Juice: 1 tablespoon (15ml). This is the secret weapon. The acid cuts through the fat of the cheese and milk. It adds a subtle brightness that you won’t expect but will definitely notice.
- Chili Crisp Oil: 1-2 teaspoons. This adds heat and texture. It’s not mandatory, but it adds a nice kick and some visual appeal. If you don’t have it, a dash of hot sauce works too.
- Garlic Powder: 1/2 teaspoon. Adds a savory depth without the risk of burning fresh garlic in the roux.
- Smoked Paprika: 1/2 teaspoon. This gives a subtle smoky flavor that pairs well with the cheese. It’s a game-changer for depth.
- Salt and Black Pepper: To taste. Always season your sauce well. Cheese can be salty, so taste before adding extra salt.
- Fresh Parsley: 2 tablespoons, chopped. For garnish. It adds a pop of color and a fresh herbal note to finish the dish.
I personally prefer using a brand like Cabot for cheddar because it melts evenly and has a consistent flavor. For the Monterey Jack, any good quality block works fine. If you are dairy-free, you can use plant-based butter and milk, but the melting properties will be different. You might need to add a little more starch to get the right consistency. Also, if you are watching your sodium, look for low-sodium cheeses and skip the added salt in the water.
What Equipment Do I Need?
You don’t need fancy gadgets for this recipe. A large pot for boiling pasta and a medium saucepan for the cheese sauce are all you really need. I recommend using a non-stick saucepan for the cheese. Cheese sauce can stick to the bottom of stainless steel pans if you aren’t careful, and you don’t want to burn it. A whisk is essential for making the roux smooth. Don’t use a spoon; a whisk incorporates the flour and butter evenly and breaks up lumps instantly. A colander is needed for draining the pasta. Make sure it has fine holes so your small elbows don’t slip through. I also like using a measuring cup with a spout for pouring the milk. It keeps things clean and controlled. If you don’t have a grater, buy a box grater. It’s cheap and makes shredding cheese much faster than using a knife.
How to Make Creamy Queso Mac And Cheese
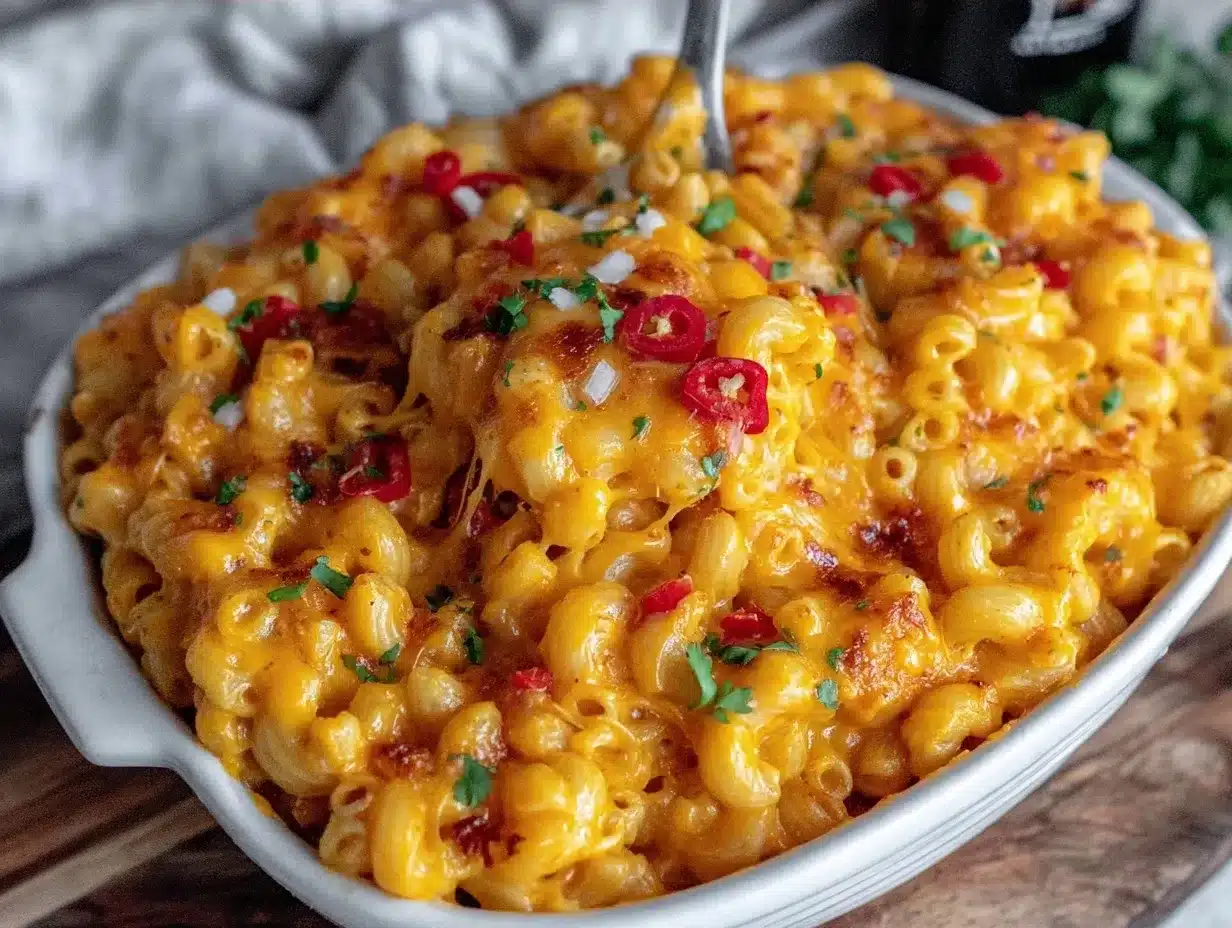
Let’s get into the nitty-gritty of making this dish. The process is straightforward, but timing is everything. You want the pasta to be ready when the sauce is ready, so start boiling the water first. It takes about 10 minutes for water to boil in a large pot, so get that going early. While the water heats up, you can prep your cheese. Shred it all at once and put it in a bowl. This is called mise en place, and it will save you from panic later. Once the water is boiling, add a generous amount of salt. It should taste like the sea. This seasons the pasta from the inside out.
- Boil the Pasta: Add the elbow macaroni to the boiling water. Cook it according to the package instructions, but take it out about one minute before it is fully done. We call this al dente. The pasta will finish cooking in the sauce later. Drain the pasta and set it aside. Do not rinse it! Rinsing washes away the starch that helps the sauce cling to the noodles.
- Make the Roux: In your medium saucepan, melt the butter over medium heat. Once it is foaming, sprinkle in the flour. Whisk constantly for about 1-2 minutes. You want the mixture to look like wet sand and smell slightly nutty. This cooks out the raw flour taste. Be careful not to let it brown. You want a white roux for this recipe.
- Add the Milk: Slowly pour in the milk while whisking vigorously. This is the most important step. If you pour it all at once, you will get lumps. Pour in a little, whisk until smooth, then add more. Continue until all the milk is incorporated. The sauce will start to thicken as it heats up. Let it simmer gently for 3-4 minutes. It should coat the back of a spoon.
- Melt the Cheese: Turn the heat down to low. This is crucial. High heat can cause the cheese to separate and become oily. Add the cheddar and Monterey Jack cheese a handful at a time. Stir gently until each addition is fully melted before adding the next. This patience pays off with a silky smooth sauce.
- Season and Acidify: Once the cheese is melted, remove the pan from the heat. Stir in the garlic powder, smoked paprika, salt, and pepper. Then, add the lime juice and chili crisp oil. Stir it in. The sauce might look a little thin at this point, but that’s okay. It will thicken as it cools slightly and mixes with the pasta.
- Combine: Add the drained pasta to the cheese sauce. Toss everything together until every noodle is coated. Taste and adjust seasoning. If it needs more salt, add a pinch. If it’s too thick, add a splash of milk. If it’s too thin, let it sit for a minute to thicken.
- Serve: Transfer to a serving bowl or individual plates. Garnish with fresh parsley and an extra drizzle of chili crisp oil if you like. Serve immediately while it is hot and gooey.
Pro tip: If you are making this ahead of time, store the sauce and pasta separately. Reheat them gently together. If you bake it, you can top it with breadcrumbs for crunch. But honestly, the stovetop version is where the magic happens. The texture is unmatched.
Cooking Tips & Techniques for Success
I have made a few mistakes along the way, and I want to help you avoid them. The biggest mistake people make is using high heat for the cheese sauce. Cheese proteins can tighten up and squeeze out fat if they get too hot. Always keep the heat low when melting cheese. Another common error is overcooking the pasta. If your pasta is mushy before it even hits the sauce, it will be a paste in the bowl. Undercook it slightly. Also, don’t skip the roux. Some people just melt cheese into milk, but that often results in a greasy sauce. The roux stabilizes the emulsion and gives you that creamy texture. If your sauce breaks and looks oily, don’t panic. Take it off the heat and whisk in an ice cube. The shock of cold can sometimes bring it back together. If not, you can add a teaspoon of cornstarch mixed with water. It’s a good emergency fix. Also, taste as you go. Cheese varies in saltiness. A sharp cheddar might be saltier than a mild one, so adjust accordingly. And finally, let the sauce rest for a minute before mixing with pasta. It allows the flavors to meld and the texture to settle. It’s a small step that makes a big difference.
Variations & Adaptations
One of the best things about this recipe is how flexible it is. You can make it your own with a few simple changes. For a vegetarian boost, stir in some sautéed broccoli or spinach. The acid in the lime juice pairs perfectly with the bitterness of greens. If you want more heat, add diced jalapeños or a dash of cayenne pepper. For a smoky flavor, try using pepper jack cheese instead of Monterey Jack. You can also add cooked bacon bits for a classic twist. For a lighter version, use cauliflower florets instead of pasta. Toss the steamed cauliflower in the cheese sauce for a low-carb option. If you are dairy-free, use plant-based cheese and milk. Note that plant-based cheeses often melt differently, so you might need to add a little extra thickener. I also like adding a spoonful of cream cheese for extra tang and creaminess. It’s a great way to use up leftovers. Feel free to experiment. Cooking is about playing with flavors. Just remember to balance the richness with acidity. A squeeze of lime or a splash of vinegar can save a heavy dish.
Serving & Storage Suggestions
This mac and cheese is best served immediately. It is hot, gooey, and perfect for dipping. I like to serve it with a simple green salad on the side. The crisp, acidic dressing of the salad complements the rich pasta perfectly. You can also pair it with grilled chicken or roasted vegetables. For drinks, a crisp white wine or a sparkling water with lemon works well to cut the richness. If you have leftovers, store them in an airtight container in the refrigerator for up to 3 days. The sauce will thicken in the fridge, which is normal. To reheat, add a splash of milk and warm it gently on the stove or in the microwave, stirring often. It will return to its creamy glory. You can also freeze it, but the texture might change slightly. Thaw it in the fridge and reheat with extra liquid. The flavors actually develop over time, so day-two mac is often quite good. Just give it a good stir and a sprinkle of fresh herbs before serving.
Nutritional Information & Benefits
While this is a comfort food, it does have some nutritional benefits. Cheddar cheese is a good source of protein and calcium. Milk adds more calcium and vitamin D. The lime juice provides a small amount of vitamin C. The chili crisp oil adds some healthy fats if you use a good quality oil base. However, it is still a calorie-dense dish, so enjoy it in moderation. It is not gluten-free due to the pasta and flour. For a gluten-free version, use gluten-free pasta and cornstarch instead of flour. It is a great option for those who want a hearty meal without feeling too heavy afterward. The acid helps with digestion by cutting through the fat, making it easier on your stomach. I often eat this as a weekend treat. It’s a reminder that food is meant to be enjoyed, not just consumed. Balance is key.
Conclusion
This creamy queso mac and cheese is more than just a recipe. It is a solution to the heavy, bland comfort foods we often rely on. By adding that touch of lime and chili, you create a dish that is both comforting and exciting. It’s easy to make, uses simple ingredients, and tastes incredible. I hope you try it and make it your own. Feel free to add your favorite veggies or meats. The possibilities are endless. If you make this, please leave a comment and let me know how it turned out. I love hearing from you. Share your variations and tips with the community. And don’t forget to share this recipe with friends who need a little brightness in their lives. Enjoy every bite, and remember, food is better when it’s balanced. Happy cooking!
Frequently Asked Questions
Can I use pre-shredded cheese?
It is not recommended. Pre-shredded cheese contains anti-caking agents that can prevent the cheese from melting smoothly. This can result in a grainy or gritty sauce. Always shred block cheese yourself for the best texture.
How do I fix a broken cheese sauce?
If the sauce looks oily or separated, take it off the heat immediately. Whisk in an ice cube or a tablespoon of cold milk. The cold temperature can help re-emulsify the fats. If that doesn’t work, add a small amount of cornstarch mixed with water.
Can I make this recipe gluten-free?
Yes. Use gluten-free elbow macaroni and substitute the all-purpose flour with a gluten-free 1:1 baking flour or cornstarch. Make sure to check that your cheese and spices are also certified gluten-free.
What kind of pasta works best?
Elbow macaroni is the classic choice because it holds sauce well. Cavatappi, shells, or penne are also great options. Avoid long pasta like spaghetti, as it is harder to mix with a thick cheese sauce.
Can I bake this instead of serving it stovetop?
Absolutely. You can transfer the mixture to a baking dish, top with breadcrumbs or extra cheese, and bake at 350°F (175°C) for 15-20 minutes until bubbly. This gives it a nice crust on top.
Pin This Recipe!
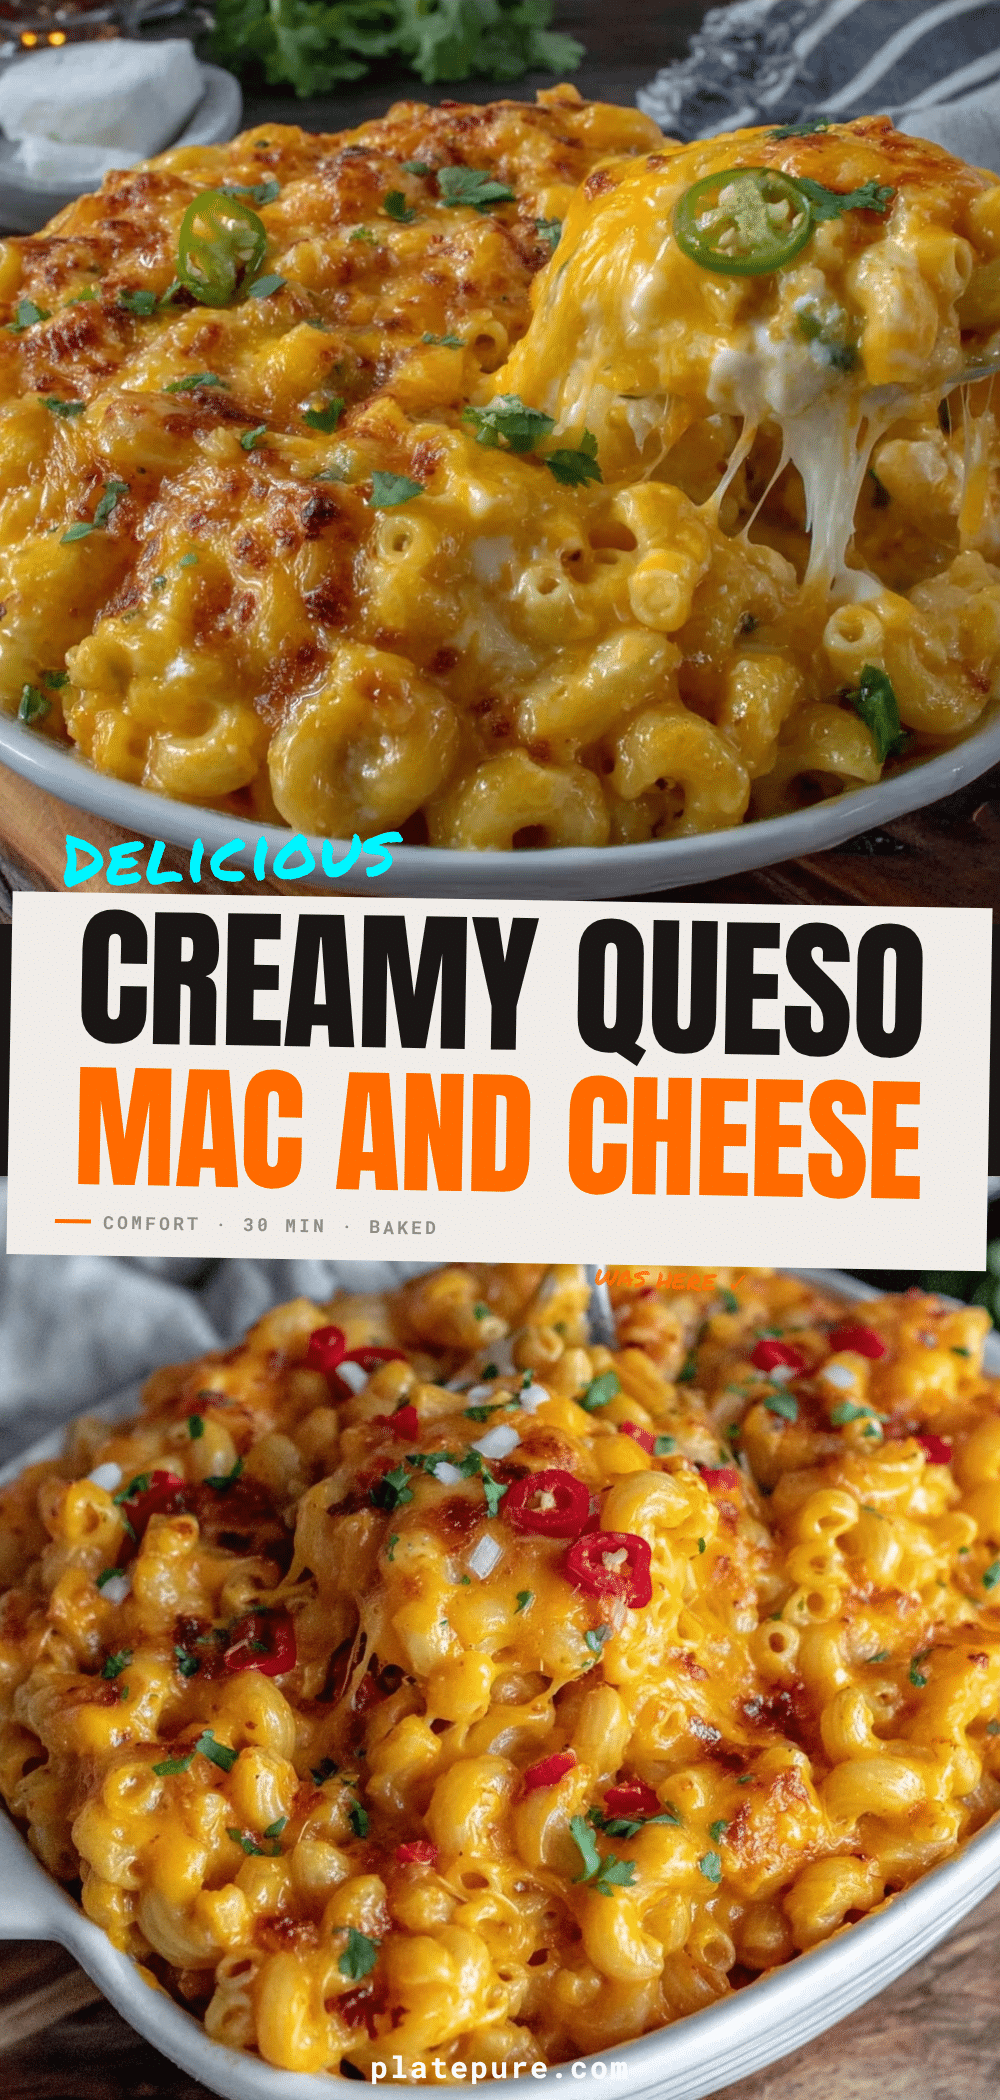

Creamy Queso Mac And Cheese: The Zesty Acid That Cuts Richness
- Total Time: 30 minutes
- Yield: 4 servings 1x
Description
A rich and creamy stovetop mac and cheese that balances heavy comfort food with bright acidity from lime juice and chili crisp oil, ensuring a flavorful dish that doesn’t leave you feeling weighed down.
Ingredients
- 1 pound (450g) elbow macaroni
- 4 tablespoons (56g) unsalted butter
- 1/4 cup (30g) all-purpose flour
- 2 cups (480ml) whole milk
- 2 cups (200g) sharp cheddar cheese, shredded
- 1 cup (100g) Monterey Jack cheese, shredded
- 1 tablespoon (15ml) lime juice
- 1–2 teaspoons chili crisp oil
- 1/2 teaspoon garlic powder
- 1/2 teaspoon smoked paprika
- Salt and black pepper to taste
- 2 tablespoons fresh parsley, chopped
Instructions
- Boil water in a large pot, salt generously, and cook elbow macaroni until al dente (about one minute less than package instructions). Drain and set aside without rinsing.
- In a medium saucepan, melt butter over medium heat. Sprinkle in flour and whisk constantly for 1-2 minutes until the mixture resembles wet sand and smells nutty.
- Slowly pour in milk while whisking vigorously to prevent lumps. Simmer gently for 3-4 minutes until the sauce thickens enough to coat the back of a spoon.
- Reduce heat to low. Add cheddar and Monterey Jack cheese a handful at a time, stirring gently until fully melted before adding the next batch.
- Remove pan from heat. Stir in garlic powder, smoked paprika, salt, and pepper. Add lime juice and chili crisp oil, mixing well.
- Combine the drained pasta with the cheese sauce, tossing until every noodle is coated. Adjust seasoning or consistency with milk if needed.
- Serve immediately, garnished with fresh parsley and an extra drizzle of chili crisp oil.
Notes
Shred block cheese yourself to avoid anti-caking agents that cause grainy sauce. Keep heat low when melting cheese to prevent separation. If sauce breaks, whisk in an ice cube or cold milk. For a gluten-free version, use GF pasta and cornstarch instead of flour.
- Prep Time: 10 minutes
- Cook Time: 20 minutes
- Category: Main Course
- Cuisine: American
Nutrition
- Serving Size: 1 bowl
- Calories: 650
- Sugar: 6
- Sodium: 800
- Fat: 35
- Saturated Fat: 20
- Carbohydrates: 55
- Fiber: 2
- Protein: 25
Keywords: mac and cheese, queso, creamy pasta, lime juice, chili crisp, comfort food, stovetop mac, easy dinner