The smell of yeast blooming in warm milk is basically the scent of summer. Honestly, if you’ve ever waited for that aroma to fill your kitchen, you know it’s the best part of the process. I first realized I was doing it wrong when I tried to make a burger for my family during a backyard BBQ last July. The buns from the store were fine, sure. But they were dry, flat, and frankly, a little boring. They didn’t have that squeeze, that cloud-like bounce that should happen when you press down on a perfect burger bun.
I remember looking at my plate and thinking, “This is it? This is the vessel for my masterpiece?” It felt like serving a steak on a paper plate. That night, I went home and whipped up a batch of these soft hamburger buns. The difference was night and day. Suddenly, the burger wasn’t just a meal; it was an experience. The bun held the juices without falling apart, and the slight sweetness balanced the savory patty perfectly.
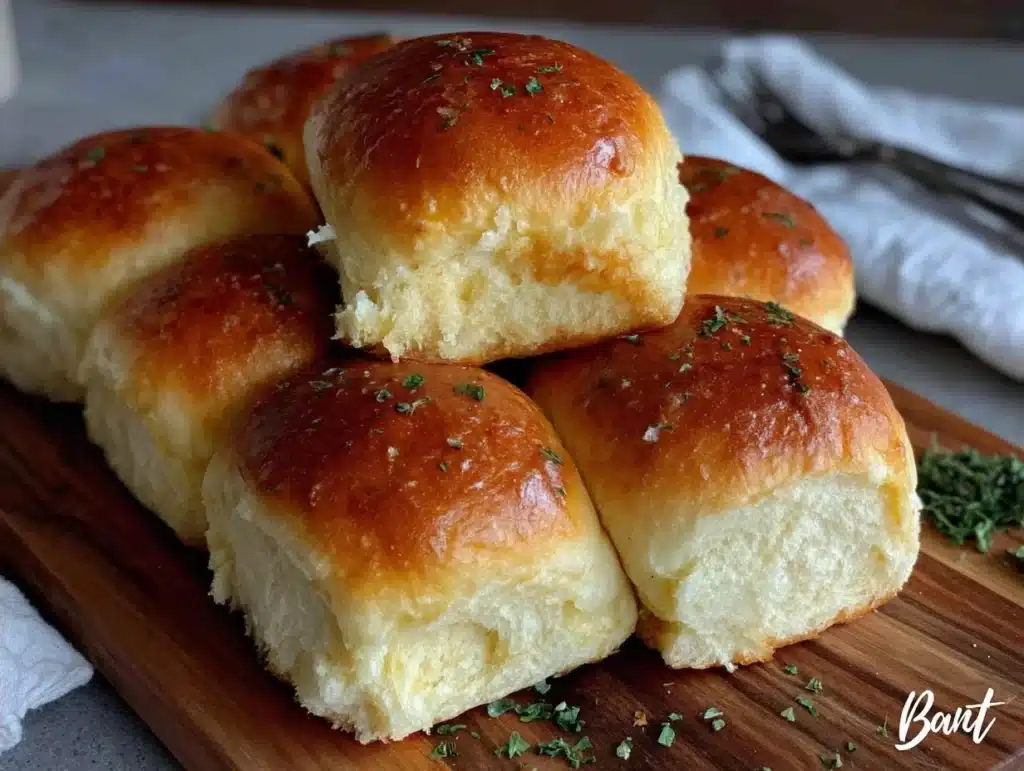
Let’s face it, we all love a good burger. But the bun is the unsung hero. These best soft hamburger buns are not just fluffy; they have a bit of brightness in them that keeps them from feeling heavy or doughy. I’ve tested this recipe over a dozen times, tweaking the hydration and proofing times to get that exact texture you’re dreaming of. Whether you’re a grill master or just trying to impress your kids on taco Tuesday, these buns will change your game. They are easy, forgiving, and incredibly rewarding.
Why You’ll Love This Recipe
There is something deeply satisfying about pulling a tray of golden, pillowy buns out of the oven. It’s comfort food, but with a twist. I’ve spent years testing yeast doughs, from stiff breads to delicate pastries, and these soft hamburger buns hit the sweet spot. They are tender enough to tear apart with your hands but sturdy enough to hold a juicy burger without disintegrating. Here is why this recipe has become a staple in my kitchen and why it will likely become one in yours too.
- Quick & Easy: You might think homemade bread takes hours, but this recipe comes together in under two hours total. It’s perfect for busy weeknights or when you’re planning a weekend cookout and need to prep ahead.
- Simple Ingredients: No fancy flours or obscure ingredients are needed. You likely already have yeast, flour, milk, and butter in your kitchen. It’s pantry-friendly cooking at its finest.
- Perfect for Summer Grilling: These buns are the ultimate companion for outdoor cooking. They pair beautifully with grilled vegetables, smoky meats, and even the beef and veggie stir-fry for a fun fusion night.
- Crowd-Pleaser: Kids love them because they are soft and slightly sweet. Adults love them because they taste fresh and homemade. They are always a hit at potlucks and family dinners.
- Unbelievably Delicious: The texture is next-level. It’s not just fluffy; it has a slight chew that makes every bite enjoyable. The flavor is balanced, not too yeasty, with a hint of richness from the butter.
What makes this recipe different from the rest is the attention to detail in the mixing and proofing. I’ve found that using warm milk and letting the dough rest properly creates that airy structure you crave. It’s not just another version of a burger bun; it’s the best version. It’s the kind of bun that makes you close your eyes after the first bite. It’s comfort food reimagined—healthier because you control the ingredients, faster than you think, and with the same soul-soothing satisfaction as your favorite bakery.
What Ingredients You Will Need
This recipe uses simple, wholesome ingredients to deliver bold flavor and satisfying texture without the fuss. The key here is quality over quantity. Since there are few ingredients, each one plays a crucial role in the final structure and taste. I like to keep things straightforward so you can focus on the technique rather than hunting for obscure items. Most of these are staples, but a few small details make a big difference in the final result.
- Warm Milk: About 1 cup. This activates the yeast and adds richness. I recommend using whole milk for the best texture, but 2% works fine too. Make sure it’s warm, not hot, or you’ll kill the yeast.
- Active Dry Yeast: 2 packets (about 1 1/2 teaspoons). This is the engine of the recipe. If your yeast is old, your buns won’t rise. I always keep a fresh packet in my pantry to be safe.
- Granulated Sugar: 2 tablespoons. This feeds the yeast and adds a subtle sweetness that balances the savory burger. You can use honey if you prefer, but sugar dissolves easier in cold milk.
- Unsalted Butter: 4 tablespoons, melted. This adds flavor and tenderness. I use high-quality butter, like Land O’ Lakes, because it makes a noticeable difference in the crumb.
- Large Eggs: 1 large egg, room temperature. This binds the dough and adds structure. Room temperature eggs incorporate better into the mixture.
- All-Purpose Flour: About 3 to 3 1/2 cups. This is the main structure. Don’t pack it down when measuring; spoon it into the cup and level it off. Too much flour will make dense buns.
- Salt: 1 1/2 teaspoons. This enhances the flavor and controls the yeast growth. Don’t skip it, even if you are watching your sodium.
- Vegetable Oil: For greasing the bowl. A light coat prevents sticking and helps the dough rise evenly.
If you need a substitution, you can use bread flour for a chewier bun, but all-purpose is perfect for that soft, sandwich-style texture. For a dairy-free option, swap the milk for almond milk and the butter for a neutral oil. These substitutions work well, but the classic version is hard to beat.
Equipment Needed
You don’t need a fancy stand mixer to make these buns, but having the right tools helps. A large mixing bowl is essential for giving the dough room to expand. I use a glass bowl because I can see the dough rising, which is satisfying. A wooden spoon or a sturdy spatula is great for mixing the initial dough. If you have a stand mixer with a dough hook, use it on low speed to avoid overworking the dough. A baking sheet lined with parchment paper is crucial for even baking. I also recommend a pastry brush for the egg wash and butter topping. A kitchen thermometer is helpful for checking the milk temperature, aiming for around 110°F (43°C). If you don’t have one, just make sure it feels warm to the touch, like a baby’s bathwater.
How to Make the Best Soft Hamburger Buns
- Activate the Yeast: In a large bowl, combine the warm milk and sugar. Sprinkle the yeast over the top and stir gently. Let it sit for 5-10 minutes until it becomes foamy. This step is crucial; if it doesn’t foam, your yeast is dead, and you need to start over. (Time: 10 minutes)
- Mix the Wet Ingredients: Once the yeast is active, stir in the melted butter and the beaten egg. Mix until everything is well combined. The mixture should look creamy and slightly bubbly. (Time: 2 minutes)
- Add the Dry Ingredients: Gradually add the flour and salt to the wet mixture. If you are using a stand mixer, start on low speed. If mixing by hand, use a wooden spoon. Add about 2 cups of flour first, then switch to your hands. (Time: 5 minutes)
- Knead the Dough: Turn the dough onto a lightly floured surface. Knead for 5-7 minutes until the dough is smooth and elastic. It should pass the “windowpane test,” meaning you can stretch a small piece thin enough to see light through it without tearing. Add more flour if it’s sticky, but don’t overdo it. (Time: 7 minutes)
- First Rise: Place the dough in a greased bowl, turning once to coat. Cover with plastic wrap or a damp towel. Let it rise in a warm, draft-free area for 1-1.5 hours, or until doubled in size. (Time: 60-90 minutes)
- Shape the Buns: Punch down the dough to release air. Divide it into 8 equal pieces. Roll each piece into a smooth ball by tucking the edges underneath. Place them on a parchment-lined baking sheet, leaving space between them. (Time: 10 minutes)
- Second Rise: Cover the shaped buns loosely with a towel. Let them rise again for 30-45 minutes until puffy. Preheat your oven to 375°F (190°C) during the last 15 minutes. (Time: 30-45 minutes)
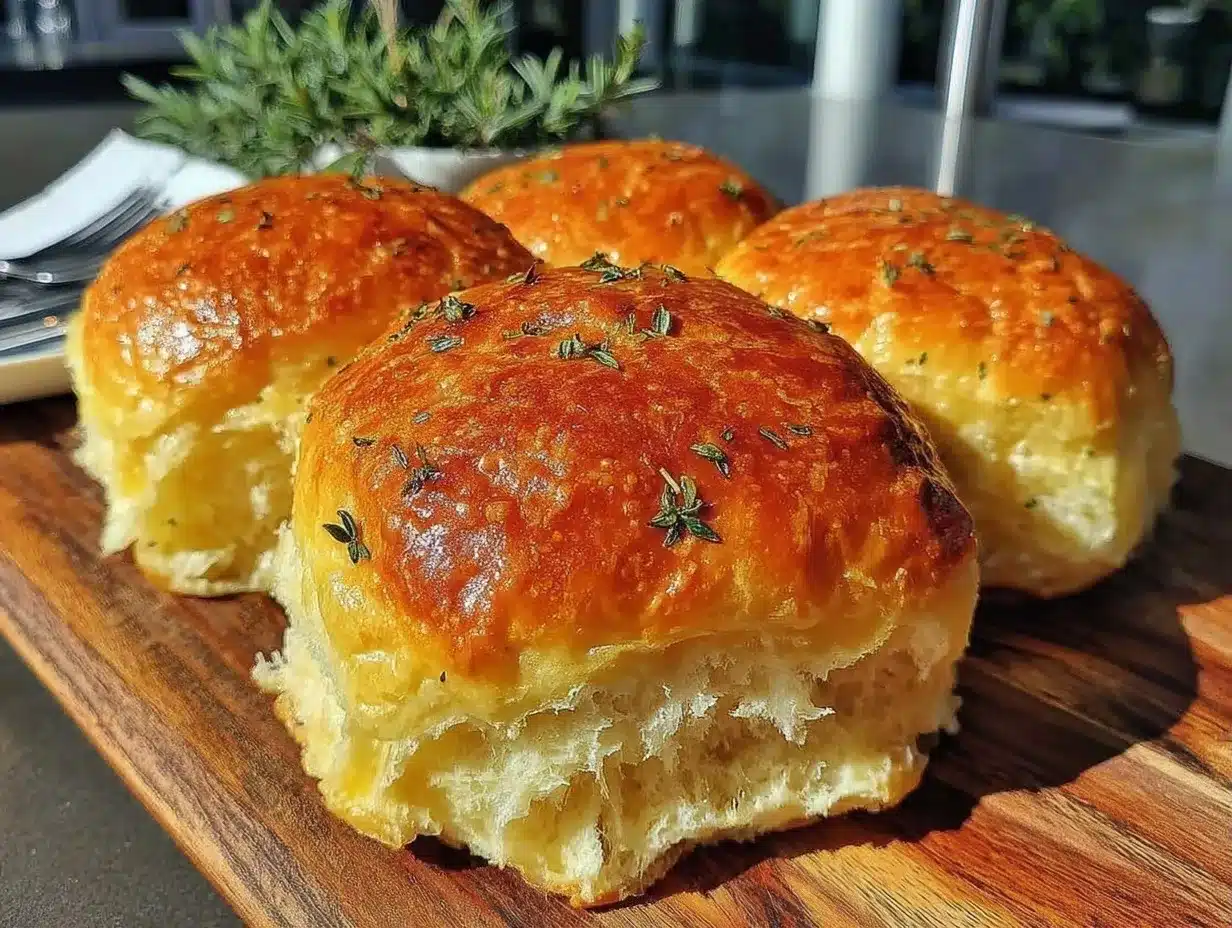
- Bake: Brush the tops with a little melted butter or an egg wash for shine. Bake for 15-18 minutes until golden brown. (Time: 15-18 minutes)
- Cool: Remove from the oven and let them cool on a wire rack for at least 10 minutes before slicing. This allows the structure to set. (Time: 10 minutes)
Cooking Tips & Techniques
Getting the dough right is the hardest part, but once you do, it’s easy. One common mistake is using water that is too hot. If it’s boiling, you’ll kill the yeast. If it’s too cold, the yeast won’t activate. Aim for a temperature that feels like a warm bath. Another tip is to not add too much flour during kneading. It’s normal for dough to be slightly sticky at first. If you add too much flour, the buns will be dense. Trust the process.
I also recommend using a kitchen scale for accuracy. Measuring flour by volume can vary significantly. If you must use cups, spoon the flour into the cup and level it off. Don’t scoop directly from the bag. This simple change can improve your results drastically. Also, be patient with the rising times. If it’s cold in your kitchen, the dough will take longer. You can speed it up by placing the bowl near a warm oven or in a microwave with a cup of hot water, but don’t rush it.
For the best texture, make sure your dough is smooth before the first rise. Kneading develops gluten, which gives the buns their structure. If you skip this step, the buns might be flat. Also, punch down the dough gently. You want to remove large air bubbles, but you don’t want to deflate the dough completely. A gentle press is all you need.
Variations & Adaptations
While these buns are perfect as is, there are plenty of ways to customize them. For a whole wheat version, substitute half of the all-purpose flour with whole wheat flour. This adds a nutty flavor and more fiber. For a sesame seed topping, brush the buns with water before the second rise and sprinkle with sesame seeds. They add a nice crunch and visual appeal.
If you want to add a twist, try brushing the tops with garlic butter before baking. This pairs well with the spicy Asian cucumber salad for a fusion burger. You can also add herbs like rosemary or thyme to the dough for an herbal note. For a dairy-free option, use coconut oil instead of butter and almond milk instead of dairy milk. These adaptations keep the softness while changing the flavor profile.
I once tried adding cheese to the dough, but it made the buns too heavy. Stick to simple variations for the best results. You can also shape the dough into rolls instead of buns for slider-sized treats. They are perfect for parties and appetizers. The flexibility of this recipe makes it a great base for experimentation.
Serving & Storage Suggestions
These buns are best served fresh out of the oven. They are incredibly soft and warm, making them perfect for burgers, sandwiches, or even as side bread for soup. I like to serve them with a simple side salad or the crispy avocado toast for a complete meal. They pair well with cold beverages like the classic southern sweet tea or a refreshing dirty strawberry soda.
To store leftovers, place the buns in an airtight container or a plastic bag at room temperature for up to 2 days. For longer storage, freeze them. Wrap them tightly in plastic wrap and then in foil. They will last for up to 3 months. To reheat, thaw them and warm them in the oven at 350°F for 5-10 minutes. This restores their softness. Do not microwave them, as they can become chewy. The flavors develop nicely over the first day, becoming slightly more tender as they rest.
Nutritional Information & Benefits
These buns are a good source of carbohydrates and provide energy for your day. They contain protein from the eggs and milk, which helps with satiety. However, they are not particularly low in calories, so enjoy them in moderation. One bun contains approximately 200-250 calories, depending on size. They are not gluten-free, so those with celiac disease should avoid them. They do contain dairy and eggs, so substitute accordingly for allergies. From a wellness perspective, homemade bread allows you to control the sugar and sodium content, making it a healthier choice than store-bought versions. I love having these on hand for a quick, satisfying meal.
Conclusion
Making the best soft hamburger buns at home is easier than you think and so much more rewarding. These buns are fluffy, flavorful, and perfect for any occasion. I hope this recipe brings joy to your kitchen and your table. Feel free to experiment with toppings and flavors to make them your own. Don’t forget to share your creations with me in the comments below. I love seeing how you adapt the recipe. Happy baking!
Frequently Asked Questions
Can I use instant yeast instead of active dry yeast?
Yes, you can use instant yeast. You can mix it directly with the flour instead of activating it in milk first. The results will be very similar, though active dry yeast gives a slightly more robust flavor.
Why are my buns dense?
Dense buns are usually caused by too much flour or under-proofing. Make sure you measure your flour correctly and let the dough rise until it is doubled in size. Also, ensure your yeast is fresh and active.
Can I freeze the dough before baking?
Yes, you can shape the buns and freeze them on the baking sheet. Once frozen, transfer them to a bag. When ready to bake, let them thaw and rise at room temperature before baking.
How do I make the buns shiny?
Brush the tops with an egg wash (1 egg beaten with 1 tablespoon water) or melted butter before baking. This gives them a beautiful golden shine.
Can I make these buns ahead of time?
Yes, you can make the dough and let it rise in the fridge overnight. Shape them the next day and let them rise before baking. This can help develop more flavor.
Pin This Recipe!
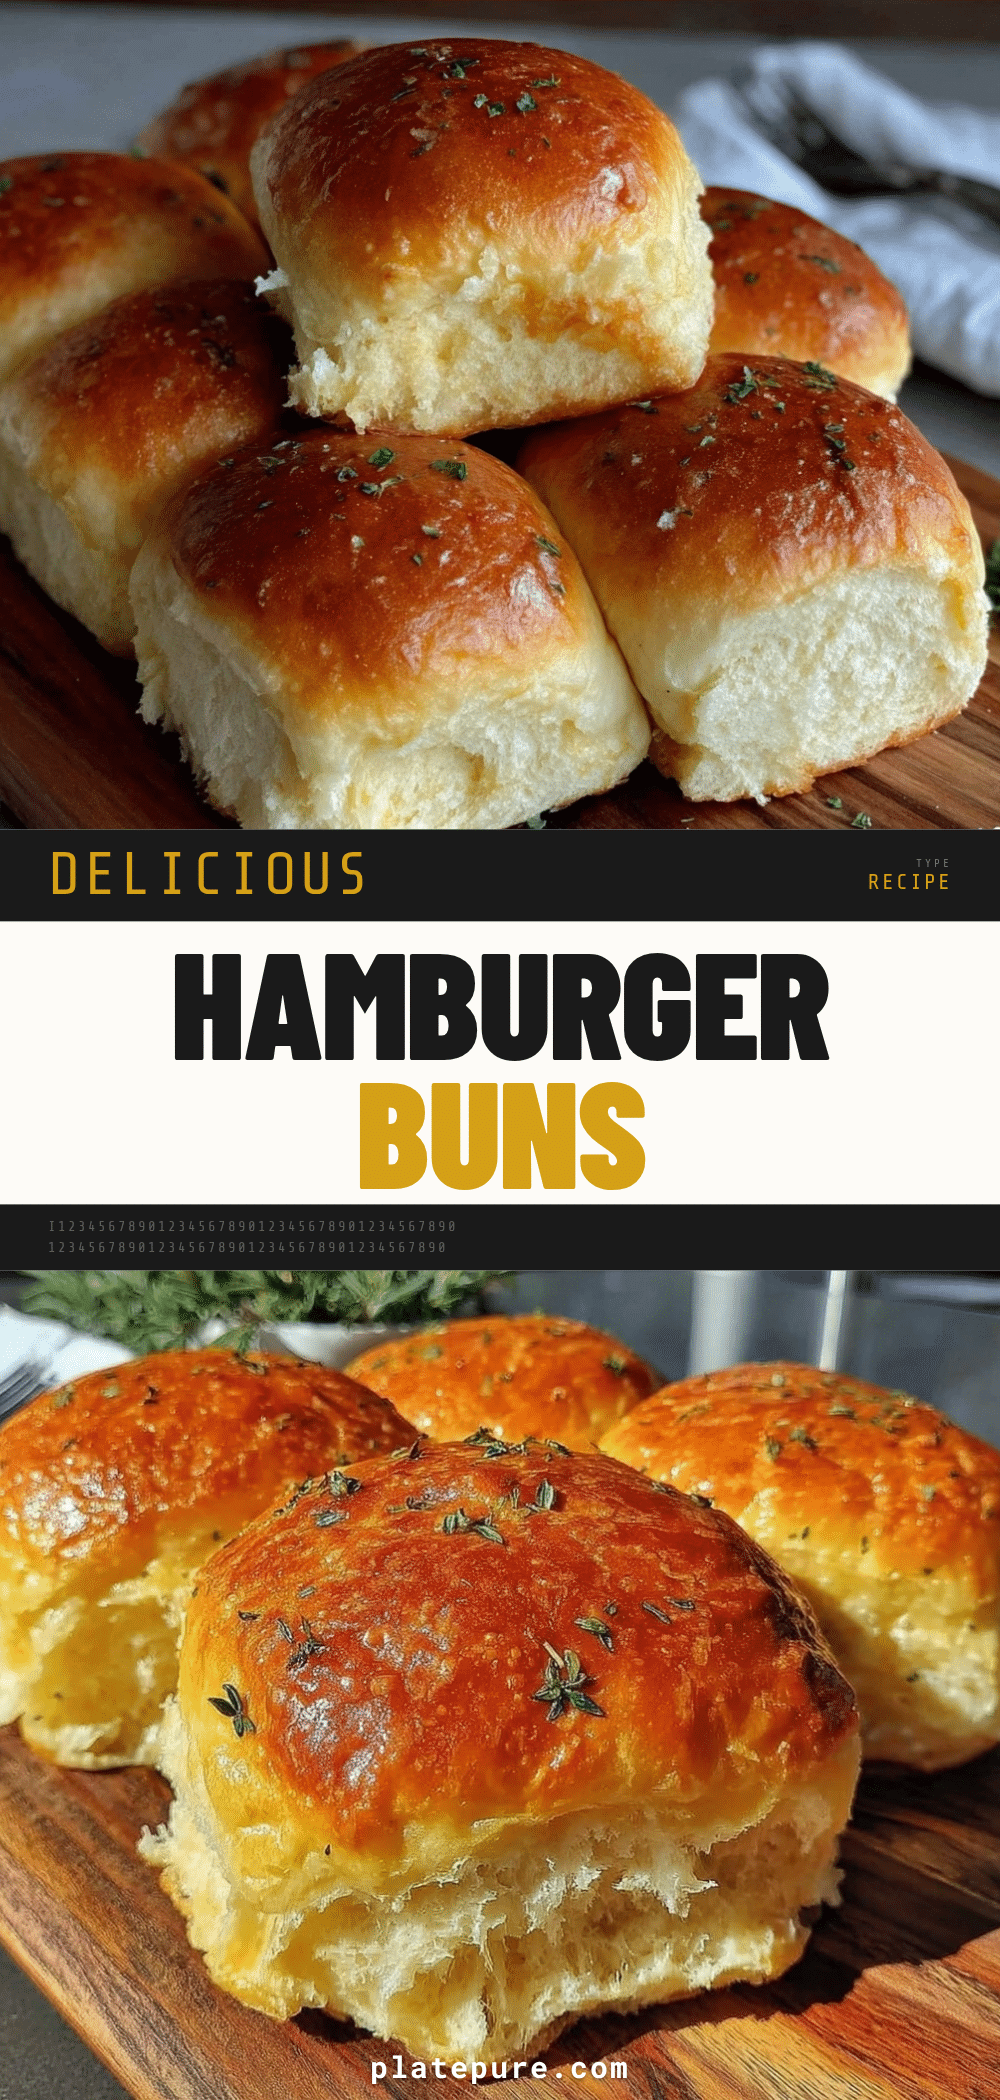

Best Soft Hamburger Buns: 7 Easy Steps for Zesty Perfection
- Total Time: 2 hours 30 minutes
- Yield: 8 servings 1x
Description
These homemade soft hamburger buns are fluffy, slightly sweet, and sturdy enough to hold juicy burgers. Made with simple pantry ingredients, they offer a bakery-quality texture that is perfect for summer grilling or weeknight dinners.
Ingredients
- 1 cup warm milk (whole or 2%)
- 2 packets active dry yeast (about 1 1/2 teaspoons)
- 2 tablespoons granulated sugar
- 4 tablespoons unsalted butter, melted
- 1 large egg, room temperature
- 3 to 3 1/2 cups all-purpose flour
- 1 1/2 teaspoons salt
- Vegetable oil (for greasing bowl)
- Egg wash or melted butter (for topping)
Instructions
- In a large bowl, combine warm milk and sugar. Sprinkle yeast over the top and stir gently. Let sit for 5-10 minutes until foamy.
- Stir in the melted butter and beaten egg until the mixture is creamy and slightly bubbly.
- Gradually add flour and salt to the wet mixture. Start with 2 cups of flour, then switch to hands to knead.
- Turn dough onto a lightly floured surface and knead for 5-7 minutes until smooth and elastic, passing the windowpane test.
- Place dough in a greased bowl, turning to coat. Cover and let rise in a warm area for 1-1.5 hours until doubled in size.
- Punch down dough to release air. Divide into 8 equal pieces and roll into smooth balls. Place on a parchment-lined baking sheet.
- Cover buns loosely and let rise again for 30-45 minutes until puffy. Preheat oven to 375°F (190°C) during the last 15 minutes.
- Brush tops with melted butter or egg wash. Bake for 15-18 minutes until golden brown.
- Remove from oven and cool on a wire rack for at least 10 minutes before slicing.
Notes
Ensure milk is warm (around 110°F) but not hot to avoid killing the yeast. Do not add too much flour during kneading as it can make buns dense. For a shiny finish, brush with egg wash or butter before baking. Store leftovers in an airtight container at room temperature for up to 2 days, or freeze for up to 3 months.
- Prep Time: 30 minutes
- Cook Time: 18 minutes
- Category: Side Dish
- Cuisine: American
Nutrition
- Serving Size: 1 bun
- Calories: 225
- Sugar: 4
- Sodium: 350
- Fat: 6
- Saturated Fat: 3
- Carbohydrates: 38
- Fiber: 2
- Protein: 6
Keywords: hamburger buns, soft bread, homemade buns, yeast dough, burger buns, easy bread recipe, summer grilling