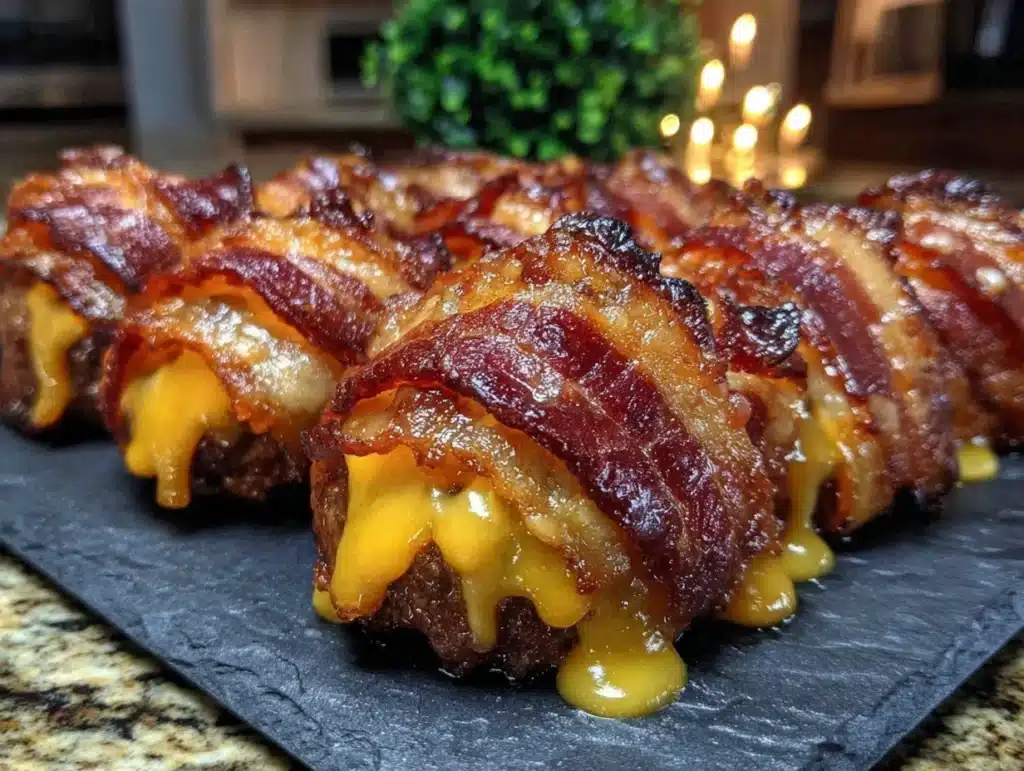
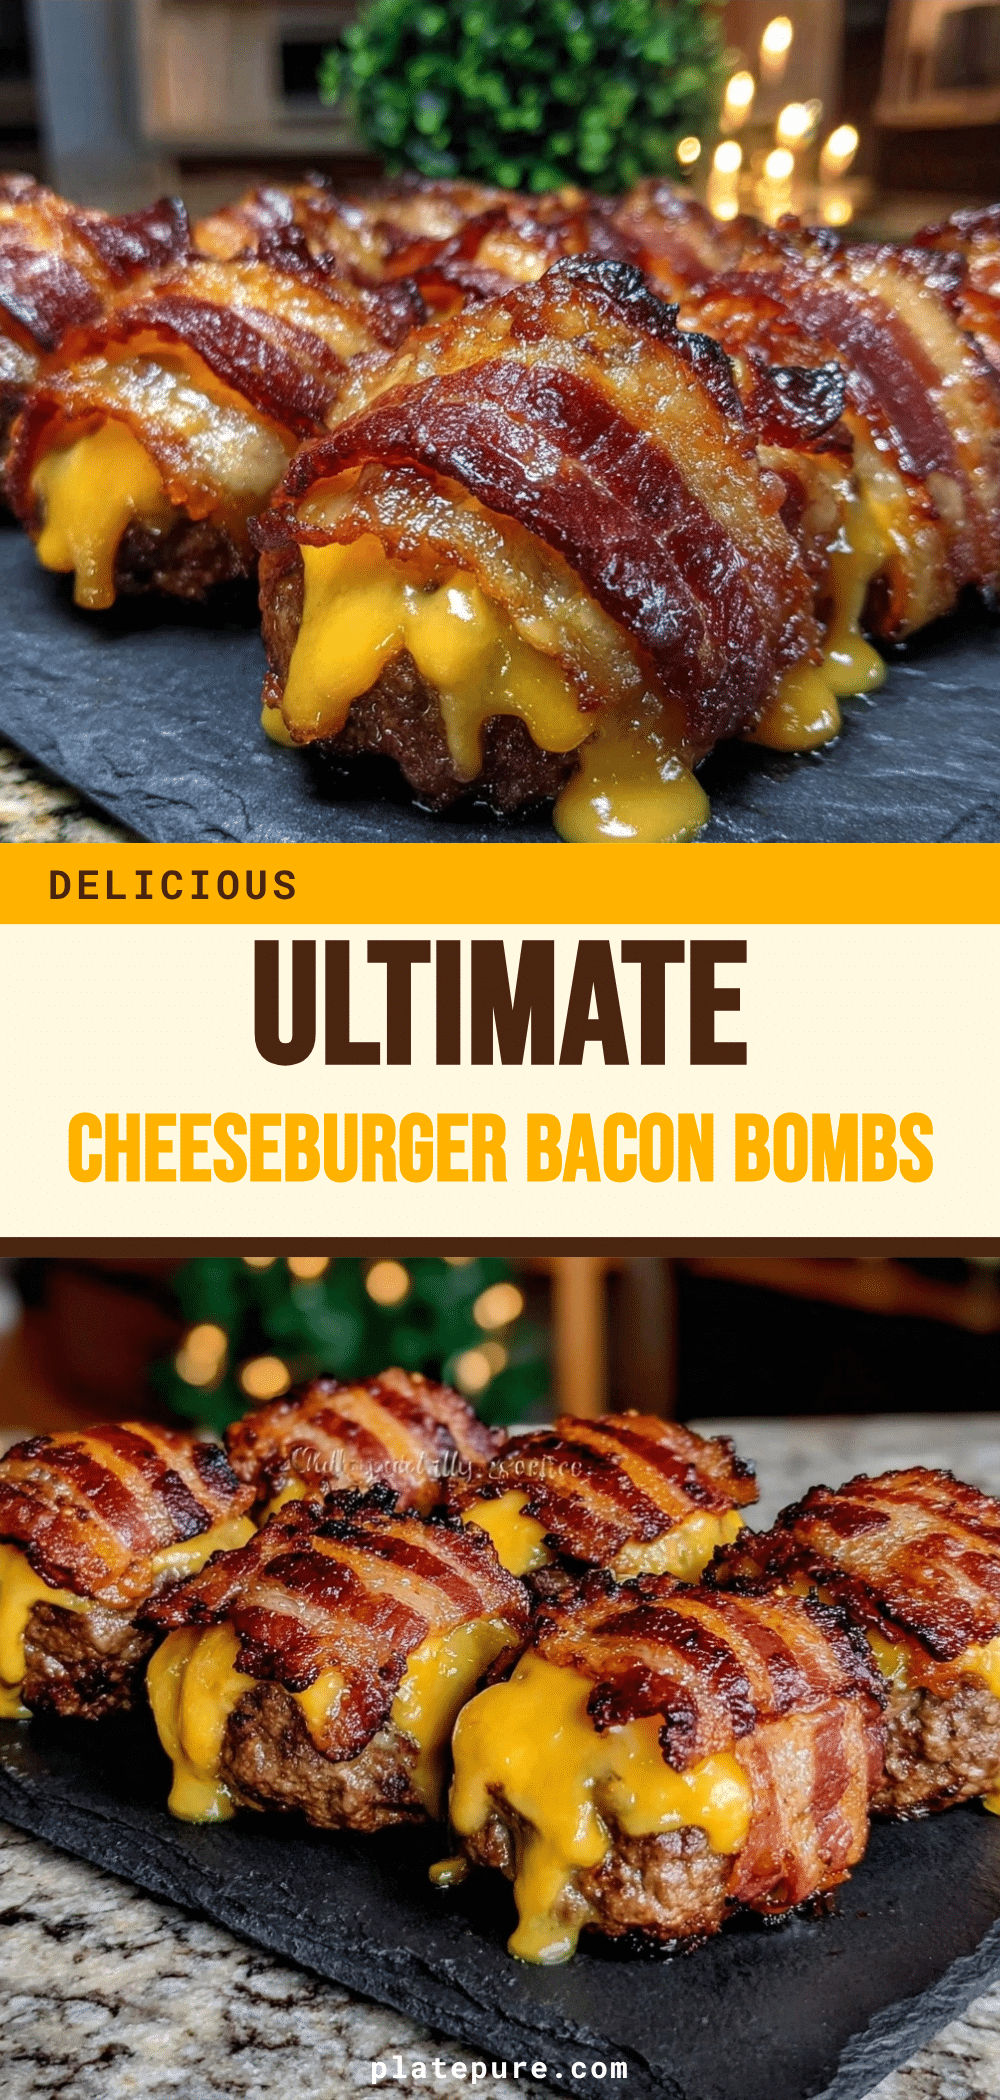
There is a specific kind of magic that happens when you combine the salty crunch of bacon with the gooey pull of melted cheese, all wrapped in a warm, doughy shell. Honestly, I didn’t invent Cheesy Bacon Cheeseburger Bombs. I just got tired of making the same old sliders for game day and decided to go big. Like, really big. These aren’t your average appetizers. They are handheld explosions of flavor that taste like the best burger you ever had, but way easier to eat while standing up.
I first made these during a chaotic Sunday afternoon when the house was full of kids and the fridge was half-empty. I had some leftover ground beef, a package of crescent rolls, and a handful of bacon strips that needed to be used up. I thought, “Why not wrap it all up?” The result was messy, delicious, and instantly popular. Now, I make them almost every weekend. It’s my go-to way to sneak some protein into a snack that feels like pure indulgence.
What makes Cheesy Bacon Cheeseburger Bombs so special is the contrast. You get that crisp exterior from the dough, the savory punch from the beef and bacon, and the creamy comfort of sharp cheddar. Plus, let’s face it, we all love a good squeeze of lemon or lime at the end to cut through the richness. It wakes up the flavors in a way that keeps you coming back for more. If you’re looking for a dish that brings people together, this is it. It’s bold, it’s fun, and it’s surprisingly simple to pull off.
Why You’ll Love This Recipe
After testing this recipe over a dozen times, I’ve found that the secret isn’t just in the ingredients—it’s in the technique. Most people rush the assembly, and that leads to leaking cheese or undercooked dough. I’ve learned how to seal them tight so every bite is perfect. This isn’t just another appetizer; it’s a tested, family-approved hit that works for everything from Super Bowl parties to quick weeknight dinners.
- Quick & Easy: These come together in under 30 minutes. You can have them in the oven while you’re still chopping veggies for dinner. It’s the perfect solution for when you need food fast but don’t want to compromise on taste.
- Simple Ingredients: You likely have most of this in your kitchen already. Ground beef, crescent dough, cheese, and bacon are staples. No fancy grocery trips or obscure spices needed.
- Perfect for Parties: Whether it’s a game day spread or a casual hangout, these are always a hit. They are easy to grab and eat without making a huge mess, which is key for social gatherings.
- Crowd-Pleaser: Kids love the cheesy pull, and adults appreciate the savory depth. It bridges the gap between a snack and a meal, making it versatile for any occasion.
- Unbelievably Delicious: The texture combo is next-level. Crispy dough, juicy beef, crispy bacon, and melted cheese create a symphony of flavors that feels like comfort food reimagined.
What sets this apart from other burger bites is the balance. I always add a little bit of tangy relish or a squeeze of citrus right before serving to cut the heaviness. It’s the kind of recipe that makes you close your eyes after the first bite. It’s soul-soothing but bright enough to keep your palate interested. Plus, it’s a great way to use up leftovers, which is always a win in my book.
What Ingredients You Will Need
This recipe relies on a few key components to build that signature burger flavor inside a bite-sized package. The goal is to balance the richness of the meat and cheese with the savory crunch of bacon and the lightness of the dough. Here is what you need to get started.
- Ground Beef (1 lb / 450g): Use 80/20 lean-to-fat ratio for the juiciest result. Leaner beef can make the filling dry. I prefer grass-fed if possible, but any quality ground beef works.
- Crescent Roll Dough (1 can / 8 oz): This is your wrapper. It’s flaky, buttery, and easy to work with. Keep it cold until you’re ready to use it so it bakes up properly.
- Cheddar Cheese (1 cup / 100g, shredded): Sharp cheddar melts best and has the strongest flavor. Avoid pre-shredded cheese if you can, as the anti-caking agents can prevent smooth melting. Grate it yourself for the best texture.
- Bacon (6-8 strips): Cooked until crisp and crumbled. This adds the essential smoky, salty crunch. I like to use thick-cut bacon for a more substantial bite.
- Yellow Mustard (1 tbsp): Adds that classic burger tang. It’s subtle but makes a big difference in the overall flavor profile.
- Relish or Pickled Onions (1 tbsp): I use sweet pickle relish for a traditional burger taste. If you prefer a sharper kick, try pickled red onions. This adds the necessary acidity to balance the fat.
- Garlic Powder (1/2 tsp): Enhances the beef flavor without adding moisture. It’s a pantry staple that boosts savory notes.
- Onion Powder (1/2 tsp): Complements the garlic and adds a layer of depth. It’s subtle but essential for that “burger” taste.
- Salt and Black Pepper (to taste): Season the beef well. Since the bacon and cheese are already salty, go easy on the salt until you’ve tasted a cooked piece.
- Egg Wash (1 egg + 1 tbsp water): Used to seal the edges of the dough and give the bombs a golden, glossy finish. It’s a small step that makes a big visual difference.
- Sesame Seeds (1 tbsp, optional): Sprinkle on top for that authentic burger bun look. It’s purely for aesthetics but adds a nice tiny crunch.
If you want to mix it up, you can swap the ground beef for ground turkey or a plant-based alternative, though the texture will vary. For a gluten-free option, use gluten-free crescent dough, but be careful as it can be more fragile to seal. I recommend buying high-quality bacon because cheap bacon often lacks that deep smoke flavor.
Equipment Needed
You don’t need much to make these, which is part of the appeal. A standard baking sheet lined with parchment paper is essential to prevent sticking and make cleanup a breeze. Parchment paper is my best friend in the kitchen; it saves so much scrubbing later.
A medium-sized skillet is needed to cook the ground beef and bacon. Cast iron is great for retaining heat and getting a good sear on the meat, but a non-stick skillet works perfectly fine too. If you don’t have a skillet, you can use a microwave to cook the bacon and beef, but the texture won’t be as good. The sear adds flavor that you can’t skip.
A small bowl for mixing the egg wash and another for combining the filling ingredients are necessary. You’ll also need a pastry brush or your fingers for applying the egg wash. Make sure your hands are clean when handling the dough, as warmth from your hands can make the crescent roll dough too sticky to work with. If it gets too warm, pop it in the fridge for ten minutes.
Budget-friendly tip: You don’t need fancy cookie cutters or specialized tools. A simple knife or pizza cutter works well for trimming excess dough. Keep your equipment simple and focused on function. The less stuff you have to wash, the more time you spend eating.
Preparation Method
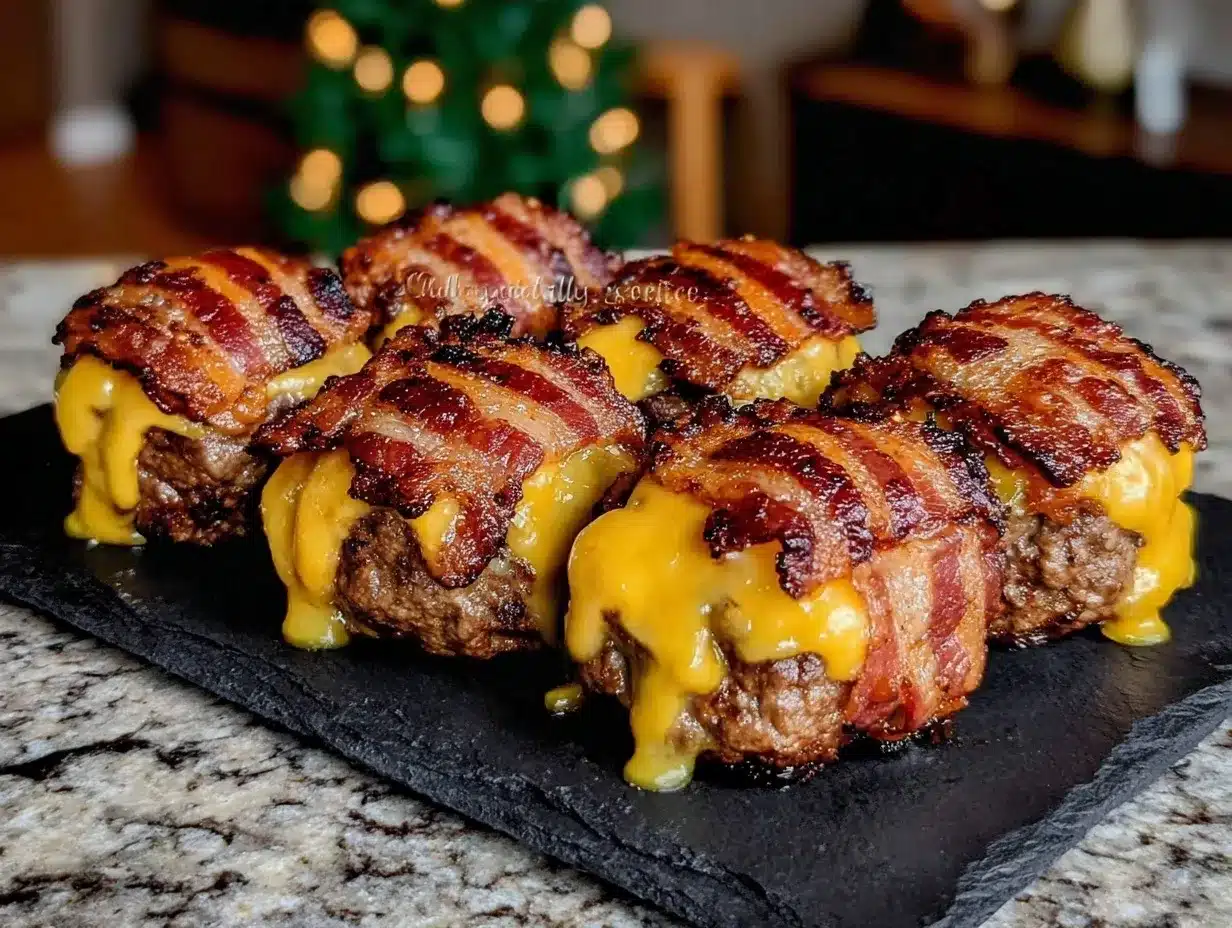
Getting the preparation right is the difference between a leaking mess and a perfect bite. Follow these steps carefully for the best results.
- Cook the Bacon and Beef (10 minutes): Start by cooking the bacon in a skillet over medium heat until crisp. Remove it and crumble it into small pieces. Set aside on a paper towel to drain excess grease. In the same skillet, add the ground beef. Cook it over medium-high heat, breaking it up with a spoon, until browned and no longer pink. Drain any excess liquid. This step is crucial because too much moisture will make the dough soggy.
- Mix the Filling (5 minutes): In a medium bowl, combine the cooked ground beef, crumbled bacon, shredded cheddar cheese, mustard, relish, garlic powder, onion powder, salt, and pepper. Mix gently until everything is evenly distributed. Taste a small piece (make sure it’s fully cooked) to adjust seasoning if needed. The mixture should be flavorful and moist but not wet.
- Prepare the Dough (5 minutes): Preheat your oven to 375°F (190°C). Line a baking sheet with parchment paper. Unroll the crescent dough and separate it into triangles according to the package instructions. If there are seams, press them together firmly. Work with one triangle at a time to keep the rest from drying out.
- Assemble the Bombs (10 minutes): Place about 1-2 tablespoons of the beef mixture in the center of each dough triangle. Sprinkle a little extra cheese on top of the meat for that gooey center. Fold the dough over the filling to create a half-moon shape. Press the edges firmly with your fingers to seal. You can also crimp the edges with a fork for a decorative touch. Repeat with all the dough triangles.
- Seal and Glaze (5 minutes): Place the assembled bombs seam-side down on the prepared baking sheet. Whisk the egg and water together in a small bowl. Brush the tops of each bomb generously with the egg wash. This will help them turn golden brown and keep the seal tight. Sprinkle with sesame seeds if using.
- Bake (12-15 minutes): Bake in the preheated oven for 12-15 minutes, or until the dough is puffed and golden brown. Keep an eye on them after 10 minutes to ensure they aren’t burning. The dough should be cooked through and the cheese inside should be fully melted.
- Cool and Serve (5 minutes): Remove from the oven and let them cool for 2-3 minutes on the baking sheet. This allows the cheese to set slightly so it doesn’t burn your mouth. Serve warm with your favorite dipping sauces.
If you notice the dough tearing while you’re assembling, it might be too warm. Just pop it in the fridge for a few minutes. Also, don’t overfill the bombs. Too much filling can cause them to burst open in the oven. A little goes a long way.
Cooking Tips & Techniques
There are a few tricks I’ve picked up along the way to make these bombs even better. First, never skip the step of draining the beef and bacon. Excess grease is the enemy of a flaky crust. If the filling is too wet, your bombs will be soggy. I usually pat the cooked meat with a paper towel to absorb any extra oil.
Another common mistake is sealing the dough too loosely. If you don’t press the edges firmly, the cheese will leak out. I recommend using your fingertips to pinch the edges together tightly. If you’re worried about leaks, you can add a tiny bit of flour to the edges to act as a glue. It’s a small detail that makes a big difference.
Timing is everything. If you bake them for too long, the dough will dry out. If you don’t bake them long enough, the dough will be raw. I usually check them at the 12-minute mark. They should be golden brown and puffed up. If they look pale, give them another 2-3 minutes.
For consistency, try to make all the bombs roughly the same size. This ensures they all cook evenly. If you have some huge bombs and some tiny ones, the tiny ones will burn while the big ones are still undercooked. Uniformity is key for a professional look.
Finally, don’t be afraid to experiment with the filling. I’ve tried adding jalapeños for a spicy kick, and it was a hit. You can also swap the cheddar for pepper jack for a spicier version. The base recipe is flexible, so feel free to make it your own.
Variations & Adaptations
While the classic version is my favorite, there are plenty of ways to twist this recipe. Here are a few ideas to keep things interesting.
- Spicy Jalapeño Bombs: Add diced jalapeños and pepper jack cheese to the filling. This adds a nice heat that pairs well with the cool ranch dipping sauce. It’s perfect for those who like a little fire in their snack.
- Veggie-Lover’s Version: Swap the ground beef for a plant-based crumble or sautéed mushrooms and spinach. You can still use the cheese and bacon bits (or bacon bits made from tempeh) for flavor. This is a great option for vegetarians who miss the burger taste.
- BBQ Bacon Bombs: Replace the mustard and relish with BBQ sauce and smoked gouda cheese. This gives the bombs a smoky, sweet flavor profile that is irresistible. It’s a bit heavier but incredibly satisfying.
- Breakfast Bombs: Use breakfast sausage instead of ground beef and add scrambled eggs to the filling. Top with cheddar cheese and bake until the dough is golden. These are perfect for a hearty morning snack.
I once tried making these with leftover rotisserie chicken, and it was surprisingly good. The chicken was mixed with ranch dressing and cheddar cheese. It was lighter than the beef version but still very flavorful. Don’t be afraid to use what you have on hand. The dough is forgiving, so most fillings will work.
Serving & Storage Suggestions
These bombs are best served warm, right out of the oven. The cheese is melty and the dough is crisp, creating the perfect texture. I like to serve them with a side of ranch dressing, ketchup, or a spicy mayo for dipping. A squeeze of fresh lemon juice over the top before serving adds a bright note that cuts through the richness. It’s the “squeeze that wakes it all up” moment.
If you have leftovers, store them in an airtight container in the refrigerator for up to 3 days. To reheat, place them in the oven at 350°F (175°C) for 5-7 minutes. This helps restore the crispiness of the dough. Avoid using the microwave, as it will make the dough chewy and soft. You want that crunch back.
You can also freeze the unbaked bombs. Place them on a baking sheet and freeze until solid, then transfer to a freezer bag. When you’re ready to eat, bake them directly from frozen, adding 2-3 minutes to the baking time. This is great for meal prep or having a quick snack ready to go.
For presentation, arrange the bombs on a platter with small bowls of dipping sauces in the center. Garnish with fresh parsley or chives for a pop of color. It makes the dish look more appealing and festive. These are perfect for potlucks, parties, or just a lazy night in.
Nutritional Information & Benefits
While Cheesy Bacon Cheeseburger Bombs are definitely an indulgent treat, they do provide some nutritional benefits. Ground beef is a good source of protein and iron, which are essential for energy and muscle health. Cheese adds calcium and more protein, supporting bone health. Bacon provides fat, which helps with satiety, meaning you’ll feel full longer.
Each bomb contains approximately 250-300 calories, depending on the size and exact ingredients used. The fat content is moderate, coming from the beef, bacon, and cheese. If you are watching your sodium intake, be mindful of the bacon and cheese, as they can be high in salt. Using low-sodium bacon and cheese can help reduce this.
For those following a low-carb diet, you can substitute the crescent dough with a low-carb alternative or use a cheese shell instead. This reduces the carbohydrate content significantly while keeping the flavor profile similar. It’s a way to enjoy the taste without the heavy dough.
Overall, these bombs are a fun, occasional treat rather than a daily staple. They are best enjoyed in moderation as part of a balanced diet. I like to think of them as a way to enjoy comfort food without feeling guilty, especially when paired with a side of veggies or a fresh salad.
Conclusion
Cheesy Bacon Cheeseburger Bombs are more than just an appetizer; they are a celebration of flavor. The combination of savory beef, crispy bacon, and gooey cheese wrapped in flaky dough is unbeatable. I love how easy they are to make and how much joy they bring to any gathering. Whether you’re hosting a party or just craving a tasty snack, these bombs are the answer.
I encourage you to try this recipe and make it your own. Add your favorite spices, swap in different cheeses, or experiment with new fillings. The possibilities are endless. I’d love to hear how you customize them. Share your variations in the comments below or tag me in your photos. It’s always inspiring to see how others put their own spin on a classic.
So, grab your ingredients and get cooking. Your taste buds will thank you. And don’t forget that final squeeze of citrus—it’s the secret to making these bombs truly shine. Happy eating!
Frequently Asked Questions
Can I make these ahead of time?
Yes, you can assemble the bombs and store them in the refrigerator for up to 24 hours before baking. Just cover them tightly with plastic wrap. You can also freeze the unbaked bombs for later use. This is great for meal prep.
What dipping sauces go best with these?
Classic options include ranch dressing, ketchup, and spicy mayo. You can also try a garlic aioli or a BBQ sauce for a different flavor profile. The choice depends on your personal preference, but ranch is a crowd favorite.
Can I use ground turkey instead of beef?
Absolutely. Ground turkey is a leaner option that works well in this recipe. Just be sure to season it well, as turkey can be milder in flavor than beef. You might want to add a bit more garlic powder or onion powder for extra taste.
How do I prevent the cheese from leaking?
The key is to seal the edges tightly. Press the dough firmly around the filling and crimp with a fork if needed. Also, avoid overfilling the bombs. A smaller amount of filling is easier to seal and less likely to burst open.
Are these gluten-free?
The standard recipe uses crescent roll dough, which contains gluten. However, you can find gluten-free crescent dough in most grocery stores. Just be careful when sealing, as gluten-free dough can be more fragile. Alternatively, you can use a cheese shell or almond flour dough for a completely gluten-free version.
Pin This Recipe!
Cheesy Bacon Cheeseburger Bombs: 5 Easy Squeeze
- Total Time: 45 minutes
- Yield: 12 servings 1x
Description
Handheld, baked dough pockets filled with seasoned ground beef, crispy bacon, sharp cheddar cheese, and burger condiments. These savory bombs are a quick, crowd-pleasing appetizer or snack that combines the flavors of a classic cheeseburger in a flaky, golden shell.
Ingredients
- 1 lb (450g) ground beef (80/20 lean-to-fat ratio)
- 1 can (8 oz) crescent roll dough
- 1 cup (100g) sharp cheddar cheese, shredded
- 6–8 strips bacon, cooked crisp and crumbled
- 1 tbsp yellow mustard
- 1 tbsp sweet pickle relish or pickled onions
- 1/2 tsp garlic powder
- 1/2 tsp onion powder
- Salt and black pepper to taste
- 1 egg + 1 tbsp water (for egg wash)
- 1 tbsp sesame seeds (optional)
Instructions
- Preheat oven to 375°F (190°C) and line a baking sheet with parchment paper.
- Cook bacon in a skillet over medium heat until crisp. Remove and crumble, setting aside on paper towels to drain.
- In the same skillet, cook ground beef over medium-high heat until browned. Drain excess liquid and grease thoroughly.
- In a medium bowl, combine the cooked beef, crumbled bacon, shredded cheddar, mustard, relish, garlic powder, onion powder, salt, and pepper. Mix gently.
- Unroll crescent dough and separate into triangles. Press seams together firmly.
- Place 1-2 tablespoons of the beef mixture in the center of each dough triangle. Sprinkle with a little extra cheese.
- Fold dough over filling to create a half-moon shape. Press edges firmly to seal, optionally crimping with a fork.
- Place bombs seam-side down on the prepared baking sheet.
- Whisk egg and water together. Brush tops generously with egg wash and sprinkle with sesame seeds if using.
- Bake for 12-15 minutes until dough is puffed and golden brown.
- Cool for 2-3 minutes before serving warm with dipping sauces.
Notes
Ensure the beef and bacon are well-drained to prevent soggy dough. Keep the dough cold until baking to ensure flakiness. Do not overfill the bombs to prevent bursting. For a gluten-free option, use gluten-free crescent dough. Serve with ranch, ketchup, or spicy mayo.
- Prep Time: 30 minutes
- Cook Time: 15 minutes
- Category: Appetizer
- Cuisine: American
Nutrition
- Serving Size: 1 bomb
- Calories: 275
- Sugar: 2
- Sodium: 450
- Fat: 18
- Saturated Fat: 8
- Carbohydrates: 15
- Fiber: 1
- Protein: 12
Keywords: cheesy bacon cheeseburger bombs, game day snacks, crescent roll recipes, easy appetizers, burger bites, party food, handheld meals