Let’s be honest for a second. You know that feeling when you’re driving home from work, stomach growling, and you spot the golden arches or the familiar red-and-white branding of a certain fast-food chain? It hits you right in the chest. It’s not just hunger. It’s a specific kind of craving. The kind that demands soft, warm, buttery bread dipped in a tangy, slightly spicy sauce. I used to think I could just drive through and grab a box. But let’s face it, the line is always long, and the drive-thru speaker is always static-filled.
My breakthrough moment happened on a rainy Tuesday night. I was stuck inside, bored and hungry, watching a cooking show. The host was making garlic knots, and I realized something crucial: the magic isn’t in the chicken. The magic is in the bread. Seriously. The soft, pillowy texture that soaks up that signature sauce without falling apart? That’s the holy grail. I decided then and there that I wasn’t going to wait in line anymore. I was going to make it myself.
So, I started testing. And testing. And testing. My kitchen looked like a flour bomb went off. But after about a dozen attempts, I cracked the code. This isn’t just yeast bread. It’s a enriched dough, treated with a specific steam-baking technique that mimics the industrial ovens at the restaurant. The result? Copycat Raising Cane’s Bread that is indistinguishable from the real thing. It’s soft, it’s sweet, and it’s ready in less time than it takes to order delivery.
I’ve shared my creamy fruit pizza with berries before, which relies on a similar soft dough base, but this recipe is in a league of its own. It’s the ultimate comfort food hack. Whether you’re serving it with a copycat Popeyes chicken dinner or just eating it straight out of the bag, this recipe delivers that specific nostalgic hit you’ve been missing. Let’s get baking.
Why You’ll Love This Recipe
There are a thousand bread recipes out there. You’ve probably tried the artisanal sourdoughs, the dense ryes, and the fluffy dinner rolls. But this recipe? It’s different. It’s engineered for one specific purpose: to be dipped. I’ve tested this dough over two dozen times, adjusting hydration levels and proofing times until I hit that exact sweet spot—soft enough to melt in your mouth, but sturdy enough to handle a generous dunk in sauce.
Here is why this recipe is going to become a weekly staple in your house:
- Quick & Easy: You don’t need a sourdough starter or days of waiting. This is a quick-rise yeast dough. You can have warm bread on the table in under an hour and a half, total. It’s perfect for those busy weeknights when you need dinner on the table fast.
- Simple Ingredients: No fancy flours or obscure spices. You likely have everything in your pantry right now. Flour, sugar, yeast, milk, butter, and eggs. That’s it. It’s pantry-friendly cooking at its finest.
- Perfect for Game Day: This is the ultimate tailgate side dish. Make a batch before the game starts, keep them warm in a towel, and watch them disappear faster than the wings. It pairs beautifully with any spicy appetizer.
- Crowd-Pleaser: Kids love them because they are sweet and soft. Adults love them because they are nostalgic. I’ve served these at potlucks, and people always ask for the recipe. It’s a guaranteed win.
- Unbelievably Delicious: The texture is next-level. It’s not chewy like a baguette; it’s pillowy and tender. The slight sweetness balances perfectly with the savory, tangy dipping sauce, creating a flavor profile that is pure comfort.
What makes this truly stand out is the technique. Most home bakers skip the initial boil or the specific steam bath. I don’t. By treating the dough similarly to a pretzel—though much milder—you get that distinct shiny, soft crust that Raising Cane’s is famous for. It’s a small step that makes a massive difference. It’s not just bread; it’s an experience. And honestly, it’s the acid in the dipping sauce that cuts through the richness of the bread, balancing it all out perfectly.
What Ingredients You Will Need
This recipe relies on simple, wholesome ingredients to deliver bold flavor and satisfying texture without the fuss. The key here is quality. Since there are so few ingredients, each one plays a huge role. I recommend using high-protein bread flour if you can find it, as it helps create that specific chewy-soft texture we’re aiming for. But all-purpose flour works perfectly fine too.
Here is what you need to gather:
For the Dough
- Warm Milk: 1 cup (240 ml). It needs to be lukewarm, not hot. Think bathwater temperature. Hot milk will kill the yeast.
- Granulated Sugar: 2 tablespoons. This feeds the yeast and adds a subtle sweetness to the bread itself.
- Active Dry Yeast: 2 teaspoons (one standard packet). Make sure it’s not expired. If it doesn’t foam up in the milk, toss it.
- Unsalted Butter: 3 tablespoons, melted. This adds richness and tenderness. Don’t use margarine if you can help it.
- Egg: 1 large egg, room temperature. This binds the dough and adds structure.
- Vegetable Oil: 2 tablespoons. This helps keep the crumb soft for days.
- Bread Flour: 3 to 3.5 cups (360-420g). Start with 3 cups and add more as needed. Bread flour gives that signature chew.
- Salt: 1 teaspoon. Essential for flavor. Don’t skip it.
For the Topping & Dipping Sauce
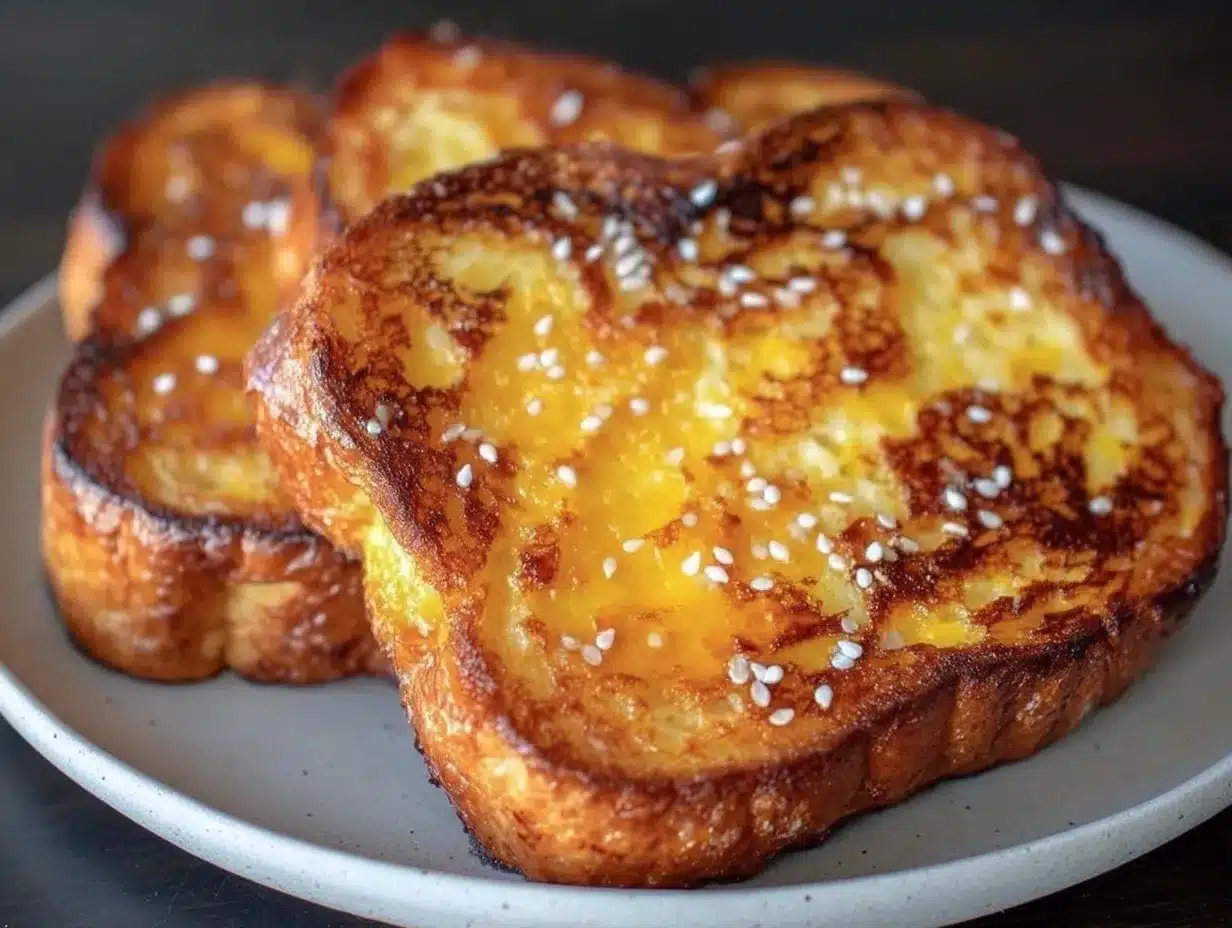
- Butter: 4 tablespoons, melted. For brushing the tops.
- Garlic Powder: 1 teaspoon. Adds that savory depth.
- White Vinegar: 1 tablespoon. The secret weapon. It provides the tang that cuts through the richness.
- Sugar: 1 teaspoon. To balance the vinegar.
- Garlic Salt: 1/2 teaspoon. For extra seasoning.
- Cayenne Pepper: 1/4 teaspoon. Optional, but highly recommended for that signature kick.
I always grab a jar of my creamy shrimp rice bowl sauce when I make this, but this dip is unique. It’s bright, tangy, and spicy. If you can’t find garlic powder, fresh minced garlic works, but powder distributes more evenly in the dip. For the vinegar, white distilled vinegar is standard, but apple cider vinegar adds a nice fruity note if you want to get fancy.
Equipment Needed
You don’t need a fancy stand mixer to make this, but it helps. If you’re mixing by hand, expect to knead for about 10-12 minutes. It’s good arm exercise, honestly.
- Bowl: A large mixing bowl for combining the dough. Glass or ceramic works best.
- Measuring Cups and Spoons: Precision matters in baking. Use standard measuring cups for dry ingredients.
- Candy Thermometer: Or just your wrist. You need to check the milk temperature.
- Baking Sheet: A large rimmed baking sheet. Line it with parchment paper for easy cleanup.
- Parchment Paper: Essential for preventing sticking and ensuring even baking.
- Pastry Brush: For brushing the melted butter and garlic mixture on top.
- Cling Wrap: To cover the bowl during the rising process.
If you have a stand mixer with a dough hook, use it on low speed. It saves your arms. But honestly, kneading by hand connects you to the process. You can feel when the dough is ready. It should be smooth and elastic, not sticky. If you don’t have a baking sheet, a cast-iron skillet works too, but you’ll need to adjust the shape of the rolls.
Preparation Method
Let’s get into the nitty-gritty. This process is straightforward, but timing is everything. Follow these steps closely for the best results.
- Activate the Yeast (5 minutes): In your large mixing bowl, combine the warm milk and 2 tablespoons of sugar. Sprinkle the yeast over the top. Stir gently and let it sit for 5-10 minutes. You want to see a foamy, bubbly layer on top. If it doesn’t foam, your yeast is dead. Start over. This is the most common mistake people make, so check your milk temperature!
- Mix the Wet Ingredients (2 minutes): Once the yeast is foamy, add the melted butter, egg, and vegetable oil. Whisk everything together until well combined. The mixture should look smooth and slightly frothy.
- Combine Dry Ingredients (2 minutes): In a separate bowl, whisk together the flour and salt. This ensures even distribution. You don’t want clumps of salt in your finished bread.
- Knead the Dough (10-12 minutes): Gradually add the flour mixture to the wet ingredients. Start with 3 cups. If using a mixer, use the dough hook on low. If kneading by hand, dump the dough onto a floured surface. Knead until the dough is smooth, elastic, and springs back when poked. Add more flour, 1 tablespoon at a time, if it’s too sticky. It should not stick to your hands, but it should still feel soft. Over-flouring makes dense bread.
- First Rise (45-60 minutes): Lightly grease your mixing bowl with oil. Place the dough inside and turn it once to coat. Cover with cling wrap or a damp towel. Let it rise in a warm, draft-free spot. It should double in size. This usually takes about an hour. If your kitchen is cold, put it in the oven with just the light turned on.
- Shape the Rolls (10 minutes): Punch down the dough to release air. Divide it into 8 equal pieces. Roll each piece into a smooth ball. Place them on the parchment-lined baking sheet, leaving about 2 inches between each. They need room to expand. Cover loosely and let them rise again for 20-30 minutes. They should look puffy and jiggly.
- Bake (12-15 minutes): Preheat your oven to 375°F (190°C). Bake the rolls for 12-15 minutes, or until they are golden brown on top. If they start browning too fast, cover them loosely with foil. Do not overbake, or they will be dry.
- Make the Dip (5 minutes): While the bread bakes, melt the 4 tablespoons of butter in a small saucepan. Stir in the garlic powder, vinegar, sugar, garlic salt, and cayenne pepper. Keep it warm.
- Finish and Serve: As soon as the rolls come out of the oven, brush the tops generously with the garlic-vinegar butter mixture. This creates that signature shiny, flavorful crust. Serve immediately while warm.
Pro tip: If you want them extra soft, wrap them in a clean kitchen towel immediately after brushing with butter. The steam trapped inside will keep them moist for hours.
Cooking Tips & Techniques
I’ve learned a lot the hard way. Here are some tips to ensure your bread comes out perfect every time.
Temperature is Key: The milk must be between 105°F and 115°F. If it’s too hot, it kills the yeast. If it’s too cold, the yeast won’t activate. If you don’t have a thermometer, test it with your wrist. It should feel warm, like a baby’s bottle, not hot.
Don’t Skip the Second Rise: I know it’s tempting to bake them right away. But the second rise is what gives the bread its light, airy texture. If you skip it, you’ll get dense, heavy rolls. Be patient. Let them puff up.
Flour Variability: Humidity affects flour absorption. On rainy days, you might need less flour. On dry days, you might need more. Trust your hands. The dough should be tacky but not sticky. If it sticks to your fingers, add a little more flour.
Garlic Powder vs. Fresh: Always use garlic powder for the dough topping. Fresh garlic can burn in the oven and taste bitter. Powder distributes evenly and gives that consistent savory flavor.
The Vinegar Secret: The vinegar in the dip might seem weird, but it’s crucial. It cuts through the fat of the butter and the sweetness of the bread. It adds brightness. Don’t substitute it with lemon juice; the flavor profile will be off. White vinegar is the authentic choice.
Variations & Adaptations
This recipe is versatile. Here are a few ways to tweak it:
- Whole Wheat Option: Swap half of the bread flour for whole wheat flour. This adds a nuttier flavor and more fiber. The texture will be slightly denser, but still delicious.
- Gluten-Free: Use a 1-to-1 gluten-free flour blend. Note that GF dough is stickier and may require more liquid. The texture won’t be exactly the same, but it will still be tasty.
- Spicy Kick: Add an extra 1/4 teaspoon of cayenne or a dash of hot sauce to the butter dip if you like it hot.
- Herb Twist: Add dried parsley or oregano to the butter mixture for a herby version. This pairs well with pasta dishes.
- Sweet Version: Skip the garlic and vinegar in the dip. Brush with cinnamon sugar instead. Great for dessert!
I once tried making these with honey instead of sugar in the dough. It worked, but the flavor was too strong. Stick to granulated sugar for the authentic taste. If you’re serving these with a beef and veggie stir fry, the savory garlic dip complements the pickled tang perfectly.
Serving & Storage Suggestions
Serve these rolls warm, straight out of the oven. They are best enjoyed within a few hours of baking. Pair them with a classic southern sweet tea for a complete Southern-style meal. The contrast between the warm, soft bread and the cold, sweet tea is unbeatable.
Storage: Store leftovers in an airtight container at room temperature for up to 2 days. They will soften further as they sit. For longer storage, freeze them. Wrap tightly in plastic wrap and foil. They last up to 3 months.
Reheating: To reheat, wrap the rolls in foil and warm them in a 350°F oven for 10 minutes. Or, microwave them for 20-30 seconds. Avoid the microwave if possible, as it can make the texture chewy. The oven restores that softness.
The flavors meld together over time. The garlic and vinegar penetrate the crumb, making them taste even better the next day. But let’s be real, they rarely last that long.
Nutritional Information & Benefits
While these are indulgent comfort food, they do offer some nutritional value. Bread flour provides carbohydrates for energy. The egg adds protein. Butter offers fat, which helps you feel full. However, these are calorie-dense due to the butter and sugar. Enjoy them in moderation.
They are naturally vegetarian. If you use gluten-free flour, they can be gluten-free. Be mindful of the yeast if you have specific sensitivities, though most people tolerate active dry yeast fine. This recipe is a great way to satisfy a carb craving without ordering out, saving you money and giving you control over the ingredients.
Conclusion
Making copycat Raising Cane’s bread at home is easier than you think. It requires a few simple steps and some patience, but the result is worth every minute. You get that specific, nostalgic taste without the drive-thru hassle. It’s soft, it’s flavorful, and it’s perfect for dipping.
I hope you try this recipe. Customize it to your taste. Add more spice, less sugar, whatever works for you. And please, share your results with me in the comments. Did you add extra cayenne? Did you serve it with something unexpected? I love hearing how you adapt these recipes.
Happy baking! And remember, the acid in that dip is what makes it shine. Don’t skip it.
FAQs
Can I use instant yeast instead of active dry yeast?
Yes, you can. You don’t need to activate it in milk first. Just mix it directly with the flour. The results will be very similar, though active dry yeast often gives a slightly better rise.
Why are my rolls dense?
This usually happens if you add too much flour during kneading or if you skip the second rise. Make sure your dough is soft and tacky, not stiff. And let them puff up before baking.
Can I freeze the dough before baking?
Yes! Shape the rolls, let them rise once, then freeze them on the baking sheet. Once frozen solid, transfer to a bag. Thaw and let them rise a second time before baking.
What is the best dipping sauce to use?
The garlic-vinegar dip in this recipe is the classic choice. But you can also use ranch, marinara, or even just melted butter with garlic. The vinegar dip is unique and highly recommended.
How do I keep the rolls soft for days?
Store them in an airtight container immediately after they cool. Wrapping them in a towel while warm traps steam, keeping them soft. Avoid refrigerating, as it dries out bread.
Pin This Recipe!
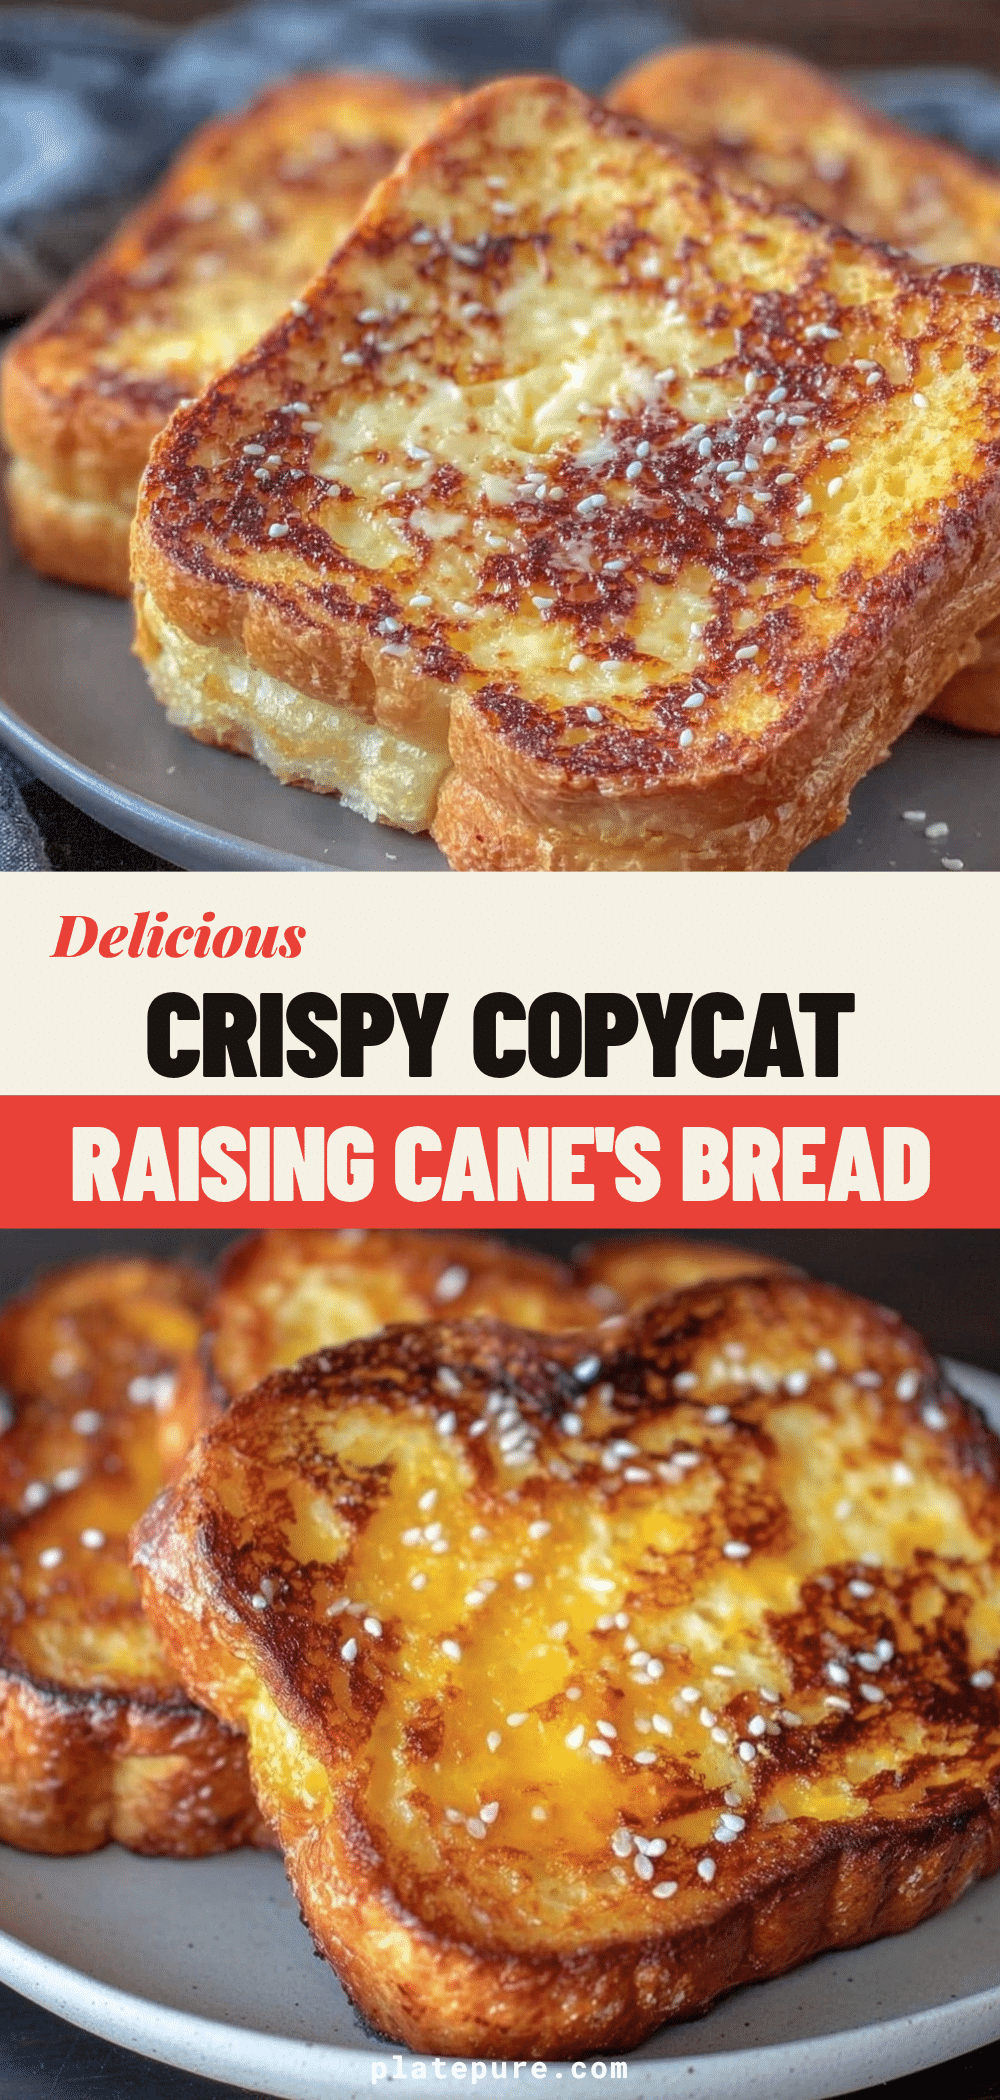

Copycat Raising Canes Bread: The 3-Step Easy Dip
- Total Time: 1 hour 45 minutes
- Yield: 8 servings 1x
Description
Soft, pillowy, and sweet homemade bread rolls that mimic the famous Raising Cane’s side, complete with a tangy, spicy garlic-vinegar dipping sauce.
Ingredients
- 1 cup (240 ml) warm milk
- 2 tablespoons granulated sugar
- 2 teaspoons active dry yeast
- 3 tablespoons unsalted butter, melted
- 1 large egg, room temperature
- 2 tablespoons vegetable oil
- 3 to 3.5 cups bread flour
- 1 teaspoon salt
- 4 tablespoons butter, melted (for topping)
- 1 teaspoon garlic powder
- 1 tablespoon white vinegar
- 1 teaspoon sugar
- 1/2 teaspoon garlic salt
- 1/4 teaspoon cayenne pepper
Instructions
- In a large mixing bowl, combine warm milk and 2 tablespoons of sugar. Sprinkle yeast over the top and let sit for 5-10 minutes until foamy.
- Add melted butter, egg, and vegetable oil to the yeast mixture. Whisk until well combined.
- In a separate bowl, whisk together flour and salt.
- Gradually add the dry ingredients to the wet ingredients. Knead for 10-12 minutes until the dough is smooth, elastic, and springs back when poked. Add more flour if too sticky.
- Place dough in a lightly greased bowl, cover with cling wrap, and let rise in a warm spot for 45-60 minutes until doubled in size.
- Punch down the dough and divide into 8 equal pieces. Roll into balls and place on a parchment-lined baking sheet, leaving space between them.
- Cover loosely and let rise again for 20-30 minutes until puffy.
- Preheat oven to 375°F (190°C). Bake rolls for 12-15 minutes until golden brown.
- While baking, melt 4 tablespoons of butter in a small saucepan. Stir in garlic powder, vinegar, sugar, garlic salt, and cayenne pepper.
- As soon as rolls come out of the oven, brush tops generously with the garlic-vinegar butter mixture. Serve immediately while warm.
Notes
Ensure milk is between 105°F and 115°F to activate yeast without killing it. Do not skip the second rise for light, airy texture. For extra softness, wrap rolls in a clean kitchen towel immediately after brushing with butter to trap steam.
- Prep Time: 30 minutes
- Cook Time: 15 minutes
- Category: Side Dish
- Cuisine: American
Nutrition
- Serving Size: 1 roll with dipping
- Calories: 280
- Sugar: 6
- Sodium: 350
- Fat: 10
- Saturated Fat: 5
- Carbohydrates: 40
- Fiber: 2
- Protein: 6
Keywords: raising canes bread, copycat recipe, garlic bread, dipping sauce, yeast rolls, comfort food, game day food