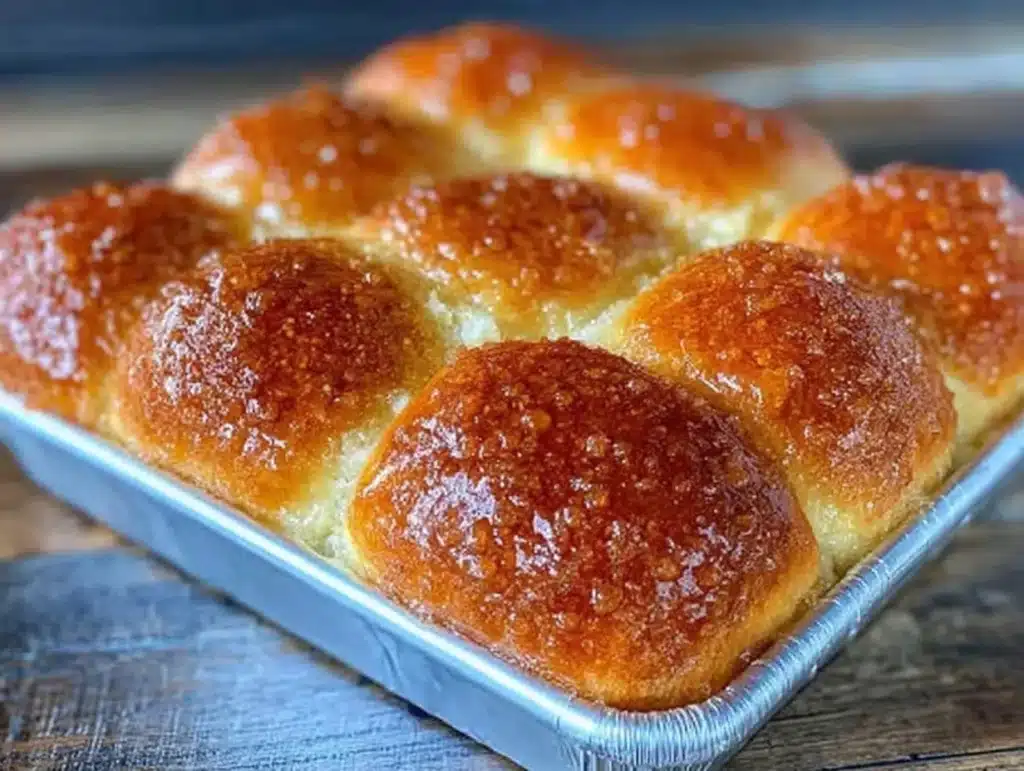
There is a specific kind of magic that happens when you pull a tray of homemade honey butter rolls out of the oven. The smell hits you first, of course. It’s sweet, buttery, and just a little bit savory. But honestly, the real magic is in the texture. You know that feeling when you tear into something warm and fluffy? That’s what we are chasing here.
I first started making these make-ahead honey butter rolls during a particularly chaotic holiday season. I was stressed, short on time, and needed a side dish that looked impressive but didn’t require me to stand over a stove for hours. I experimented with doughs that could be prepped the night before. The result was pure comfort. These rolls became my secret weapon for stress-free hosting.
Let’s face it, store-bought rolls are fine for emergencies. But they lack soul. They lack that bright, zesty kick that makes you want seconds. I’ve tested this homemade honey butter rolls recipe over a dozen times. I’ve tweaked the hydration, the rise times, and the glaze ratios. This version is the winner. It’s reliable, fluffy, and deeply flavorful.
Why make these? Because they are worth the effort. They are perfect for busy families who want a homemade taste without the morning rush. They are great for meal prep, too. You can make the dough on Sunday and bake on Wednesday. Plus, the honey butter glaze adds a brightness that cuts through the richness. It’s not just bread; it’s an experience. If you love bright flavors, you’ll appreciate how the honey balances the salt.
I’ve always believed that bread should be a joy, not a chore. These rolls are proof of that. They are soft, pillowy, and coated in a sticky-sweet glaze. Whether you serve them with a creamy strawberry protein ice cream for dessert or alongside a main course, they bring a warmth to the table. Let’s get baking.
Why You’ll Love This Recipe
There are a lot of bread recipes out there. Some are complicated. Some require fancy equipment you don’t have. This homemade honey butter rolls recipe is different. It’s built for real life. It’s designed for people who want great taste without the headache. I’ve refined this method through trial and error, and it’s foolproof if you follow the steps.
- Make-Ahead Friendly: This is the big one. You can mix and knead the dough the night before. Let it do its thing in the fridge. Then, shape and bake in the morning. It saves so much time.
- Simple Ingredients: You don’t need weird flours or expensive additives. Just flour, yeast, sugar, salt, milk, butter, and honey. Things you likely have right now.
- Brightness Stacked Up: Most sweet rolls are cloying. They’re just sugar and fat. Not this one. The honey butter glaze has a hint of citrus zest in my version. It adds a punch of brightness that keeps every bite interesting.
- Crowd-Pleaser: Kids love the sweetness. Adults love the texture. It’s a win-win. I’ve served these at potlucks and brunches. They always disappear first.
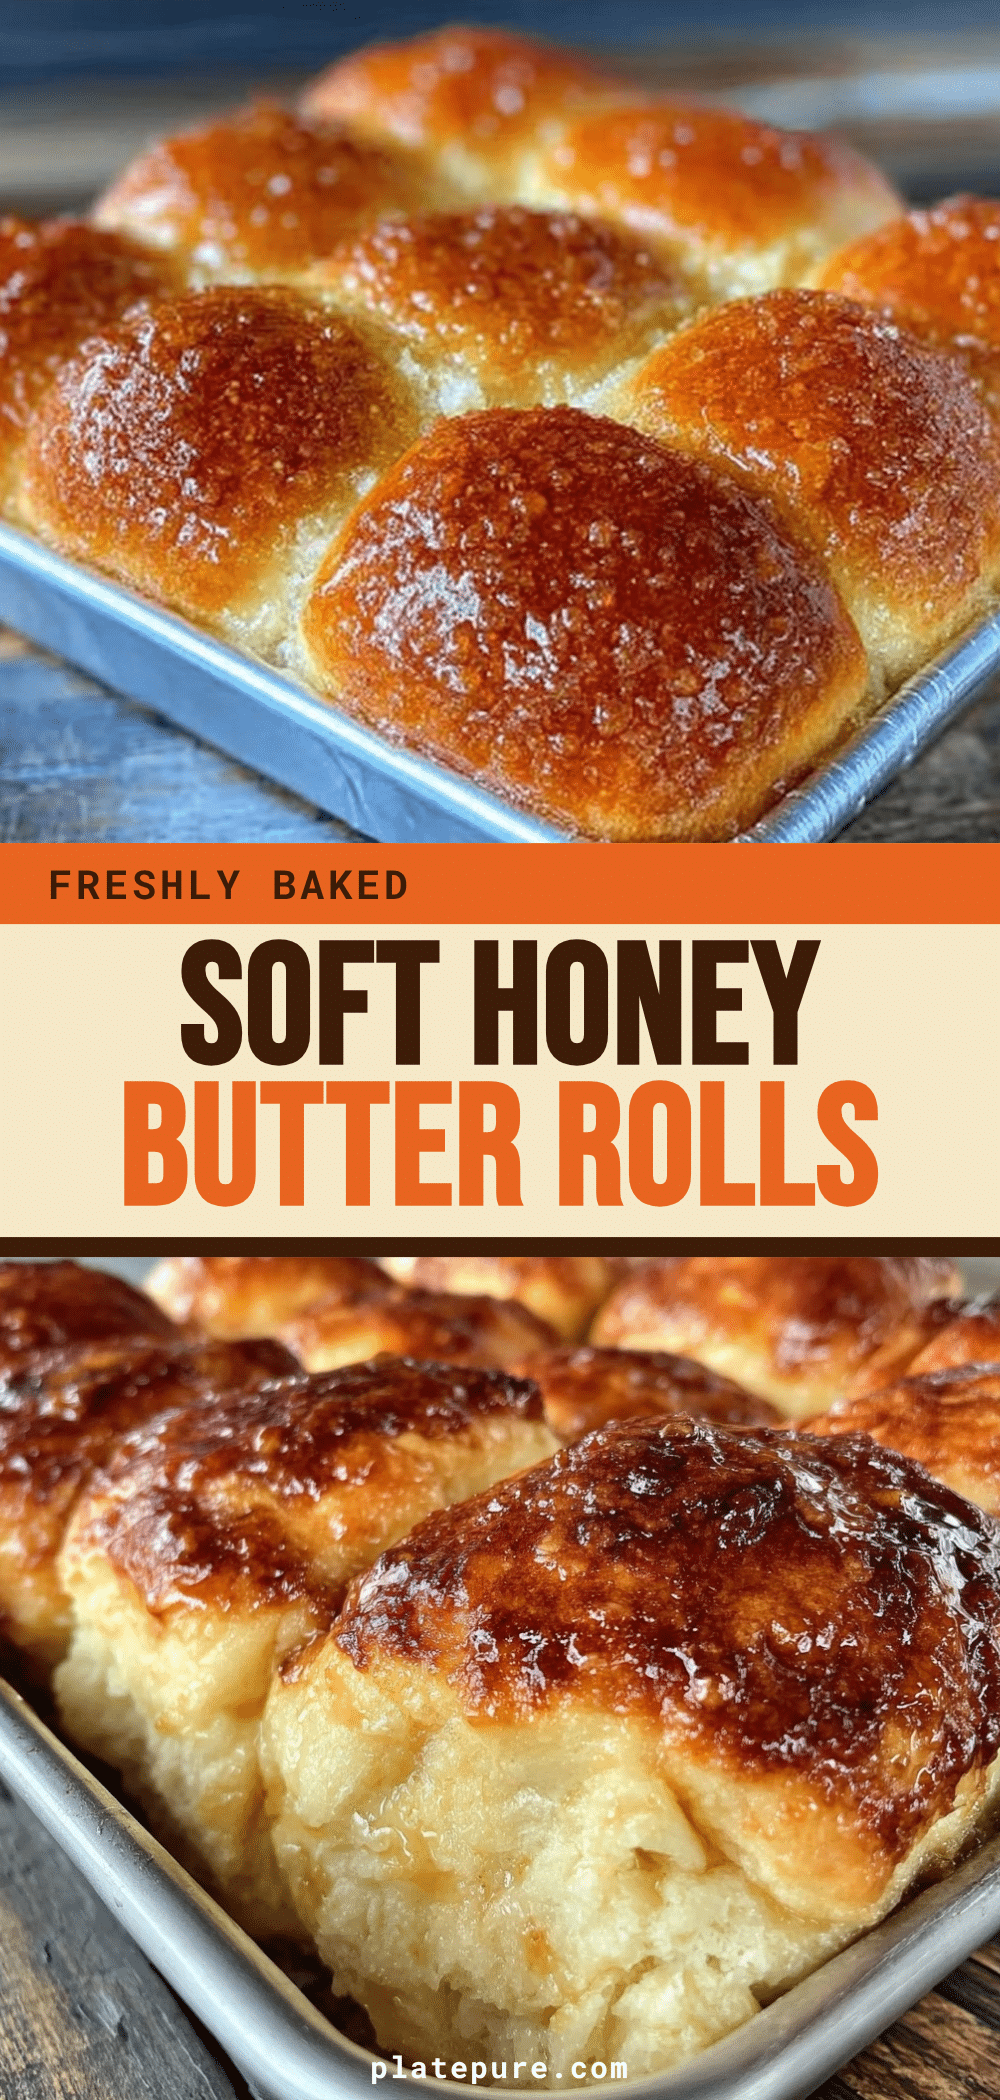
- Unbelievably Delicious: The interior is soft and airy. The exterior is slightly crisp from the glaze. The flavor is rich but balanced. It’s comfort food reimagined.
What makes this recipe stand out is the make-ahead aspect combined with the flavor profile. Many make-ahead breads turn out dense or dry. This one stays moist. The cold fermentation in the fridge actually improves the flavor. It develops a slight tang that pairs beautifully with the sweet honey butter. It’s not just another roll recipe. It’s your best version of a dinner roll.
Connect with the why. This isn’t just about feeding people. It’s about creating a moment. Imagine waking up to the smell of fresh bread. Or pulling a tray into a dinner party and seeing the looks on your guests’ faces. It’s those small moments of joy that make cooking worthwhile. This recipe delivers that joy consistently.
What Ingredients You Will Need
Building the perfect homemade honey butter rolls starts with understanding what each ingredient does. We aren’t just throwing things in a bowl. We are creating a structure. The flour provides the骨架 (skeleton). The yeast provides the lift. The liquid hydrates the flour. And the fats provide the tenderness. Here is what you need to get that bright, fluffy result.
For the Dough
- Strong Bread Flour: 500g (about 4 cups). I recommend King Arthur Bread Flour. It has a higher protein content, which helps the rolls rise tall and stay chewy. All-purpose flour works, but the texture will be softer, less structured.
- Instant Yeast: 7g (one packet). Instant yeast doesn’t need to be activated in water. It mixes right in. It’s faster and more reliable for make-ahead doughs. If you use active dry yeast, you’ll need to bloom it first.
- Granulated Sugar: 60g (about 1/3 cup). This feeds the yeast and adds sweetness. Don’t skip it. Sugar also helps with browning.
- Salt: 10g (about 1.5 teaspoons). Salt controls the yeast and enhances flavor. Without it, the rolls will taste flat. Use fine sea salt for even distribution.
- Whole Milk: 240ml (1 cup), warmed to about 110°F (43°C). Warm milk helps activate the yeast if you are using active dry, and it adds richness. You can use skim milk, but whole milk makes a softer crumb.
- Large Egg: One large egg, room temperature. The egg adds structure and richness. It helps the dough hold its shape during the rise.
- Unsalted Butter: 57g (4 tablespoons), melted and cooled slightly. This is crucial for the “butter” in honey butter rolls. It adds flavor and tenderness. Don’t use margarine.
- Vanilla Extract: 1 teaspoon. Adds a subtle background note that complements the honey later.
For the Honey Butter Glaze
- Unsalted Butter: 113g (1/2 cup), softened. This forms the base of the glaze. Softened butter mixes easier with the honey.
- Honey: 120ml (1/2 cup). Use a good quality honey. Clover or wildflower honey adds a nice floral note. The honey provides the signature sweetness and shine.
- Powdered Sugar: 120g (1 cup). This thickens the glaze and adds sweetness. Sift it to avoid lumps.
- Milk: 1-2 tablespoons. Adjust for consistency. You want a glaze that is thick enough to coat the rolls but thin enough to drizzle.
- Lemon Zest: One medium lemon. This is the secret weapon. The zest adds that bright, acidic punch that cuts the richness. It’s zest on zest, brightness stacked up.
I personally prefer using a digital scale for measuring flour. It’s so much more accurate than cups. If you use cups, fluff the flour first, then spoon it into the cup. Don’t scoop directly, or you’ll pack it down and end up with dry rolls. For the honey, lightly oiling your measuring cup helps it slide out easily. These small tips make a big difference in the final texture.
Equipment Needed
You don’t need a fancy kitchen to make these rolls. But having the right tools helps. Here is what you’ll need.
- Digital Kitchen Scale: Highly recommended. Baking is chemistry. Weights are more accurate than volume measurements.
- Stand Mixer with Dough Hook: This saves your arms. Kneading this dough by hand is possible but tiring. A stand mixer does the work in about 8 minutes.
- Large Mixing Bowl: For the initial mixing. Glass or stainless steel works best.
- 9×13 Inch Baking Pan: For baking the rolls. A metal pan gives better browning than glass. Grease it well.
- Cling Wrap: For covering the dough during the rise. Plastic wrap works well to prevent drying.
- Bench Scraper: Helps in dividing the dough and cleaning the counter.
If you don’t have a stand mixer, you can use a large spoon and then your hands. It will take longer, but it’s doable. For the baking pan, I prefer metal because it conducts heat evenly. Glass pans can sometimes result in softer bottoms. If you use glass, reduce the oven temperature by 25°F (15°C). Keep your equipment clean. A clean bowl ensures no old dough interferes with the new rise.
Preparation Method
Let’s get into the nitty-gritty. Making homemade honey butter rolls is straightforward if you take your time. Here is how to do it step-by-step.
Step 1: Mix the Dough (10 minutes)
In the bowl of a stand mixer, combine the bread flour, instant yeast, sugar, and salt. Whisk them together briefly to distribute the yeast. In a separate jug, mix the warm milk, egg, melted butter, and vanilla extract. Pour the wet ingredients into the dry ingredients. Attach the dough hook. Mix on low speed for 2 minutes until a shaggy dough forms. Then, increase to medium speed and knead for 6-8 minutes. The dough should be smooth, elastic, and slightly tacky but not sticky. It should pass the windowpane test. Stretch a small piece of dough. If you can stretch it thin enough to see light through it without tearing, it’s ready. If it tears, knead for another minute.
Tip: If your kitchen is cold, the dough might take longer. Be patient. Over-kneading can make the rolls tough. Under-kneading makes them dense. Aim for that sweet spot.
Step 2: First Rise (Overnight in Fridge)
Lightly grease a large bowl with oil. Place the dough inside and turn it once to coat. Cover tightly with cling wrap or a damp towel. Place it in the refrigerator. This is the make-ahead part. Let it rise slowly for 8-12 hours. The cold slows down the yeast, developing better flavor. You can leave it for up to 24 hours. Don’t exceed this, or the dough might over-proof and collapse.
Step 3: Shape the Rolls (15 minutes)
Take the dough out of the fridge. It should be puffy and cold. Turn it out onto a lightly floured surface. Gently press it down to remove large air bubbles. Do not deflate it completely. We want to keep some air. Divide the dough into 12 equal pieces. I use a scale for this. Roll each piece into a smooth ball. Tuck the edges underneath to create tension. Place the balls in the greased 9×13 inch pan. Leave a little space between them for expansion. They will puff up and touch.
Step 4: Second Rise (1-2 hours)
Cover the pan with cling wrap. Let the rolls rise at room temperature. They should double in size. This takes about 1-2 hours, depending on your kitchen warmth. Press a finger into a roll. If the indent springs back slowly, they are ready. If it springs back quickly, they need more time. If it stays indented, they are over-proofed.
Step 5: Bake (25-30 minutes)
Preheat your oven to 350°F (175°C). Place the rolls in the center rack. Bake for 25-30 minutes. They should be golden brown on top. If they brown too quickly, cover them loosely with foil. Internal temperature should reach 190°F (88°C). Remove from the oven immediately.
Step 6: Glaze (Immediately)
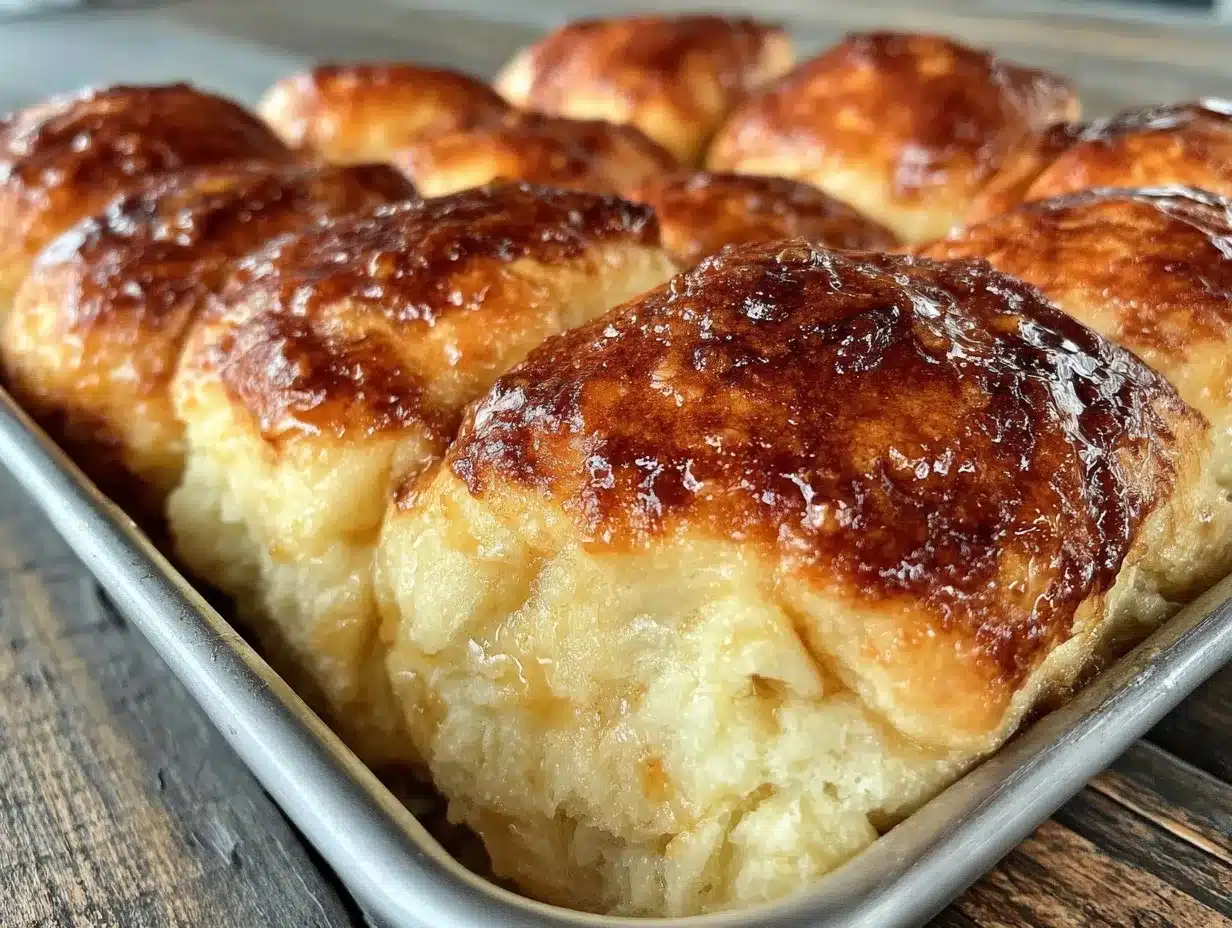
While the rolls bake, make the honey butter glaze. Whisk the softened butter, honey, powdered sugar, milk, and lemon zest until smooth. As soon as the rolls come out of the oven, brush the glaze over the top. The heat will melt the glaze slightly, creating a sticky, shiny coating. Let them cool in the pan for 10 minutes before serving. This sets the glaze.
Cooking Tips & Techniques
Let’s talk about how to get it right. I’ve made my fair share of mistakes along the way. Here is what I’ve learned.
Temperature Matters: Your milk should be warm, not hot. If it’s too hot, it will kill the yeast. If it’s too cold, the yeast won’t activate. Aim for 110°F (43°C). Touch it to your wrist. It should feel like warm bathwater. Not hot. Not cold.
Don’t Overfill the Pan: When shaping, leave space between the rolls. They need room to expand. If they are too close, they won’t rise properly. They will be dense and misshapen.
The Cold Rise Secret: I know some people rush. But the overnight rise is key. It develops flavor. It makes the dough easier to handle. It also gives you that make-ahead convenience. Trust the process. The dough will be firmer when you take it out. Let it come to room temperature for 15 minutes before shaping. It will be easier to work with.
Glaze Timing: Brush the glaze on hot. This is non-negotiable. The hot rolls absorb the glaze. If you wait, the glaze sits on top and can get soggy. Hot rolls = best texture.
Common Mistake: Over-baking. These rolls continue to cook in the pan after you take them out. If they look done, they are done. Over-baked rolls are dry. Under-baked rolls are gummy. Aim for golden brown and 190°F internal temp.
Multitasking: While the rolls rise, you can prep other things. Make your breakfast. Clean the kitchen. The dough is waiting for no one. Use that time wisely. Also, keep an eye on the oven. Ovens vary. Mine runs hot. Yours might run cool. Use an oven thermometer to be sure.
Variations & Adaptations
These rolls are versatile. You can tweak them to suit your taste.
Cinnamon Roll Variation: Add 1 teaspoon of cinnamon to the dough. After shaping, roll each ball in a mixture of cinnamon and sugar before placing it in the pan. The glaze will turn into a cinnamon drizzle. It’s like a mini cinnamon roll.
Herb & Garlic Twist: Skip the honey in the glaze. Mix minced garlic and chopped parsley into the softened butter for the glaze. Sprinkle with sea salt. These become perfect savory sides for roasted meats. They pair well with a spicy asian cucumber salad for a bright contrast.
Gluten-Free Option: Use a 1:1 gluten-free flour blend with xanthan gum. Note that the texture will be slightly different. It might be more crumbly. Add an extra egg for structure. The rise might be less dramatic.
Dairy-Free: Swap milk for oat milk or almond milk. Use coconut oil or vegan butter instead of dairy butter. The flavor will be slightly different, but still delicious. The honey can be swapped with maple syrup if you want a vegan version.
My Personal Twist: I sometimes add a tablespoon of orange zest to the glaze. It pairs beautifully with the honey. It adds another layer of brightness. It’s zest on zest, brightness stacked up. It feels festive and fresh.
Serving & Storage Suggestions
How do you serve these? Warm is best. They are perfect for breakfast with coffee. Or as a side for dinner. They go well with roasted chicken or creamy shrimp rice bowl. The sweetness balances savory dishes.
Storage: If you have leftovers, store them in an airtight container at room temperature for up to 2 days. They stay soft. For longer storage, freeze them. Wrap them individually in plastic wrap, then put them in a freezer bag. They last for 1 month.
Reheating: To reheat, unwrap and microwave for 20-30 seconds. Or warm them in the oven at 300°F for 10 minutes. They should taste fresh. Do not reheat in the toaster. They will dry out.
Flavor Development: The flavors actually improve after a day. The honey and butter meld together. The rolls become even softer. If you can wait, let them sit overnight. The glaze soaks in. It’s worth the wait.
Nutritional Information & Benefits
Let’s talk nutrition. These are treat rolls, but they have some good points. One roll (approx. 85g) contains about 220 calories. They provide carbohydrates for energy. The honey offers some antioxidants. The butter provides fat for satiety. They are not low-carb. They are not keto. But they are a balanced treat when eaten in moderation.
Allergens: These contain wheat, dairy, and eggs. They are not suitable for those with allergies to these ingredients. Use the substitutions mentioned earlier for dietary needs.
Wellness Perspective: I view these as a mindful treat. They are not everyday food. They are for special mornings or gatherings. Enjoy them slowly. Savor the texture. The brightness from the lemon zest helps aid digestion slightly compared to heavy creams. It’s a lighter way to enjoy a sweet bread.
Conclusion
Homemade honey butter rolls are a labor of love. They are worth the effort. The make-ahead method makes them accessible for busy lives. The flavor is unmatched. They are soft, sweet, and bright. I hope you try this recipe. It has brought joy to my table. It can bring joy to yours too.
Customize it. Add your own twists. Make it yours. I’d love to hear how you like them. Leave a comment below. Share your variations. Tag me on social media if you post photos. I love seeing your creations. This recipe is a staple for a reason. It’s reliable. It’s delicious. It’s comforting.
So, preheat that oven. Get your dough ready. And get ready for the best rolls you’ve ever made. Happy baking!
FAQs
Can I use active dry yeast instead of instant yeast?
Yes, you can. But you need to bloom it first. Dissolve the yeast in the warm milk with a pinch of sugar. Wait 5-10 minutes until it foams. Then add it to the flour. The rise time might be slightly longer.
Why are my rolls dense?
This usually happens from over-kneading or under-rising. Make sure you let the dough rise until it doubles in size. Also, check your yeast. Is it old? Old yeast won’t rise properly. Use fresh yeast for best results.
Can I freeze the unbaked dough?
Yes. After shaping the rolls, place them in the pan. Cover tightly with plastic wrap and foil. Freeze them. When ready to bake, let them thaw and rise at room temperature. Then bake as directed. This is great for meal prep.
How do I know when the rolls are done baking?
Look for a golden brown color. Use an instant-read thermometer. The internal temperature should be 190°F (88°C). If you don’t have a thermometer, tap the bottom. It should sound hollow.
Can I make these in a bread machine?
Yes. Use the dough setting. Add ingredients in the order recommended by your machine. Once the dough is done, shape them and proceed with the rising and baking steps. It’s a hands-off way to get the dough ready.
Pin This Recipe!
Homemade Honey Butter Rolls: Easy Make-Ahead Brightness
- Total Time: 1 hour 25 minutes (plus overnight rise)
- Yield: 12 servings 1x
Description
Soft, pillowy homemade honey butter rolls with a bright, zesty glaze. This make-ahead recipe allows you to prep the dough the night before for stress-free baking and delicious, fluffy results.
Ingredients
- 500g (about 4 cups) Strong Bread Flour
- 7g (one packet) Instant Yeast
- 60g (about 1/3 cup) Granulated Sugar
- 10g (about 1.5 teaspoons) Salt
- 240ml (1 cup) Whole Milk, warmed to 110°F (43°C)
- 1 Large Egg, room temperature
- 57g (4 tablespoons) Unsalted Butter, melted and cooled
- 1 teaspoon Vanilla Extract
- 113g (1/2 cup) Unsalted Butter, softened (for glaze)
- 120ml (1/2 cup) Honey
- 120g (1 cup) Powdered Sugar
- 1–2 tablespoons Milk (for glaze consistency)
- Zest of 1 medium Lemon
Instructions
- In a stand mixer bowl, whisk together bread flour, instant yeast, sugar, and salt.
- In a separate jug, mix warm milk, egg, melted butter, and vanilla extract.
- Pour wet ingredients into dry ingredients. Mix on low speed for 2 minutes until shaggy.
- Increase to medium speed and knead with a dough hook for 6-8 minutes until smooth, elastic, and passes the windowpane test.
- Lightly grease a large bowl, place dough inside, turn to coat, and cover tightly with cling wrap.
- Refrigerate the dough for 8-12 hours (overnight) for a cold rise.
- Turn dough out onto a floured surface, gently press to remove large bubbles, and divide into 12 equal pieces.
- Roll each piece into a smooth ball, tucking edges underneath, and place in a greased 9×13 inch baking pan.
- Cover the pan and let rolls rise at room temperature for 1-2 hours until doubled in size.
- Preheat oven to 350°F (175°C). Bake rolls for 25-30 minutes until golden brown and internal temperature reaches 190°F (88°C).
- While rolls bake, whisk softened butter, honey, powdered sugar, milk, and lemon zest until smooth.
- Immediately brush the glaze over the hot rolls as they come out of the oven.
- Let cool in the pan for 10 minutes before serving.
Notes
For best results, use a digital scale for measuring flour. If using cups, fluff the flour and spoon it into the cup. Ensure milk is warm (110°F) but not hot to avoid killing the yeast. The overnight cold rise develops better flavor and makes the dough easier to handle. Brush glaze on while rolls are hot for best absorption.
- Prep Time: 25 minutes
- Cook Time: 30 minutes
- Category: Breakfast
- Cuisine: American
Nutrition
- Serving Size: 1 roll (approx. 85g)
- Calories: 220
- Sugar: 18
- Sodium: 250
- Fat: 8
- Saturated Fat: 5
- Carbohydrates: 35
- Fiber: 1
- Protein: 5
Keywords: honey butter rolls, make-ahead bread, homemade rolls, breakfast rolls, easy baking, fluffy rolls, lemon glaze