
Let’s face it, there is nothing quite like the first bite of hot, gooey mac and cheese straight out of the oven. It’s that moment where the cheese pulls away in long, satisfying strands, and the crust crunches just right under your fork. I remember being six years old, sitting at a wobbly kitchen table, watching my grandmother whisk a roux that smelled like pure heaven. She didn’t use a box from the grocery store. She used real butter, flour, and sharp cheddar that she grated herself. That memory has stuck with me for decades, shaping every single pasta dish I’ve made since.
Over the years, I’ve tested dozens of mac and cheese recipes. Some were too dry, some were too greasy, and many just tasted like processed cheese dust. Honestly, it was frustrating. I wanted that restaurant-quality creaminess but with the simplicity of a weeknight dinner. After countless failures and a few happy accidents in my own kitchen, I finally nailed it. This best creamy mac and cheese recipe is the result of that journey. It’s rich, it’s bold, and it’s surprisingly easy to pull together.
You know how some recipes feel like work? This one doesn’t. It’s perfect for busy parents who need to feed a hungry crew, or for anyone craving a little comfort food after a long day. I’ve made this over a dozen times now, tweaking the cheese blend and the baking time until it was absolutely perfect. Whether you’re making it for a holiday potluck or just a Tuesday night treat, this dish delivers. It’s not just about the taste; it’s about that warm, hug-in-a-bowl feeling you get with every spoonful. Let’s get cooking.
Why You’ll Love This Recipe
I’ve spent years perfecting this mac and cheese, and I can tell you with confidence that this is the one you’ll come back to again and again. It’s not just another pasta dish; it’s a masterclass in balance. Here is why this recipe stands out from the crowd:
- Velvety Smooth Texture: The secret lies in the cheese sauce. By using a proper roux and adding the cheese off the heat, you avoid that grainy texture that plagues so many homemade versions. It’s silky, smooth, and coats every noodle perfectly.
- Simple Pantry Staples: You likely already have most of these ingredients in your kitchen. Butter, flour, milk, and good cheese are the core components. No fancy, hard-to-find items needed.
- Crowd-Pleasing Flavor: This isn’t just plain cheese. The blend of sharp cheddar, Gruyère, and a touch of mustard powder creates a complex flavor profile that adults love, while kids just see delicious cheesy pasta.
- Perfect for Any Occasion: Whether it’s a cozy family dinner, a summer BBQ side dish, or a festive holiday centerpiece, this mac and cheese fits right in. It travels well and tastes even better the next day.
- Customizable Topping: I love the option of a crunchy breadcrumb topping, but you can skip it if you prefer all soft textures. It’s your recipe, your rules.
What makes this recipe truly special is the emotional connection it creates. It’s the kind of dish that brings people together around the table. I’ve served this at brunches, dinner parties, and simple weeknight meals, and the reaction is always the same: eyes roll back in pleasure. It’s comfort food reimagined for the modern home cook. You don’t need to be a professional chef to make this. You just need a little patience and a love for good food. Trust me, once you try this version, you’ll never go back to the box mix again.
What Ingredients You Will Need
This recipe relies on high-quality, simple ingredients to create a sauce that is rich and flavorful without being overly heavy. The key is to choose cheeses that melt well and have distinct flavors. Avoid pre-shredded cheese if you can, as the anti-caking agents can prevent your sauce from becoming truly smooth.
- Elbow Macaroni (1 pound): Traditional elbow pasta holds the sauce perfectly. You can use cavatappi or shells if you prefer, but elbows are the classic choice.
- Unsalted Butter (1/2 cup): This forms the base of the roux. I prefer unsalted so you can control the sodium level in the final dish. Salted butter works too, just reduce the added salt later.
- All-Purpose Flour (1/2 cup): This thickens the sauce. Whisking it with the butter creates a paste that cooks out the raw flour taste.
- Whole Milk (3 cups): Whole milk gives the best richness. For a lighter option, you can use 2% milk, but the sauce will be less luxurious. Room temperature milk blends easier.
- Sharp Cheddar Cheese (3 cups, freshly grated): This is the star. Use a block of cheddar and grate it yourself. Pre-shredded cheese contains potato starch which can make the sauce grainy. Sharp cheddar provides a strong, tangy flavor.
- Gruyère Cheese (1 cup, freshly grated): This Swiss cheese adds a nutty, sophisticated depth that pairs beautifully with cheddar. It melts exceptionally well.
- Dijon Mustard (1 teaspoon): This is the secret weapon. It doesn’t make the mac and cheese taste like mustard. Instead, it cuts through the richness of the cheese and enhances the overall flavor profile.
- Garlic Powder (1/2 teaspoon): Adds a subtle savory note without the risk of burning fresh garlic.
- Smoked Paprika (1/2 teaspoon): Gives a hint of smokiness that complements the baked topping. If you don’t have this, regular paprika works fine.
- Garlic Breadcrumbs (1 cup): For the topping, mix panko breadcrumbs with melted butter and a pinch of garlic powder. This adds a crucial textural contrast to the soft pasta.
- Salt and Black Pepper: To taste. Remember that cheese is salty, so taste before adding extra salt.
I recommend using a microplane grater for your cheese. It makes the job much faster and ensures the cheese shreds evenly, which helps it melt smoothly into your sauce. If you’re short on time, you can use a box grater, but take your time to get those fine shreds.
Do I need to grate my own cheese?
Yes, it is highly recommended. Pre-shredded cheeses are coated in cellulose to prevent clumping, which stops them from melting properly. You want a silky sauce, not a chunky one. It only takes a few minutes to grate a block, and the difference in texture is worth it.
Equipment Needed
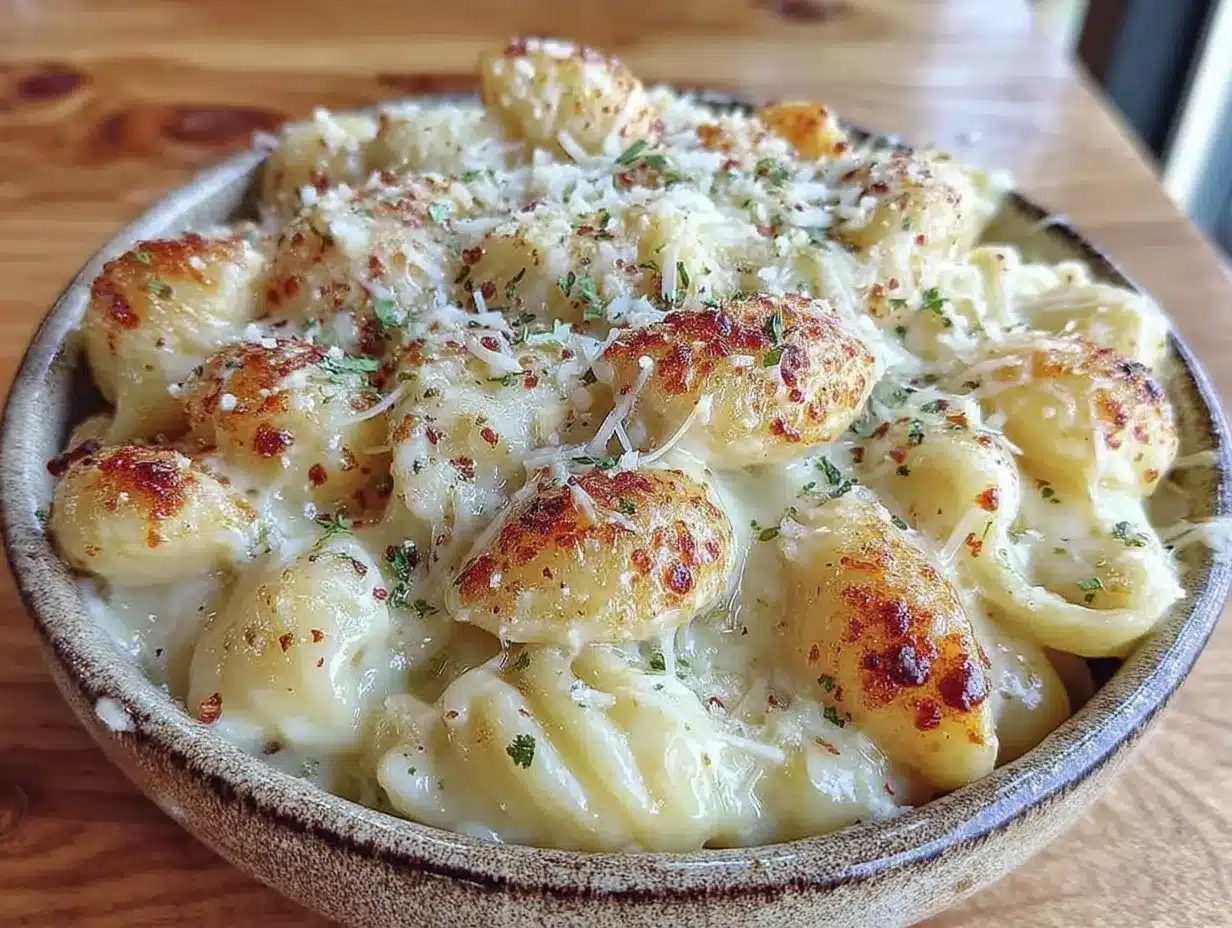
You don’t need a fancy kitchen to make this recipe. Here is what you’ll need to get started:
- Large Stockpot: For boiling the pasta. Make sure it’s big enough to hold the water and pasta without boiling over.
- Heavy-Bottomed Saucepan or Dutch Oven: This is crucial for making the roux. A heavy bottom prevents scorching when you are heating the milk and butter mixture. I use my Le Creuset Dutch oven for this, but a large saucepan works too.
- Whisk: A good quality whisk is essential for breaking up lumps in the roux and ensuring a smooth sauce.
- Colander: For draining the pasta. Do not rinse the pasta after draining! The starch on the noodles helps the sauce cling to them later.
- 9×13 Inch Baking Dish: A standard glass or ceramic baking dish works best. Glass allows you to see the browning on the bottom, which is nice for monitoring the bake.
- Microplane Grater: For grating the cheese quickly and finely.
If you don’t have a Dutch oven, a large skillet can work for the roux, but you’ll need to transfer the sauce to the baking dish carefully. Keep your tools simple and clean. A clean workspace makes cooking less stressful and more enjoyable.
Preparation Method
Follow these steps carefully to achieve the perfect creamy mac and cheese. Patience is key, especially when making the sauce.
- Preheat the Oven and Prep the Dish: Set your oven to 350°F (175°C). Grease your 9×13 inch baking dish with a little butter or cooking spray. This prevents sticking and helps the top crisp up nicely.
- Boil the Pasta: Bring a large pot of salted water to a boil. Add the elbow macaroni and cook according to the package directions, but subtract one minute from the recommended time. You want the pasta to be al dente because it will continue to cook in the oven. Drain the pasta in a colander and set aside. Do not rinse.
- Make the Roux: In your heavy-bottomed saucepan or Dutch oven, melt the butter over medium heat. Once melted and foamy, sprinkle in the flour. Whisk constantly for about 1-2 minutes. You want the mixture to turn a light golden color and smell slightly nutty. This cooks out the raw flour taste.
- Add the Milk: Slowly pour in the milk, a little at a time, whisking constantly. This is the most important step to avoid lumps. Once all the milk is added, continue to whisk and cook for 3-5 minutes until the sauce thickens enough to coat the back of a spoon. It should look like thin gravy.
- Season the Sauce: Remove the saucepan from the heat. This is critical. If you add cheese to a boiling sauce, it can separate and become oily. Stir in the Dijon mustard, garlic powder, smoked paprika, salt, and black pepper.
- Melt the Cheese: Add the grated cheddar and Gruyère cheese to the warm sauce. Stir gently until the cheese is completely melted and the sauce is smooth. If it looks too thick, add a splash of milk. If it’s too thin, it will thicken as it cools slightly.
- Combine Pasta and Sauce: Pour the cooked pasta into the cheese sauce. Stir until every noodle is evenly coated. Taste the mixture and adjust seasoning if needed. Remember, the topping will add some saltiness.
- Assemble the Dish: Transfer the mac and cheese mixture into the prepared baking dish. Spread it out evenly.
- Add the Topping: In a small bowl, mix the panko breadcrumbs with the melted butter and garlic powder. Sprinkle this mixture evenly over the top of the mac and cheese. Press it down gently so it sticks.
- Bake: Place the dish in the preheated oven and bake for 20-25 minutes. You are looking for a golden, crispy top and bubbling edges. If the top starts browning too quickly, cover it loosely with foil for the last 10 minutes.
- Rest and Serve: Remove from the oven and let it rest for 5-10 minutes before serving. This allows the sauce to set slightly, making it easier to scoop. Enjoy your best creamy mac and cheese!
What if my sauce is too thick?
Don’t panic! Just add more warm milk, one tablespoon at a time, stirring until you reach your desired consistency. It’s better to start with a slightly thinner sauce than a thick paste.
Can I make this ahead of time?
Yes! You can assemble the entire dish up to 24 hours in advance. Cover it tightly with plastic wrap and refrigerate. When you’re ready to bake, you may need to add 5-10 minutes to the baking time since the dish will be cold from the fridge.
Cooking Tips & Techniques
There are a few tricks I’ve learned over the years to ensure your mac and cheese is always perfect. First, never skip the rest time. It’s tempting to dig in as soon as it comes out of the oven, but letting it sit allows the sauce to stabilize. If you cut into it immediately, it might be runny. Second, always grate your cheese yourself. I cannot stress this enough. Pre-shredded cheese will ruin the texture of your sauce. Third, watch your heat. When making the roux, keep the heat at medium. If it’s too high, the flour will burn, and your sauce will taste bitter. Fourth, taste as you go. Every brand of cheese and milk is different. Add salt and pepper gradually until it tastes right to you. Finally, if you want extra creaminess, you can stir in a quarter cup of cream cheese at the end. It adds a tangy richness that pairs wonderfully with the sharp cheddar.
Variations & Adaptations
This recipe is a great base for many different flavors. Here are a few ideas to customize it:
- Bacon Mac and Cheese: Cook bacon until crispy, crumble it, and fold it into the pasta before baking. The salty crunch is amazing.
- Broccoli Cheddar: Steam some broccoli florets until tender-crisp and mix them in with the pasta. It adds a healthy green element and great texture.
- Spicy Kick: Add a diced jalapeño or a dash of cayenne pepper to the sauce for those who like heat.
- Gluten-Free Option: Use gluten-free elbow pasta and ensure your breadcrumbs are gluten-free. The rest of the ingredients are naturally gluten-free.
- Dairy-Free: Use plant-based butter and milk, and try a vegan cheese shreds that melt well. Note that vegan cheese can behave differently, so you may need to adjust the liquid.
I once made a version with roasted garlic and sun-dried tomatoes. It was a bit more gourmet, but still incredibly delicious. Don’t be afraid to experiment with flavors you enjoy.
Serving & Storage Suggestions
Serve this mac and cheese warm, straight from the oven. It pairs beautifully with a simple green salad or roasted vegetables. For a complete meal, add some grilled chicken or roasted broccoli on the side. As for storage, leftovers keep well in an airtight container in the refrigerator for up to 4 days. To reheat, add a splash of milk to the leftovers and warm them in the microwave or on the stovetop, stirring frequently. This helps restore the creamy texture. You can also freeze the baked mac and cheese for up to 3 months. Thaw it in the fridge overnight before reheating. The flavor actually develops and gets even better after a day or two in the fridge.
Nutritional Information & Benefits
While this is a indulgent comfort food, it can fit into a balanced diet. A typical serving provides a good amount of protein from the cheese and pasta. Cheddar cheese is a source of calcium and vitamin A. If you use whole milk, you get vitamin D as well. To make it slightly lighter, you can use part-skim mozzarella instead of some of the cheddar, or use lower-fat milk. However, the richness is part of the appeal, so enjoy it in moderation. It’s a treat that satisfies both the body and the soul.
Conclusion
Making the best creamy mac and cheese at home is easier than you think. It requires just a few simple ingredients and a little bit of love. I hope this recipe brings you as much joy as it has brought me. Whether you are a novice cook or a seasoned chef, this dish is guaranteed to impress. I’d love to hear how it turns out for you. Please leave a comment below with your thoughts or any variations you tried. Happy cooking!
Frequently Asked Questions
1. Can I use different types of pasta?
Absolutely. While elbows are classic, cavatappi, shells, or even penne work well. Just make sure the shape can hold the sauce.
2. Why is my mac and cheese grainy?
This usually happens if the cheese is added to a sauce that is too hot, or if pre-shredded cheese is used. Always add cheese off the heat and grate your own.
3. Can I make this in a slow cooker?
Yes, you can make the sauce on the stovetop and then transfer it to a slow cooker with the pasta. Cook on low for 1-2 hours, stirring occasionally.
4. How do I prevent a soggy bottom?
Ensure your pasta is not overcooked before adding it to the sauce. Also, let the baked mac and cheese rest for 10 minutes before serving to allow the layers to set.
5. What cheese is best for mac and cheese?
A combination of sharp cheddar for flavor and Gruyère or Monterey Jack for meltability is ideal. Avoid using only mild cheddar as it lacks depth.
Pin This Recipe!

Best Creamy Mac And Cheese: Easy Homestyle Recipe
- Total Time: 45 minutes
- Yield: 8 servings 1x
Description
A rich, velvety homemade mac and cheese featuring a smooth roux-based sauce with sharp cheddar and Gruyère, topped with crunchy garlic breadcrumbs for the perfect comfort food experience.
Ingredients
- 1 pound elbow macaroni
- 1/2 cup unsalted butter
- 1/2 cup all-purpose flour
- 3 cups whole milk
- 3 cups sharp cheddar cheese, freshly grated
- 1 cup Gruyère cheese, freshly grated
- 1 teaspoon Dijon mustard
- 1/2 teaspoon garlic powder
- 1/2 teaspoon smoked paprika
- 1 cup panko breadcrumbs
- Salt and black pepper to taste
Instructions
- Preheat oven to 350°F (175°C) and grease a 9×13 inch baking dish.
- Boil elbow macaroni in salted water until al dente (subtract 1 minute from package time), then drain without rinsing.
- In a heavy-bottomed saucepan, melt butter over medium heat and whisk in flour to create a roux, cooking for 1-2 minutes until light golden.
- Slowly whisk in milk, continuing to cook for 3-5 minutes until the sauce thickens enough to coat the back of a spoon.
- Remove saucepan from heat and stir in Dijon mustard, garlic powder, smoked paprika, salt, and pepper.
- Add grated cheddar and Gruyère cheese to the warm sauce, stirring until completely melted and smooth.
- Combine the cooked pasta with the cheese sauce, ensuring every noodle is coated.
- Transfer the mixture to the prepared baking dish.
- Mix panko breadcrumbs with melted butter and garlic powder, then sprinkle evenly over the top.
- Bake for 20-25 minutes until the top is golden and crispy.
- Let rest for 5-10 minutes before serving to allow the sauce to set.
Notes
Do not rinse the pasta after draining as the starch helps the sauce cling. Always grate your own cheese to avoid anti-caking agents that cause graininess. Add cheese off the heat to prevent separation. Let the dish rest before serving to ensure the sauce sets properly.
- Prep Time: 15 minutes
- Cook Time: 30 minutes
- Category: Side Dish
- Cuisine: American
Nutrition
- Serving Size: 1 cup
- Calories: 650
- Sugar: 6
- Sodium: 800
- Fat: 35
- Saturated Fat: 20
- Carbohydrates: 55
- Fiber: 2
- Protein: 25
Keywords: mac and cheese, creamy mac and cheese, homemade mac and cheese, comfort food, cheesy pasta, baked mac and cheese, easy dinner


