
The smell of fresh bread baking in a cold kitchen is weirdly comforting, right? It reminds me of those long winter evenings when the house was quiet and the only sound was the hum of the oven. I first discovered the magic of making dough ahead of time during a particularly stressful holiday season a few years ago. I was trying to serve dinner rolls that tasted like they’d been baked by a professional chef, but I had zero time to stand over a mixing bowl for hours. Honestly, I was ready to give up on homemade bread entirely until I stumbled upon this method. It changed everything for me.
These fluffy frozen dinner rolls are not just a time-saver; they are a game-changer for anyone who loves soft, pillowy bread but hates the mess and wait. You know how expensive good bread is at the bakery? These cost pennies to make and taste infinitely better. I’ve tested this recipe over a dozen times, adjusting the hydration and proofing times to get that perfect golden crust every single time. It’s become my go-to for Sunday suppers, Thanksgiving, or just because I want something warm and comforting.
What makes this recipe special is the flexibility. You can mix the dough on Friday night, freeze the shaped rolls, and bake them fresh on Saturday morning. The texture remains incredibly soft, and the flavor develops beautifully during the slow freeze. It’s perfect for busy families, meal preppers, or anyone who wants to impress guests without spending their whole day in the kitchen. Plus, there is something deeply satisfying about pulling a tray of hot, steaming rolls out of the oven after they’ve been sleeping in your freezer all night.
Why You’ll Love This Recipe
Let’s be real, not all homemade bread recipes are created equal. Some are too dense, some take forever, and others require skills you just don’t have. This recipe is different because it is built for real life. I developed this method after failing at several traditional yeast bread recipes that demanded too much attention. This version is forgiving, reliable, and delivers consistent results every single time. It’s the kind of recipe that makes you feel like a culinary wizard without the stress.
- Quick & Easy Prep: The active time is less than 30 minutes. You mix, shape, and freeze. The rest happens while you sleep or go about your day.
- Simple Ingredients: You likely have everything you need in your pantry right now. Flour, yeast, sugar, salt, butter, and milk. No fancy flours or obscure ingredients.
- Perfect for Entertaining: Imagine walking into a party and pulling a tray of hot, fresh bread from your oven. It’s an instant crowd-pleaser that requires zero last-minute effort.
- Unbelievably Delicious: The texture is airy and light, with a slight chew that holds up to butter or jam. It’s comfort food at its finest.
- Meal Prep Friendly: Make a double batch on the weekend and freeze them. You’ll always have fresh bread ready to go, even on the busiest weeknights.
What really sets this apart is the freezing technique. Most people think frozen dough turns out tough or dry. With this method, the dough is proofed just enough to develop flavor but not so much that it collapses. The cold temperature slows down the yeast activity, preserving the structure. When you bake them straight from the freezer, they rise beautifully in the oven. It’s a trick I learned from experimenting with sourdough starters, and it works wonders for sweet yeast doughs too.
I remember serving these to my in-laws for the first time. They asked if I had bought them from a fancy bakery. I just smiled and said no. That moment of surprise and delight is why I keep coming back to this recipe. It’s not just about saving time; it’s about the joy of sharing something homemade that tastes store-bought quality, if not better.
What Ingredients You Will Need
This recipe relies on high-quality, simple ingredients to create that signature soft texture. The key is using bread flour for structure, but all-purpose flour works in a pinch if that’s all you have. The butter adds richness, while the milk powder (or powdered milk) helps with browning and tenderness. Here is what you need to get started.
- Bread Flour (500g / 4 cups): This high-protein flour creates the strong gluten network needed for those tall, fluffy rolls. If you use all-purpose flour, the rolls will be slightly softer but less chewy.
- Instant Yeast (7g / 2 1/4 tsp): I recommend using instant yeast because you don’t need to activate it in water first. It mixes right into the dry ingredients. Active dry yeast works too, but you’ll need to bloom it in warm liquid first.
- Granulated Sugar (50g / 1/4 cup): Sugar feeds the yeast and helps with browning. You can reduce this slightly if you prefer less sweet rolls, but don’t skip it entirely as it affects the rise.
- Salt (10g / 2 tsp): Essential for flavor and controlling yeast activity. Use fine sea salt or table salt for even distribution.
- Milk Powder (30g / 1/3 cup): This is the secret ingredient. It adds dairy flavor without adding extra liquid, resulting in a softer crumb. If you don’t have milk powder, you can use whole milk instead of water, but adjust the liquid amount carefully.
- Large Eggs (2, room temperature): Eggs add richness and structure. Bring them to room temperature so they incorporate easily into the dough.
- Unsalted Butter (50g / 1/4 cup, softened): Softened butter blends into the dough smoothly. Don’t use melted butter, as it can kill the yeast if the dough is too warm.
- Warm Water (120ml / 1/2 cup): The water should be lukewarm, around 105°F-110°F (40°C-43°C). Too hot will kill the yeast, and too cold will slow it down.
I personally prefer using a digital scale for measuring flour because it’s much more accurate than cups. Flour can be packed tightly, leading to dry dough. If you must use cups, fluff the flour first and spoon it into the cup, then level it off. Also, look for high-quality butter with a high fat content for the best flavor. Margarine won’t give you that same rich taste.
Equipment Needed
You don’t need fancy gadgets to make these rolls, but having the right tools makes the process smoother. A stand mixer with a dough hook is ideal for kneading, but you can absolutely do this by hand. If you use a stand mixer, it saves your arms and ensures the dough is mixed evenly. For shaping, a clean countertop or a large baking sheet works best. I use a bench scraper to help lift the sticky dough, which is a lifesaver.
A digital kitchen scale is probably the most important tool for consistency. Measuring flour by weight eliminates guesswork. You’ll also need a large mixing bowl, a baking sheet lined with parchment paper, and freezer-safe bags or an airtight container for storing the frozen rolls. A pastry brush is handy for brushing the rolls with egg wash or milk before baking. Don’t forget an oven thermometer to ensure your oven is at the correct temperature, as many ovens run hot or cold.
Preparation Method
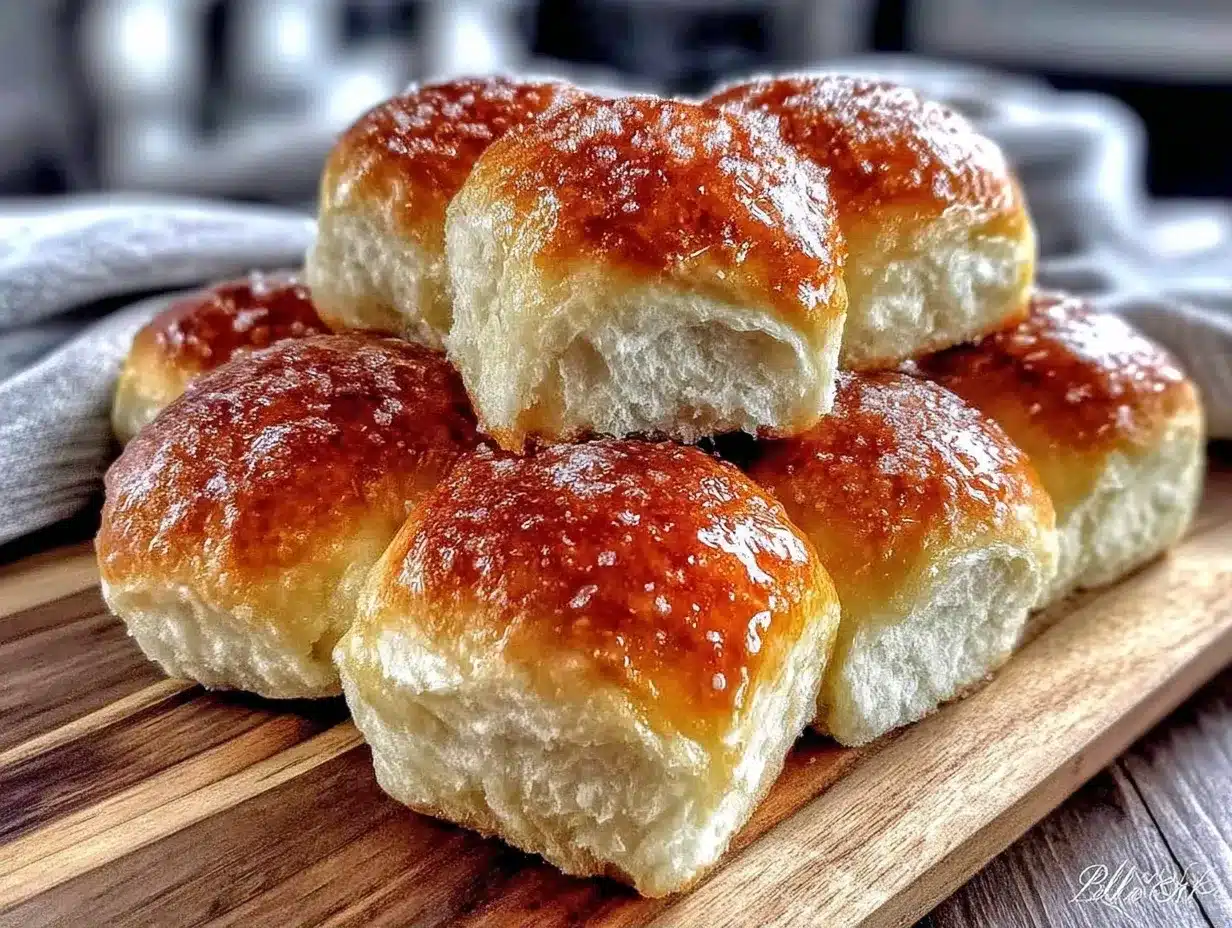
Let’s get into the nitty-gritty of making these rolls. The process is straightforward, but timing is key. We will mix the dough, let it rise slightly, shape it, freeze it, and then bake it later. Here is the step-by-step guide.
- Mix the Dry Ingredients: In the bowl of a stand mixer, combine the bread flour, instant yeast, sugar, salt, and milk powder. Whisk them together briefly to distribute the yeast evenly. This step is crucial so you don’t get a pocket of yeast in one spot.
- Add Wet Ingredients: Add the eggs, softened butter, and warm water to the dry mixture. Start the mixer on low speed with the dough hook attached. Mix until the ingredients come together into a shaggy ball, about 2 minutes.
- Knead the Dough: Increase the speed to medium-low and knead for 8-10 minutes. The dough should become smooth, elastic, and slightly tacky but not sticky. If it’s too sticky, add a tablespoon of flour. If it’s too dry, add a teaspoon of water. The windowpane test is a good indicator: tear off a small piece of dough and stretch it. It should stretch thin enough to let light through without tearing.
- First Rise: Transfer the dough to a lightly oiled bowl. Cover it with plastic wrap or a damp towel. Let it rise in a warm place for 1-1.5 hours, or until it has doubled in size. Since we are freezing these, we don’t need a full double rise. Just let it get a little puffy.
- Shape the Rolls: Punch down the dough to release air bubbles. Turn it out onto a lightly floured surface. Divide the dough into 12 equal pieces. You can use a scale to ensure they are the same size for even baking. Shape each piece into a ball by tucking the edges underneath and rolling it on the counter. Place the rolls on a parchment-lined baking sheet, spaced about 2 inches apart.
- Second Rise (Optional but Recommended): Let the shaped rolls rise for 30 minutes until they are slightly puffy. This helps them bake up taller. If you are in a rush, you can skip this step, but the texture won’t be as light.
- Freeze the Rolls: Place the entire baking sheet in the freezer for 1 hour. This “flash freezes” the rolls so they don’t stick together. Once solid, transfer the rolls to a freezer-safe bag or airtight container. Label with the date. They can be stored for up to 3 months.
- Baking from Frozen: When ready to bake, place the frozen rolls on a parchment-lined baking sheet. Let them sit at room temperature for 30-45 minutes while your oven preheats to 375°F (190°C). They should be puffy and nearly doubled. Brush with milk or egg wash for a golden crust.
- Bake: Bake for 15-18 minutes, or until the rolls are golden brown on top. If they brown too quickly, cover them loosely with foil. The internal temperature should reach 190°F (88°C).
- Finish: Remove from the oven and brush immediately with melted butter for a soft crust. Let them cool for 5 minutes before serving.
Cooking Tips & Techniques
Getting the texture right is all about hydration and temperature. Yeast is sensitive, so keep your water between 105°F and 110°F. If it’s too hot, you’ll kill the yeast and end up with dense bricks. I always test the water on my wrist; it should feel warm but not hot. Another common mistake is over-kneading. Stop as soon as the dough is smooth and elastic. Over-kneading can make the rolls tough.
When shaping the rolls, try to create surface tension. Tuck the edges under tightly. This helps them rise upward rather than outward. If you see gaps in the dough after shaping, pinch them closed. Also, don’t skimp on the butter after baking. The butter keeps the crust soft and adds flavor. If you live in a humid climate, you might need slightly less water in the dough. Conversely, in dry climates, you might need a splash more.
I once made these rolls using cold butter straight from the fridge, and the dough was uneven. Always soften your butter to room temperature. It blends much better and creates a smoother dough. Also, be patient during the freezing stage. If you try to bag them while they are still soft, they will stick together and lose their shape. The hour in the freezer is non-negotiable for perfect results.
Variations & Adaptations
One of the best things about this base recipe is how adaptable it is. You can easily customize it to suit your taste or dietary needs. Here are a few variations I love.
- Garlic Herb Rolls: Add 1 teaspoon of garlic powder and 1 teaspoon of dried parsley to the dry ingredients. Brush with garlic butter after baking for a savory twist.
- Cinnamon Sugar Rolls: After shaping, roll each ball in a mixture of cinnamon and sugar before placing them on the baking sheet. Top with a cream cheese glaze after baking.
- Whole Wheat Option: Substitute half of the bread flour with whole wheat flour. This adds nuttiness and fiber. You may need to add a tablespoon more water as whole wheat absorbs more liquid.
- Dairy-Free: Use water instead of milk powder and dairy-free butter. The rolls will be slightly less rich but still fluffy.
I often make a batch of rosemary olive oil rolls for pasta nights. Just add chopped fresh rosemary and a drizzle of olive oil to the dough. The possibilities are endless. Try experimenting with different herbs and spices to find your favorite combination.
Serving & Storage Suggestions
These rolls are best served warm, right out of the oven. They pair perfectly with soups, stews, or a simple salad. I like to serve them with a small bowl of high-quality olive oil and balsamic vinegar for dipping. They also go great with roasted meats or holiday dinners.
For storage, keep leftovers in an airtight container at room temperature for up to 2 days. To reheat, wrap them in foil and warm them in a 300°F (150°C) oven for 10 minutes. You can also freeze baked rolls for up to 3 months. Just thaw and reheat when needed. The flavor actually improves after a day or two as the moisture redistributes.
Nutritional Information & Benefits
These rolls are a good source of carbohydrates and provide energy for your body. Using bread flour adds protein, and the milk powder contributes calcium. Each roll contains approximately 120 calories, 2g of protein, and 1g of fat. They are naturally dairy-free if you omit the butter topping, but the dough contains dairy. They are not gluten-free, so those with celiac disease should avoid them. Overall, they are a wholesome addition to a balanced meal, especially when paired with vegetables and lean proteins.
Conclusion
Making fluffy frozen dinner rolls is easier than you think, and the results are worth every minute. They offer the comfort of homemade bread with the convenience of meal prep. I hope you try this recipe and enjoy the process as much as I do. Feel free to experiment with flavors and make them your own. If you do, I’d love to hear how they turned out. Leave a comment below with your thoughts or share a photo of your creations. Happy baking!
Frequently Asked Questions
Can I use active dry yeast instead of instant yeast?
Yes, you can. Just dissolve the active dry yeast in the warm water with a pinch of sugar and let it sit for 5-10 minutes until foamy before adding it to the flour. The rest of the process remains the same.
How long can I keep the frozen dough in the freezer?
You can store the shaped, frozen rolls for up to 3 months. After that, they may start to develop freezer burn or lose their optimal texture. For best results, use them within the first month.
Do I need to thaw the rolls before baking?
No, you do not need to thaw them completely. In fact, it’s better to bake them while they are still cold. Letting them sit on the counter for 30-45 minutes allows them to rise and warm up slightly, but baking them straight from the freezer prevents them from becoming soggy.
Why are my rolls dense?
Dense rolls are usually caused by over-proofing, under-proofing, or using too much flour. Make sure your yeast is fresh and your water temperature is correct. Also, measure your flour accurately using a scale rather than packing it into cups.
Can I freeze the baked rolls?
Yes, you can freeze baked rolls. Let them cool completely, then place them in a freezer bag. To reheat, warm them in the oven at 300°F for 10 minutes. They will be slightly less fluffy than freshly baked ones but still delicious.
Pin This Recipe!


Fluffy Frozen Dinner Rolls: Easy Homemade Recipe
- Total Time: 48 minutes
- Yield: 12 servings 1x
Description
These fluffy frozen dinner rolls are a game-changer for homemade bread lovers. Mix the dough ahead of time, freeze the shaped rolls, and bake them fresh whenever you need soft, pillowy bread with minimal active effort.
Ingredients
- 500g (4 cups) Bread Flour
- 7g (2 1/4 tsp) Instant Yeast
- 50g (1/4 cup) Granulated Sugar
- 10g (2 tsp) Salt
- 30g (1/3 cup) Milk Powder
- 2 Large Eggs, room temperature
- 50g (1/4 cup) Unsalted Butter, softened
- 120ml (1/2 cup) Warm Water (105°F-110°F)
Instructions
- In a stand mixer bowl, combine bread flour, instant yeast, sugar, salt, and milk powder. Whisk briefly to distribute yeast evenly.
- Add eggs, softened butter, and warm water to the dry mixture. Mix on low speed with a dough hook until a shaggy ball forms (about 2 minutes).
- Knead on medium-low speed for 8-10 minutes until the dough is smooth, elastic, and slightly tacky. Perform the windowpane test to check gluten development.
- Transfer dough to a lightly oiled bowl, cover, and let rise in a warm place for 1-1.5 hours until slightly puffy (do not let it double in size).
- Punch down the dough and turn it out onto a floured surface. Divide into 12 equal pieces and shape each into a ball by tucking edges underneath.
- Place rolls on a parchment-lined baking sheet, spaced 2 inches apart. Let rise for 30 minutes until slightly puffy (optional but recommended).
- Flash freeze the baking sheet in the freezer for 1 hour until rolls are solid. Transfer to a freezer-safe bag or airtight container. Store for up to 3 months.
- To bake, place frozen rolls on a parchment-lined sheet. Let sit at room temperature for 30-45 minutes until puffy and nearly doubled.
- Preheat oven to 375°F (190°C). Brush rolls with milk or egg wash.
- Bake for 15-18 minutes until golden brown and internal temperature reaches 190°F (88°C).
- Remove from oven and immediately brush with melted butter. Cool for 5 minutes before serving.
Notes
Ensure water temperature is between 105°F and 110°F to avoid killing the yeast. Softened butter is crucial for smooth dough incorporation. Flash freezing is necessary to prevent rolls from sticking together. Rolls can be stored in the freezer for up to 3 months.
- Prep Time: 30 minutes
- Cook Time: 18 minutes
- Category: Side Dish
- Cuisine: American
Nutrition
- Serving Size: 1 roll
- Calories: 120
- Sugar: 3
- Sodium: 250
- Fat: 1
- Saturated Fat: 0.5
- Carbohydrates: 22
- Fiber: 1
- Protein: 2
Keywords: frozen dinner rolls, homemade bread, meal prep bread, yeast rolls, easy bread recipe, make ahead dinner rolls


